How to get started on your Project 3 using Tensorflow and optional Google Cloud Vision
-
If you are using Google CLoud vision - You can make a copy of your OpenCV project 2 (and make sure it runs) then add the support for Google Cloud vision as detailed on our website at http://algebra.sci.csueastbay.edu/~grewe/CS6825/Mat/GoogleCloudVision/GoogleCloudAPIFROMAndroidViaREST.html
-
Regarding Tensorflow for your project - read over the TensorflowTensorflow resources. THEN:
- OPTION 1: Then try to clone the existing Android sample code or modify your existing Android example(s) you have worked on in class
- OPTION 2: Start from scratch following tensorflow documentation.
- NOTE: you can find pre-trained models that may work for you online --here is a starting point for some "official" and "research" supported by Tensorflow --see section on pre-trained models of our general tensorflow page
- ANOTHER NOTE: you must package your trained models especially to run on Mobile for Tensorflow --see https://www.tensorflow.org/mobile/prepare_models you must do this to work with the mobile tensorflow api because it has reduce API from normal Tensorflow to fit better on the reduce capability of mobile device and to reflect you are only running models not training them.... So this work tries to compress down the size of the trained model
-
Training your tensorflow model:
- OPTION 1: TRAIN FROM SCRATCH: Follow instructions at tensorflow site to create python based training program with training data you must collect:
- how to build a CNN (example digit recognition training data) - https://www.tensorflow.org/tutorials/layers
- example image recognition on 32x32 images for 10 classes to build CNN - https://www.tensorflow.org/tutorials/deep_cnn
- OPTION 2: TRAIN BY RETRAINING An EXISTING MODEL: see for tutorial on how to do this:
SPECIAL TIP on taking output of training mode and getting into .pb format for use in Android/iOS apps
SEE https://hackernoon.com/running-a-tensorflow-model-on-ios-and-android-ce89446c8143
SPECIAL TIP on VISUALIZING the pb trained file using TensorBoard tool
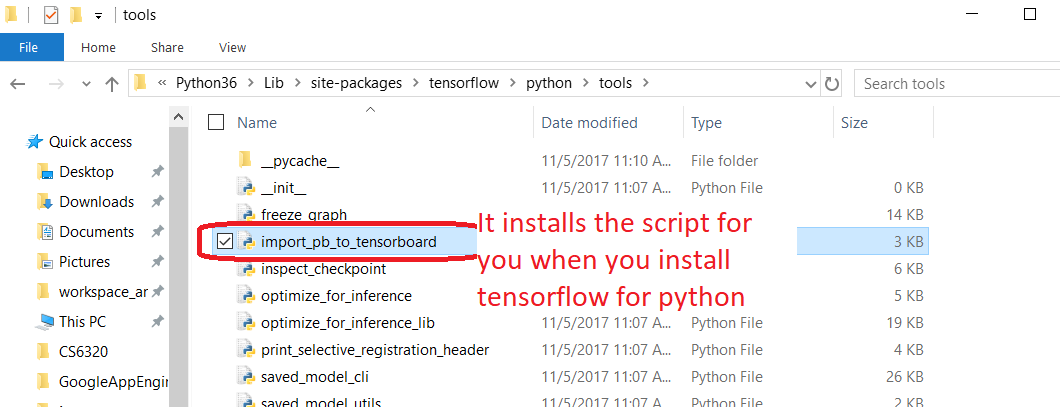
it uses the script import_pb_to_tensorboard.py script that is installed automatically
for you when you installed Tensorflow (for python) from official site

Here is how you run it.
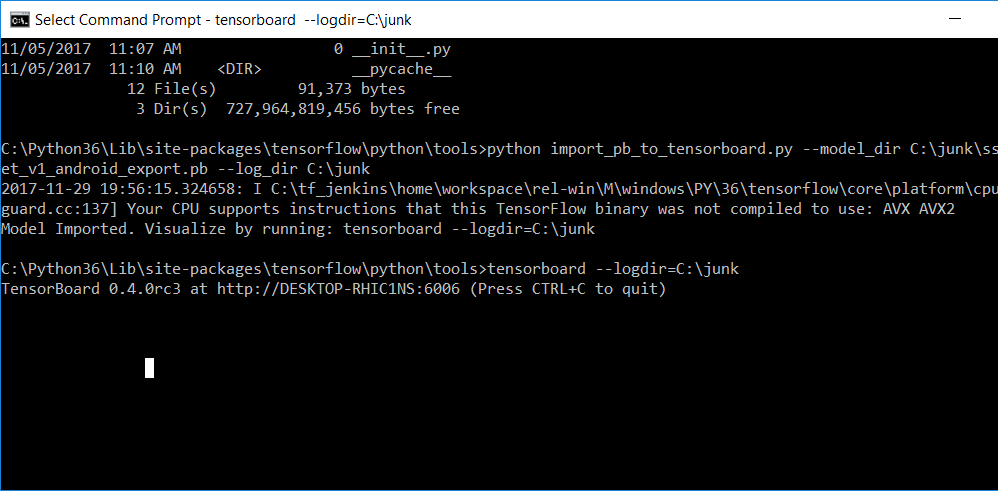
STEP 1: go to directory where your import_pb_to_tensorboard.py installed (or clarify by path) and type
python import_pb_to_tensorboard.py --model_dir C:\YOUR_PATH\YOUR_TENSORFLOW_GRAPH.pb --log_dir C:\directoryWantLogResults
STEP 2: now that model imported for use with tensorboard tool run it by typing:
tensorboard --logdir C:\directoryWantLogResults
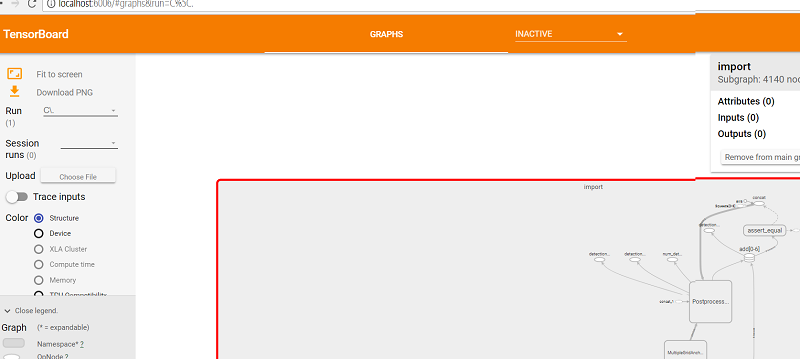
STEP 3: now go to a Webbrowsers to see results at http://localhost:6006

visualizaiton of the model/graph in your pb file

