Discussion of Google's Tensorflow Example Application using SSD based CNN TFLite model (stored in file in assets folder)
-->for OBJECT RECOGNITION: Identity and Localization
LOCAL ZIP FILE (go to examples-master.zip\examples-master\lite\examples\object_detection in ZIP archive)
OR GO TO GIT
-
SPECIAL NOTE: an alternative to the Image Classification can be found from google at Object Recognition (think uses SSD for localization): https://github.com/tensorflow/examples/blob/master/lite/examples/object_detection/android/README.md
-
HOWEVER --it does not have the same level of explanation as their recommended Image Classification --so see below my quick description.
-
SPEICAL NOTE: you can clone all tensorflow examples (current) form https://github.com/tensorflow/examples
HOW IT WORKS
-
DectorAcitivity.java:
-
Note: this implements CameraActivity class which handles the camera capture for you using the builtin Android Camera2 framework.
-
onPreviewSizeChosen(final Size size, final int rotation) - sets up the detector model from the stored TFlite model file
-
- loads the stored model and creates it from the TFlite file and the labelmap.txt files in the assets folder. It assumes an SSD based localization and defines parameters at the top like: size (300x300) of input, confidence required for recognition (MINIMUM_CONFIDENCE_TF_OD_API = 0.5f
), if the model is quantized or floating point (you can quantize the weights to reduce computation when converting from a tensorflow model to a tflite model during end of training).
detector =
    TFLiteObjectDetectionAPIModel.create(
        getAssets(),
        TF_OD_API_MODEL_FILE,
        TF_OD_API_LABELS_FILE,
        TF_OD_API_INPUT_SIZE,
        TF_OD_API_IS_QUANTIZED);
- it also prepares the input image by cropping it to 300x300
croppedBitmap = Bitmap.createBitmap(cropSize, cropSize, Config.ARGB_8888);
-
Calls the detector (detecor.recognizeImage() and gets results inside the processImage() method
- LOOK for following code
final List<Classifier.Recognition> results = detector.recognizeImage(croppedBitmap);
//********more code then

for (final Classifier.Recognition result : results) {
Call recognizeImage which passes the cropped image to the detector model created. AND cycle through all recognized objects w/locations and if above min confidence level draws the boudning box and label on top of the input image.
- LOOK for following code
-
TFLiteObjectDetectionAPIModel: this class uses the org.tensorflow.lite.Interpreter class that is part of the TFLite library all Android Apps using TFLite must use. Interpreter is the class that represts your model and runs inferences (recognition) at run time.
- import org.tensorflow.lite.Interpreter;
- Defines the following which means up to 10 detections allowed per image.
private static final int NUM_DETECTIONS = 10;
- RECOGNITION RESULTS stored in arrays:
-
// outputLocations: array of shape [Batchsize, NUM_DETECTIONS,4]
// contains the location of detected boxes
private float[][][] outputLocations;
// outputClasses: array of shape [Batchsize, NUM_DETECTIONS]
// contains the classes of detected boxes
private float[][] outputClasses;
// outputScores: array of shape [Batchsize, NUM_DETECTIONS]
// contains the scores of detected boxes
private float[][] outputScores;
// numDetections: array of shape [Batchsize]
// contains the number of detected boxes
private float[] numDetections;
-
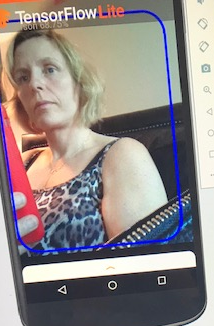
RUNNING: Below you can see it running in my emulator --it is detecting me as a person in the blue box

HOW DO YOU USE IT:
-
Understand the code
-
Modify the Code so that it works with your Model --thinks like the image size needed for cropped input, the minimum confidence level, the number of detections per image you want, the TFlite model file & labelmap.txt file located in the assets folder. NOTE: there are other examples like Image Recogntion same that may better fit your problem--see the Google examples
