Controlling Environments --useful with teams or different projects needs.
Issue:
there are many versions of python, tensorflow and all the related modules. When you are working in groups--or
you have different projects that require different versions how do you handle this?
SOLUTION: A container/manager solution (alternative not discussed here is Cloud setup)
OPTION 1: Anaconda My Solution: (as a CS student --it is up to you to teach yourself how to use this tool)
I have used Anaconda --which lets you setup virtual environments you can share with others (or save just for you) that you install whatever versions of software you want.
-
see https://www.anaconda.com/tensorflow-in-anaconda/ AND how to install
READ: about how to launch different "conda" environments for tensorflow (cpu only, gpu based)
GOOD: free for useBAD: I personally hate remember just one more thing I have to remember just to get to a point I can work --and if I am not doing it every day I forget it. (just like too many passwords)
ONCE you installed Anaconda ---read how to launch (<<this is official but, will be "something" like the following
***go to official documentation for latest on how to do this*****
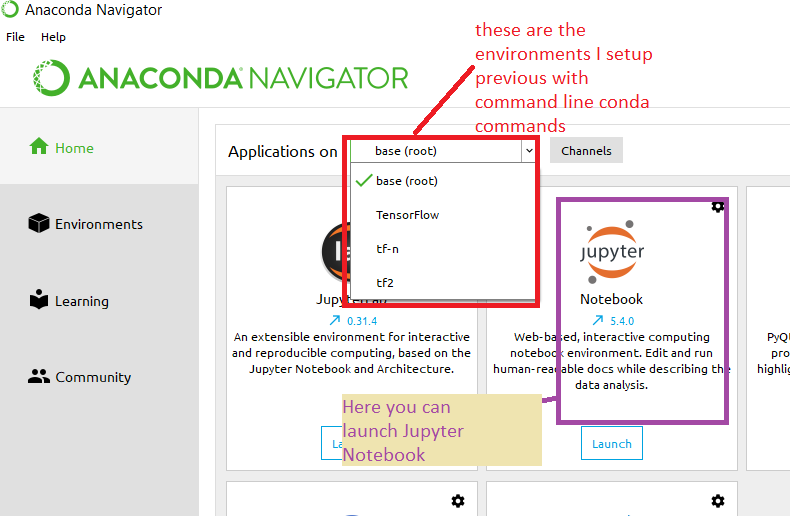
TO SETUP "ENVIRONMENTS" for Anaconda to run --you can have as many as you want. You will want your to include tensorflow
To install the current release of CPU-only TensorFlow, recommended for beginners:
 conda create -n tf tensorflow
 activate tf   OR   conda activate tf
Or, to install the current release of GPU TensorFlow on Linux or Windows:
 conda create -n tf-gpu tensorflow-gpu
 activate tf-gpu   OR    conda activate tf-gpu
Install nightly version of tensorflow
 conda create -n tf-n python
 activate tf-n    OR     conda activate tf-n
 pip install tf-nightly
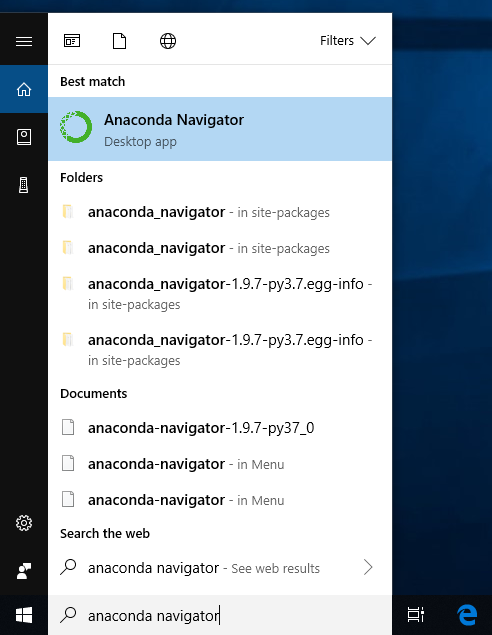
FIRST- getting started on Anaconda --Using Anaconda Navigator App

NEXT - LAUNCHING + USING Jupyter Notebook from Anaconda:
Run Python in a Jupyter Notebook
-
On Navigator’s Home tab, in the Applications pane on the right, scroll to the Jupyter Notebook tile and click the Install button to install Jupyter Notebook.Simply click on Launch for Jupyter Notebook and you are ready to go ---will launch in the browser but, you are now running using the environment setup (tensorflow version, python version etc) that you configured in your Anaconda environment (e.g. tf-n or whatever you called it)

-
They also claim their envirnoment / package manager gives better performance than pip????
IF YOU HAVE THE RIGHT HARDWARE
????

-
Alternatively, to run a local notebook, you can create a conda virtual environment and install TensorFlow 2.0.
conda create -n tf2   OR  conda create -n tf2 python=3.6
activate tf2
pip install tf   OR   pip install tf-nightly    OR     pip install tf-nightly-gpu
conda install jupyter
OPTION 2: Run Docker container (similar solution)
****first must install Docker***** PROBLEM: may require Pro version of Windows or ? to run
-
The current version of Docker for Windows runs on 64bit Windows 10 Pro, Enterprise and Education (1607 Anniversary Update, Build 14393 or later). In the future we will support more versions of Windows 10.
AN OLDER Docker toolbox install(MAY work??? up to you to try) look at this older tutorial
Run a TensorFlow container(<< read here for options / gpu w/ Jupyter notebook etc)
The TensorFlow Docker images are already configured to run TensorFlow. A Docker container runs in a virtual environment and is the easiest way to set up GPU support.
 docker pull tensorflow/tensorflow                  # Download latest image
 docker run -it -p 8888:8888 tensorflow/tensorflow  # Start a Jupyter notebook server
another example: run python3 with tensoorflow and jupyter notebook
docker run -it --rm -v $(realpath ~/notebooks):/tf/notebooks -p 8888:8888 tensorflow/tensorflow:latest-py3-jupyter
