CVAT Tool
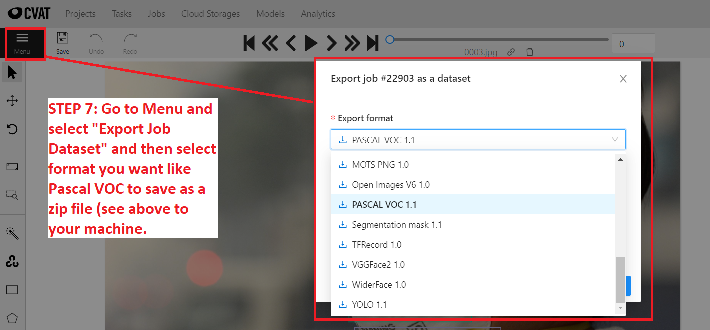
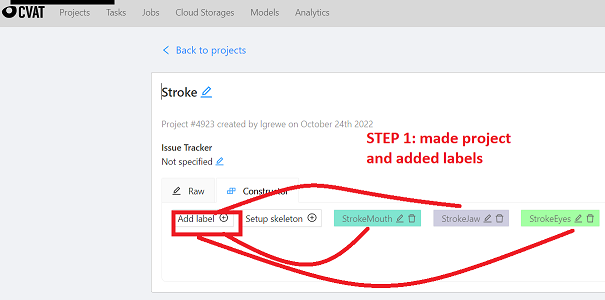
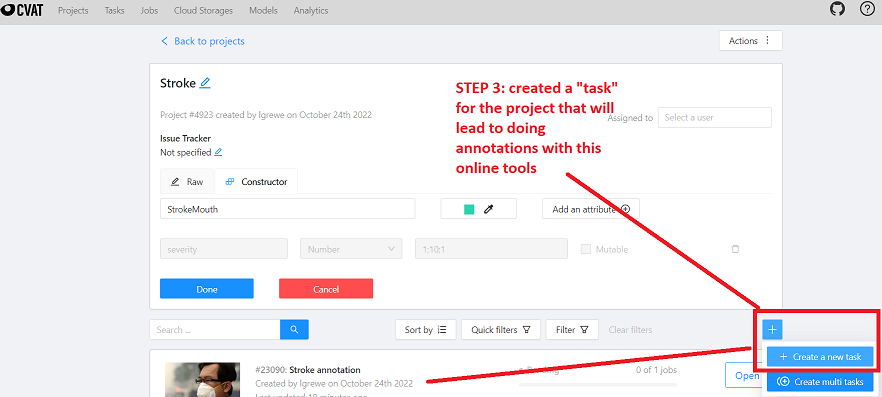
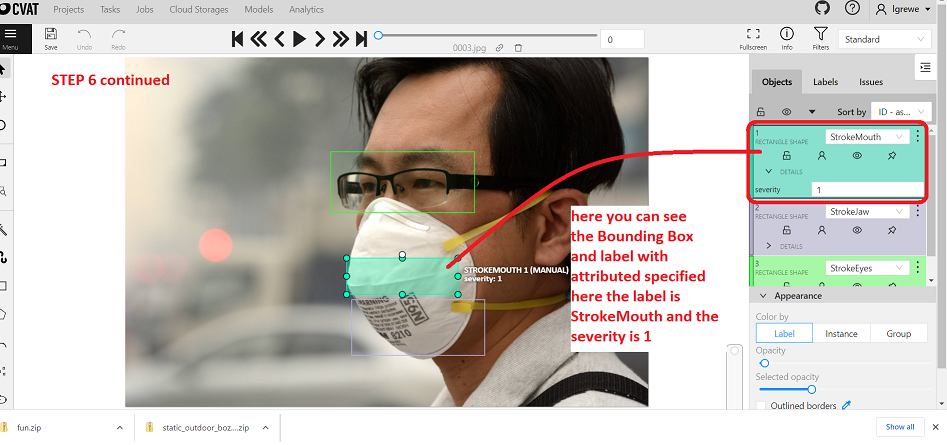
Take a look at the following images that show screen shots of me using the online CVAT tool for labeling. It does att the ability to do more than the LabelImg tool does including adding attributes beyond just the label and bounding box of an object. I simply played around to use it. It is a bit more work in setting up to get to the point of annotations as you have to first create a Project, then Task then a Job to do the actual annotation. But, the screen shots (hoepfully) capture what I did. I simply poked around and tried it out and also looked at this blog to figure out how to get to the annotation job interface.
OUTPUT:
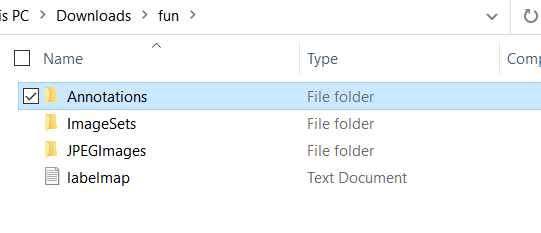
Pascal VOC formatted directory & example image and corresponding Pascal VOC and annotation xml file. WARNING: the labelmap does not correspond to the format needed by Tensorflow for training you will need to create this manually.
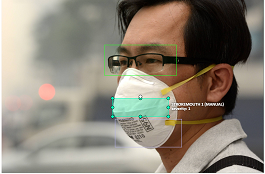 XML FILE

STEPS - after creating account to use online (or dowloading and setting up software)
1)Create Project, the labels with them
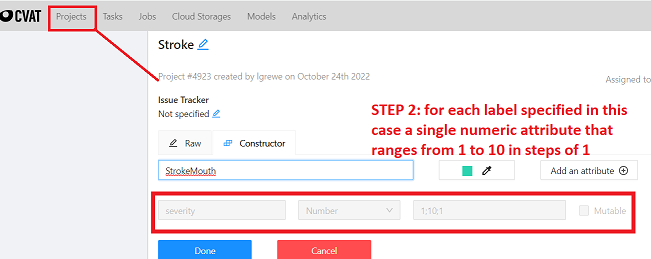
2) Create Task and upload or specify where the images are
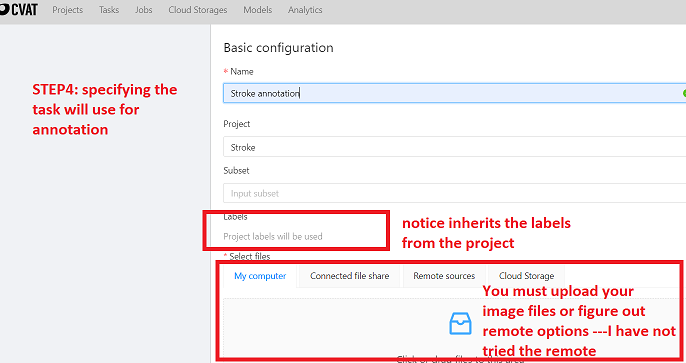
3) Go to Jobs and create job to annotate and launch annotation tool , annotate , make sure you save periodically (you can come back)

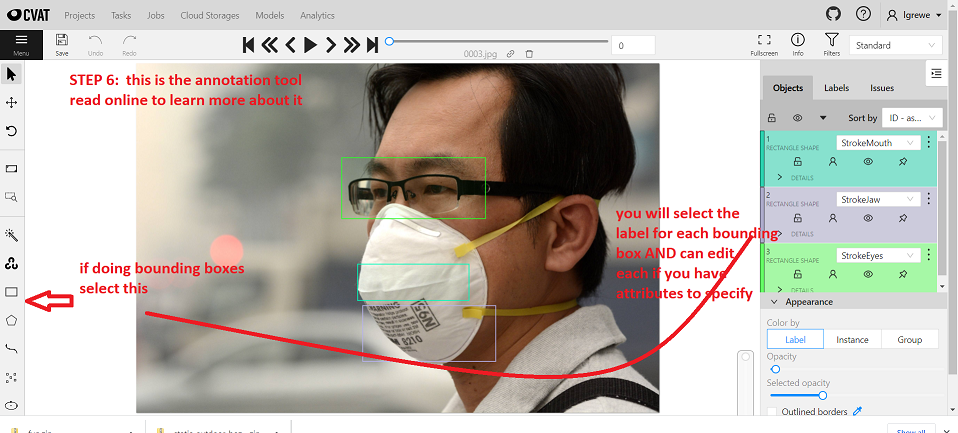
4)Go to Menu and
select "Export Job Dataset" and then select format you want like Pascal VOC to save as a zip file (see above to your machine).
