Exercise: Video Activity Recogntion using (CNN + LSTM)
modified from "Hands-On Comptuer VIsion with Tensorflow 2 by B. Planche and E. Andres.
You are going to go over and implement Video Activity Recognition using CNN for feature extraction followed by LSTM
and a final decision layer.
Using TensorFlow 2 featuring tf.keras built in Keras
>>>>AFTER reading everything look at STEP 14 before you get started- ROADMAP saying LSTM will come 2019
FIRST: dowload the dataset UCF-101 found here https://www.crcv.ucf.edu/data/UCF101.php
(remember where you installed it to modify the python code to point to data directory)
BASIC INSTRUCTIONS
1) Assumes you have already installed latest TensorFLow
2) Assumes you have already installed Jupyter Notebook
3)
GET Jupyter Notebook file here that represents the code below and look at the step by step explanation below
4) AND Refer to the Tensorflow api for changes and detail --it is up to YOU to fix any errors or discrepenencies in the code and changing APIs.
5) RUN the code as is and using TensorBoard show the results of training and validation
6) Figure out how to store the trained model and convert to a mobile ready model and integrate into an Android app -- extend
previous exercises to have a
spinner option called "ActiveRec" .
7) Make a Youtube video (one per group)showing theJupyeter notebook running at different stages (cut, and paste the video --I don't want to see it training for too long--but, show me the results after each step of the code to the end). Also show the TensorBoard running AND show the Mobile Application running. Post to BB-Exercises-Ex:Learn Training
Jupyter Notebook
Corresponding Python
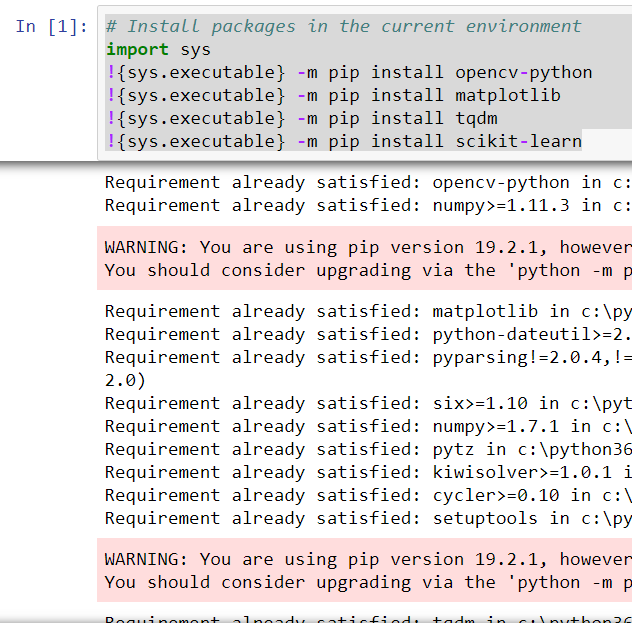
STEP 1: Install modules
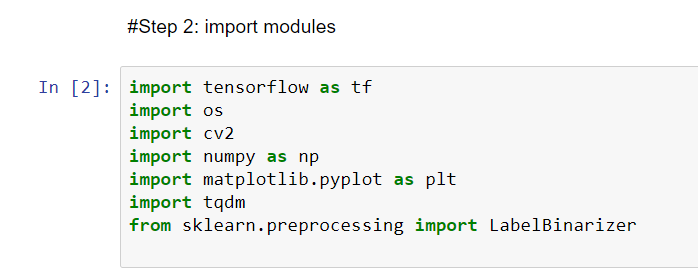
STEP 2: Import modules
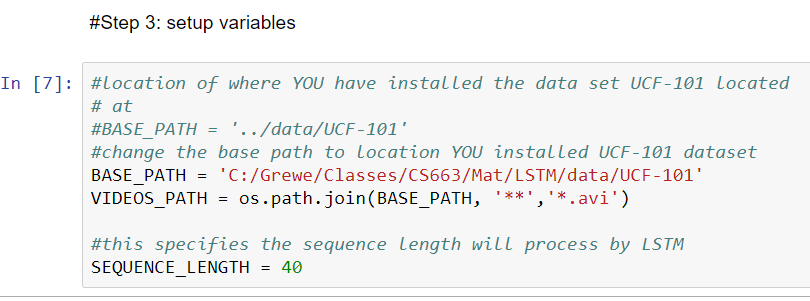
STEP 3: setup Variables including the path to where you installed the UCF-101 dataset
NOTE: SEQUENCE_LENGTH specified how many frames in your LSTM you will process for
each video
STEP 4: Use the Inception V3 CNN that is an existing trained model in TensorFlow(see api on it) to perform
feature extraction for us (rather than developing are own).
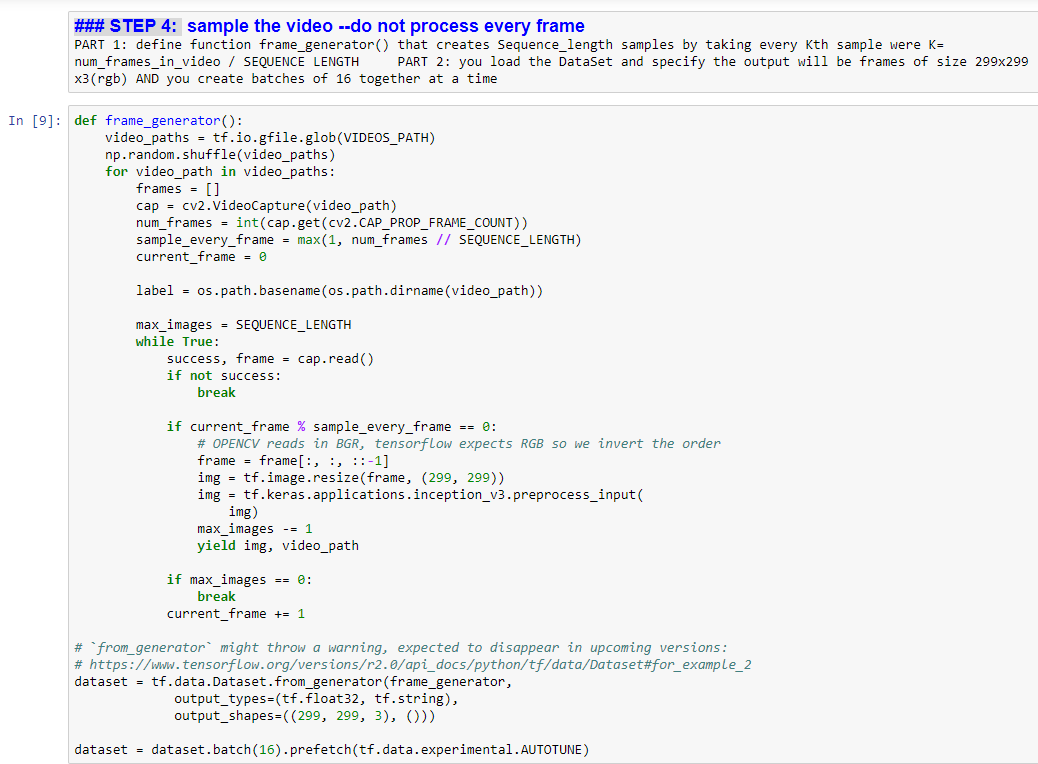
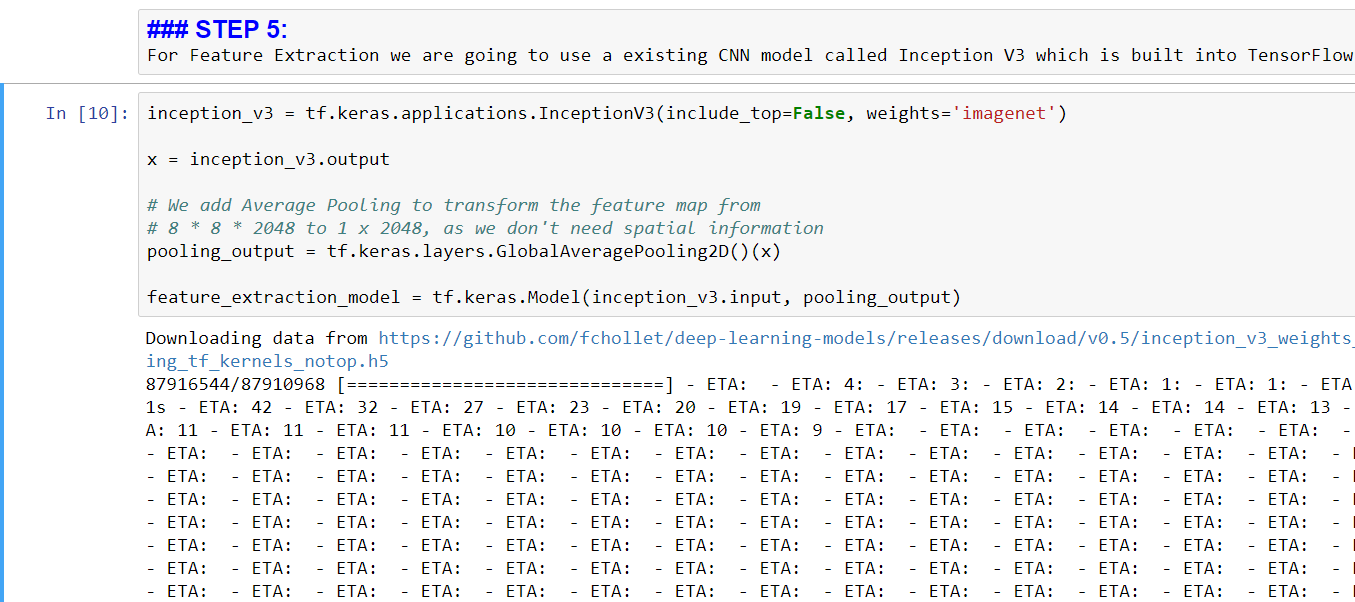
STEP 5: Using the pre-built Inception V3 model as a CNN for our feature extraction
read about Inception here and see api and see the better keras documentation on inception v3
-
Create Inception v3 instance where:
-
include_top = false MEANS no fully connected layer --> HENCE this does not have the fina fully connected layer, and is just the feature extraction part of the network.
weights= 'imagenet' MEANS load the InceptionV3 architecture network pre-trained on ImageNet dataset
-
-
make NEW model that is basically the InceptionV3 without final fully connected layer but ADD the GlobalAverage Pooling 2D layer (which will flaten the output to 1x2048) --> call it feature_extraction_model
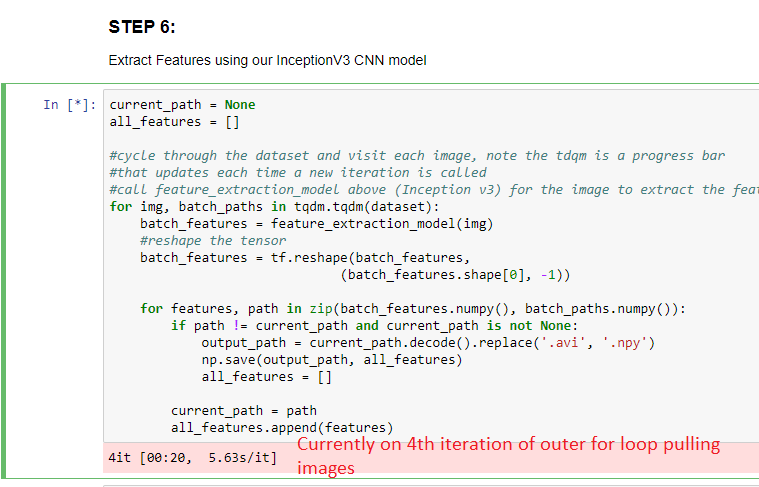
STEP 6: Extract features using the InceptionV3 CNN model loaded in step 4...
.....will store the features in .npy file
NOTE: Extraction takes about ~1h20 minutes on an NVIDIA 1080 GPU
I DONT have this good GPU so mine took MUCH LONGER --and was doing other work at
same time.
THIS STEP --may take a while!!!
....at the end the "progress bar (tqdm ) updates for each iteration / image through dataset
(
Total 33,085 iterations= #image frames from all videos = #samples/video * #videos)
-
tqdm is a progress manager that performs the printout at the bottom of the block every time a new image is pulled
from the dataset see https://tqdm.github.io/docs/tqdm and also see https://github.com/tqdm/tqdm -
cycle through the images in the dataset AND
-
call feature_extracton_model (Inception v3) on the image -> will yield a 1x2048 feature vector
-
reshape the feature vector output see api : https://www.tensorflow.org/api_docs/python/tf/reshape NOTE: the -1 dictates that the output tensor shape will be to
# tensor 't' is [1, 2, 3, 4, 5, 6, 7, 8, 9]
# tensor 't' has shape [9]
reshape(t, [3, 3]) ==> [[1, 2, 3],
                        [4, 5, 6],
                        [7, 8, 9]]

# tensor 't' is [[[1, 1], [2, 2]],
#                [[3, 3], [4, 4]]]
# tensor 't' has shape [2, 2, 2]
reshape(t, [2, 4]) ==> [[1, 1, 2, 2],
                        [3, 3, 4, 4]]
# tensor 't' is [[[1, 1, 1],
# [2, 2, 2]],
# [[3, 3, 3],
# [4, 4, 4]],
# [[5, 5, 5],
# [6, 6, 6]]]
# tensor 't' has shape [3, 2, 3]
# pass '[-1]' to flatten 't'
reshape(t, [-1]) ==> [1, 1, 1, 2, 2, 2, 3, 3, 3, 4, 4, 4, 5, 5, 5, 6, 6, 6]# tensor 't' is [[[1, 1, 1],
# [2, 2, 2]],
# [[3, 3, 3],
# [4, 4, 4]],
# [[5, 5, 5],
# [6, 6, 6]]]
# tensor 't' has shape [3, 2, 3]
# -1 is inferred to be 9:
reshape(t, [2, -1]) ==> [[1, 1, 1, 2, 2, 2, 3, 3, 3],
[4, 4, 4, 5, 5, 5, 6, 6, 6]]
# -1 is inferred to be 2:
reshape(t, [-1, 9]) ==> [[1, 1, 1, 2, 2, 2, 3, 3, 3],
[4, 4, 4, 5, 5, 5, 6, 6, 6]] -
-
convert the batch_features feature vector to a numpy array (see doc. on numpy)
-
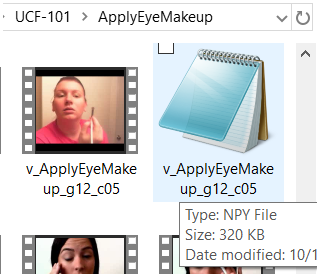
for all of the images in the same avi append to the feature vector numpy array and then write it out to a .npy file in the same directory as the avi file.
-
this is what your directories will look like --they will contain BOTH the original avi files and now for each
one a .npy file that contains the features
STEP 7: Create Labels of our classes
-
Load the Labels for the Video Activities we have data for and will use to train our LSTM
-
Make it so 1 or 0 to tell if belongs to or does not belong to a class...uses LabelBinarizer part of scikit (read https://scikit-learn.org/stable/modules/generated/sklearn.preprocessing.LabelBinarizer.html)

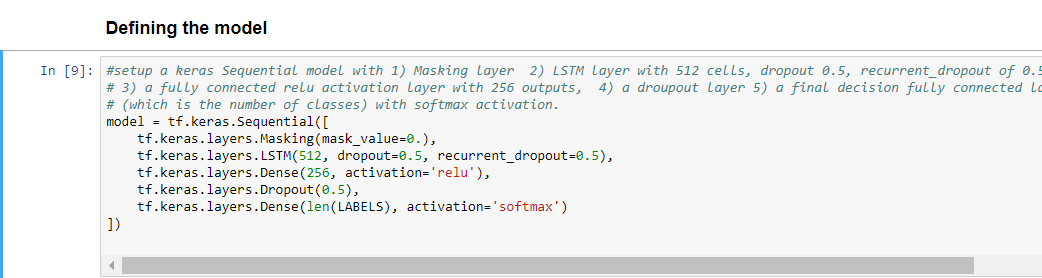
STEP 8: Define Network with LSTM to train for Video Activity Recogntion
-
Layer 1= Masking layer (and see Keras doc) which is used in RNN, should always insert a MaskingLayer(mask_value=0) before the LSTM layer. For each timestep in the input tensor (dimension #1 in the tensor), if all values in the input tensor at that timestep are equal to mask_value, then the timestep will be masked (skipped) in all downstream layers (as long as they support masking).
-
Layer 2 = LSTM and also
IMPORTANT: what you are really defining is what ONE LSTM cell looks like ---you will have SEQUENCE_NUMBER cells (as defined above)
-
512 #units
IMPORTANT: the first parameter #units is not the number of cells you have, but rather the cell's internal state (hidden state) vector that is produced and fed into the next cell (time in sequence). There is no "correct" value for the #units. Generally the larger number will yield more "parameters" in your model to learn, it will require more training and more data BUT can also be more descriminating. Think of this like having a larger number of layers in a CNN. READ this blog for a better understanding.
-
dropout: Float between 0 and 1. Fraction of the units to drop for the linear transformation of the inputs.
-
recurrent_dropout: Float between 0 and 1. Fraction of the units to drop for the linear transformation of the recurrent state.
-
Layer 3= fully connected (Dense) layer - see documentation and keras doc. Number of output values=256
Layer 4 = Dropout
Layer 5= finaly fully connect softmax decision layer --output has # classes/labels values.
STEP 9: Specify the loss function & optimizer function & metrics you wish to calculate for training
-
compile: Specified loss as categorical_crossentropy which is the cross-entropy loss between true labels and predicted labels.
compile: Specified optimizer as rmsprop which is used to adjust weights as training as described here
compile: Specified metrics to caclulate accuracy as the top_k_categorical_accuracy (see better documentation here) - default value of k=5, calculates the top-k categorical accuracy rate, i.e. success when the target class is within the top-k predictions provided.

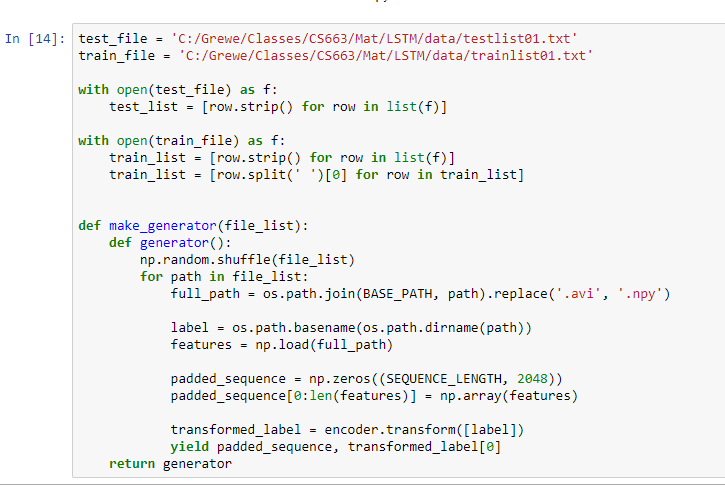
STEP 10: Specify files to use in testing (test_file) and in training (train_file). Create function make_generato
r which will take in an array of files and randomly select from it building out the list as the .npy feature files for each
avi in this set of files
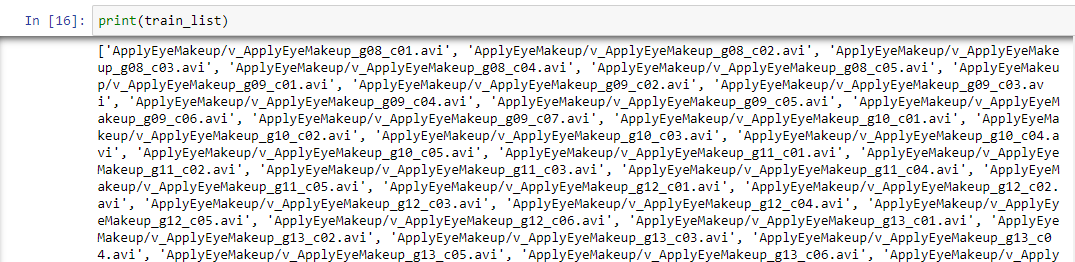
To give an idea of the balance between train and testing - for training on the "ApplyEyeMakeup" there
are 102 videos in the training dataset. In the testing dataset there are
44 videos.
Format for trainlist01.txt FileName ClassLabelNumber
ApplyEyeMakeup/v_ApplyEyeMakeup_g08_c01.avi 1 |
Format for testlist01.txt FileName
ApplyEyeMakeup/v_ApplyEyeMakeup_g01_c01.avi |
This is what the train_list looks like:
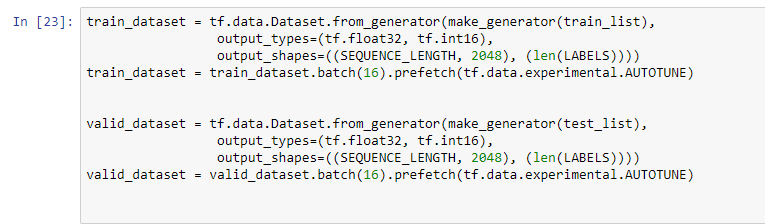
STEP 11: Create Training dataset (train_datset) and Validation dataset (valid_daataset)
Create Datasets from the list of training feature files (train_list step 10) and validation feature files (test_list step 10)
-
create the datasets: train_datset and valid_dataset. Note we are batching 16 & prefetching. Also,each training sample: has SEQUENCE_LENGTH (40--see above where defined) feature vectors of length 2048 and a Label associated with it.
batch = the number of training samples to work through before the model's internal parameters are updated.
tf.data.Dataset.prefetch= can be used to decouple the time when data is produced from the time when data is consumed. In particular, the transformation uses a background thread and an internal buffer to prefetch elements from the input dataset ahead of the time they are requested. The number of elements to prefetch should be equal to (or possibly greater than) the number of batches consumed by a single training step. Read about ways to improve performance of training here.
-
Rather than setting the amount to prefectch manually used tf.data.experimental.AUTOTUNE which will prompt the tf.data runtime to tune the value dynamically at runtime (does not publish how this is done)
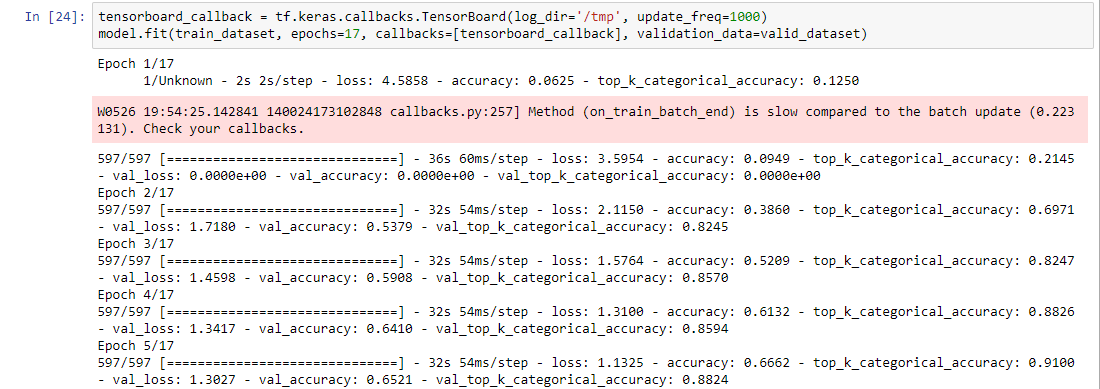
STEP 12: Train your LSTM
Creating a callback function pointing to tf.keras.callback.TensorBoard which will store information (checkpoints,etc) that is used
with TensorBoard a visualization tool used in TensorFlow to show the trends in training and validation --will perform
plots of data etc.
-
update_freq: 'batch' or 'epoch' or integer. When using 'batch', writes the losses and metrics to TensorBoard after each batch.
The same applies for 'epoch'. If using an integer, let's say 1000, the callback will write the metrics and losses to TensorBoard
every 1000 samples. Note that writing too frequently to TensorBoard can slow down your training.
Epoch = controls the number of complete passes through the training dataset..
Calling model.fit:
-
passing train_dataset & valid_dataset
specifying will run for 17 Epochs (a stopping condition)
specifying the callback function to call at certain points (trigger points)
Ignore the warning --but, notice that with each Epoch the accuracy is improving
-
@Epoch 1: accuracy = 0.0625
@Epoch 5: accuracy = 0.6662
STEP 13: SAVE your model --using same model.save as found in the CNN example

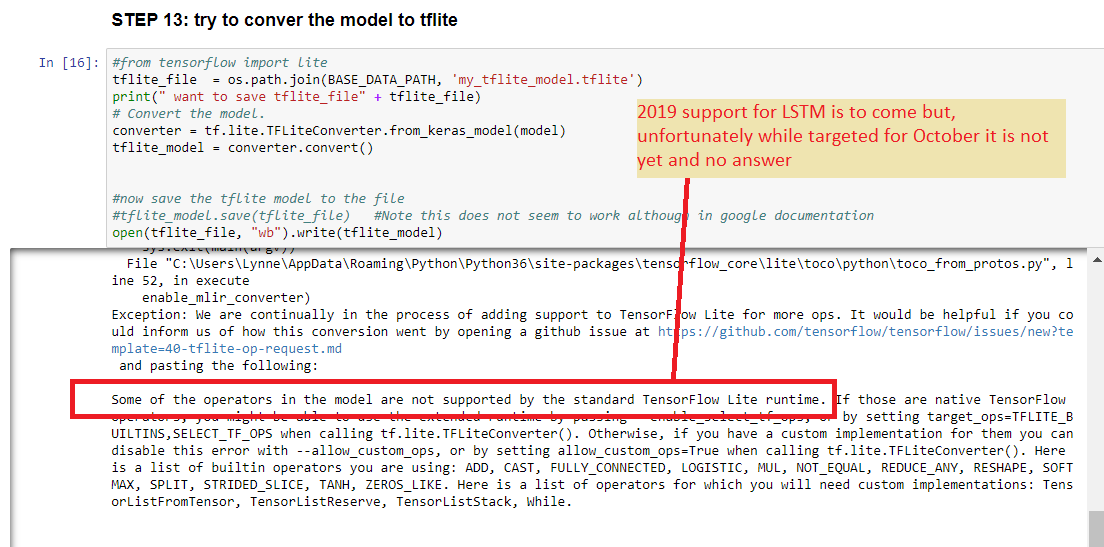
STEP 14: CONVERT LSTM model to tflite--- you have to investigate this --https://www.tensorflow.org/lite/convert/rnn (THERE are limitations)
SUPPOSEDLY THE FOLLOWING IS NO LONGER TRUE AND TFlite Conversion of LSTM is possible ---until we know for sure leaving the info below.
The TensorFlow Lite interpreter currently implements a subset of TensorFlow operations, meaning some model architectures cannot immediately be converted due to missing operations.
Some RNN-based architectures are affected by this.
Option:
Deploy your trained and saved TensorFlow model to cloud (follow official directions ) and make request/response via REST (web-based request/response). I believe you will have to deploy using a Saved Model format (not h5) https://www.tensorflow.org/guide/saved_model You will "deploy" using Tensorflow Serving
ROADMAP saying LSTM will come 2019
Possible OPTION to get TFlite to work???? https://www.youtube.com/watch?v=gHN0jDbJz8E&feature=youtu.be --only for limited ops or for flow-control like RNNs?? OR LOOK at : For models with LSTM/RNNs, you can also try the experimental API OpHint to convert
STEP 7:Run prediction on a SINGLE video clip (from file) --mimicing parts of what you need to do
in a run-time scenario:
7.1=capture SEQUENCE_LENGTH images in video clip
7.2= process each Image -> resize & convert to tensor, call preprocessor for Feature Extractor model ( this mimics what is done to images in training)
7.3= take processed image tensor and pass to Feature Extractor CNN -> output here is tensor (1x2040) feature vector AND store
feature vectors in an array
7.4= convert your array of (40x feature_vector_tensors(1x2048) ) -> a tensor which will be input to your LSTM model
7.5= call prediction on your tensor representing your video on your LSTM model
-
STEP 7.1 capture SEQUENCE_LEGTH images in video clip & 7.2 - process each image & 7.3 call Feature Extraction CNN
# create function to go through video specified and return an array of images of lenght SEQUNCE_LENGTH
# each image is resized and preprocessed for input into a FeatureExtractor InceptionV3 CNN
# then run through the FeatureExtractor --output will be a 1x2048 feature vector for each image
# append to the set of features and return
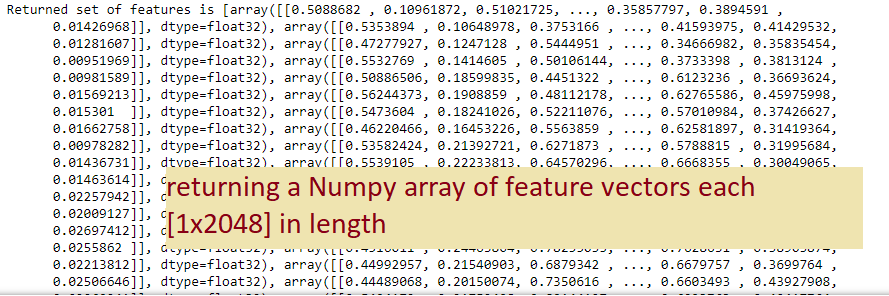
# features is an array of SEQUENCE_LENGTH (40) Tensors (each 1x2048 in length)
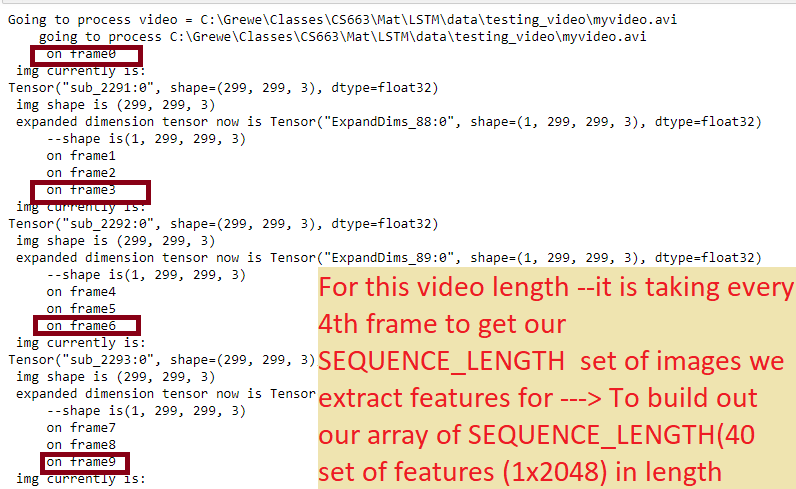
def grabImagesFromVideo_Process_with_InceptionCNN_FeatureExtractor(video_path, feature_extraction_model):
print(" going to process " + str(video_path))
features = []
cap = cv2.VideoCapture(video_path)
num_frames = int(cap.get(cv2.CAP_PROP_FRAME_COUNT))
sample_every_frame = max(1, num_frames // SEQUENCE_LENGTH)
max_images = SEQUENCE_LENGTH
# cycle through the frames in the video
for current_frame_index in range(num_frames):
print(" on frame" + str(current_frame_index))
# read in next frame from video
success, frame = cap.read()
if not success:
break
# take every kth(sample_every_frame) frame and store in frames array
if current_frame_index % sample_every_frame == 0:
# OPENCV reads in BGR, tensorflow expects RGB so we invert the order
frame = frame[:, :, ::-1]
# appropriately resize and preprocess the image for Feature Extraction with inceptionV3 CNN
# CONVERTS TO A TENSOR from an array with the size of 299x299
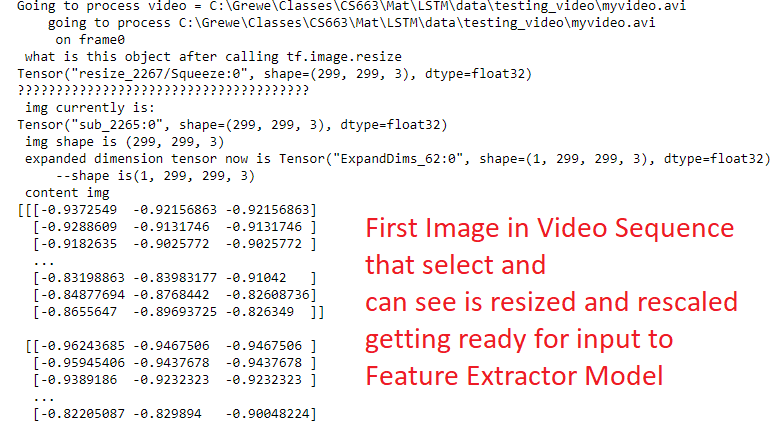
img = tf.image.resize(frame, (299, 299))
img = tf.keras.applications.inception_v3.preprocess_input(img)
print(" img currently is:")
print(img)
print(" img shape is " + str(img.shape))
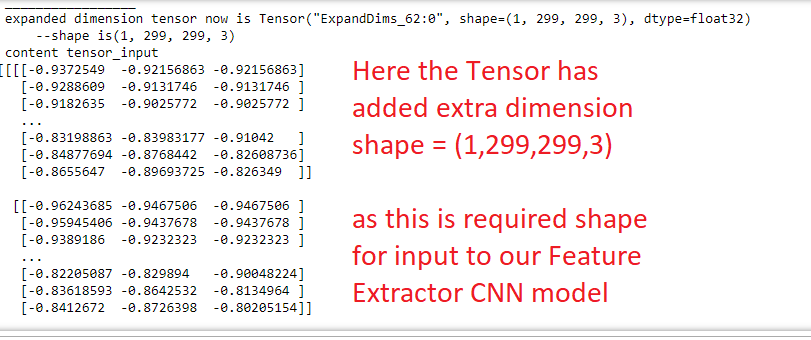
tensor_input = tf.expand_dims(img, axis=0)
print(" expanded dimension tensor now is " + str(tensor_input))
print(" --shape is" + str(tensor_input.shape))
# Diagnostics: run the "graph" to print out tensor object
if (False):
with tf.Session() as sess:
# sess.run(init_op) #execute init_op
# print the random values that we sample
print(" content img")
print(sess.run(img))
print(" _________________")
print(" expanded dimension tensor now is " + str(tensor_input))
print(" --shape is" + str(tensor_input.shape))
print(" content tensor_input")
print(sess.run(tensor_input))
# now going to process with the feature extraction model (inceptionv3 CNN based)
current_features = feature_extraction_model(tensor_input)
# current_features = feature_extraction_model.predict(img, steps=1)
# reshape the tensor to shape ( #features x 1)--see https://www.tensorflow.org/api_docs/python/tf/reshape
current_features = tf.reshape(current_features, (current_features.shape[0], -1))
# convert tensor current_features to an numpy array !!!!!!!!!!!!!!!!!!!!!!!!!!!!!!!!!!!!
# only works in TF 2.* !!!!!!!!!!!!!!!!!!!!!!!!!!!!!!!!!!!!!!!!!!!!!!!!!!!!!
current_features = current_features.numpy()
features.append(current_features)
# reduce counter
max_images -= 1
# if we have sampled SEQUENCE_LENGTH number of frames then stop
if max_images == 0:
break
# now make sure we have length SEQUENCE_LENGTH and pad with zeros if necessary
# padded_sequence = np.zeros((SEQUENCE_LENGTH, 2048))
# padded_sequence[0:len(features)] = np.array(features)
return features
# step 7.1& 7.2 call function passing a video_path and returning the array of images of SEQUENCE_LENGTH
# step 7.3 call function passing a video_path and feature extraction model
# extract images of SEQUENCE_LENGTH and process each with feature extractor
# returning the array of features of SEQUENCE_LENGTH
features = grabImagesFromVideo_Process_with_InceptionCNN_FeatureExtractor(video, feature_extraction_model)
print(" Returned set of features is " + str(features))
-
VARIOUS Printouts showing steps in - 7.1,7.2& 7.3
-
7.4 convert the above array of SEQUENCE_LENGTH tensors to a tensor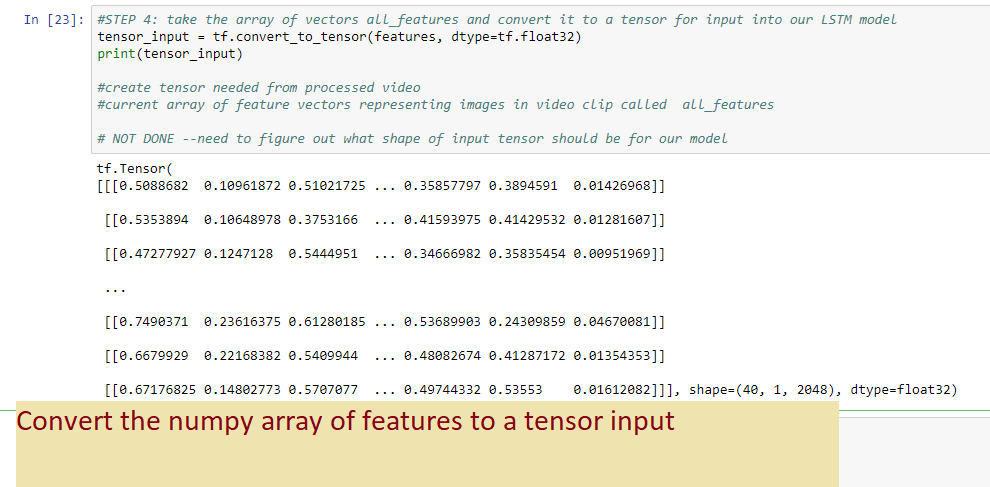
7.5 run the tensor input through our LSTM model for prediction

