Running Colab on Google Compute Engine VM
**** read this blog as it reflec the steps below *****
IMPORTANT: when you are Not using your VM stop and Delete it ---see this video on how to do . Otherwise you will continue to be charged even when you are not using it.
STEP 1: Setup your Google Account with your Google Credits
See class annoucement on how to do this
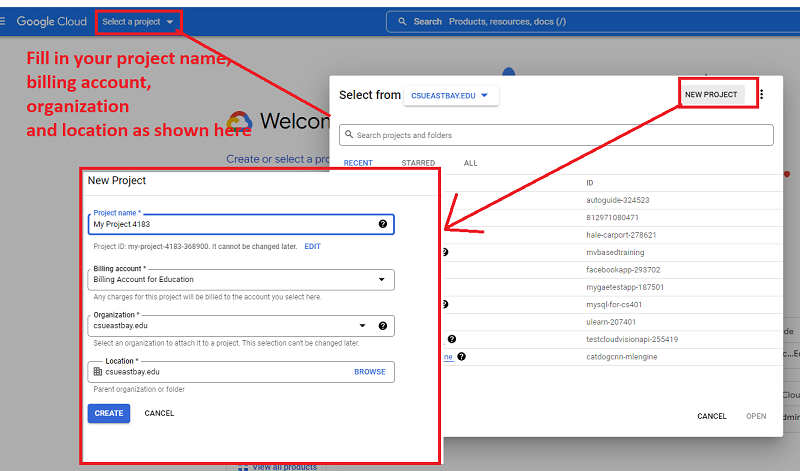
STEP 2: Create a new project and associate your billing with it
You will go to your Google Cloud Counsel and select a project and hit the New Project button and fill out project name, choose the billing account you setup in previous step, organizaton (csueastbay.edu ) and location (csueastbay.edu) is fine.
STEP 3: Enable Compute Engine API & Increase the Quota for GPU for your project from Default(0) to at least 1 for ALL REGIONS
STEP 3.1: Go to Computer Engine & Enable API
STEP 3.2: You will go to your Google Console and (note you can read about quotas here)
(NOTE: it may ask you to create credentials --top of scren message --do so)
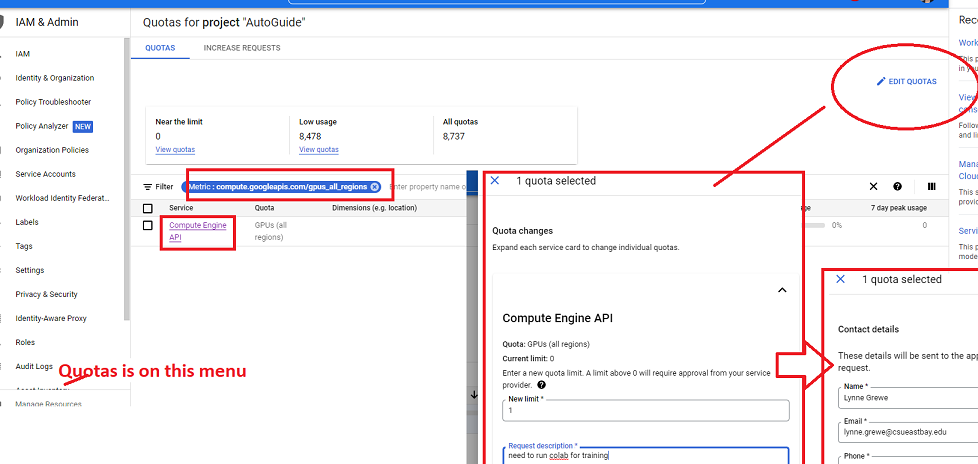
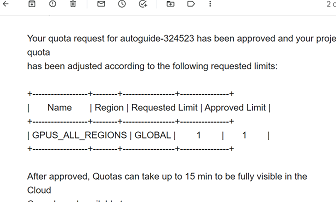
>>> go to your Project (select it) and on the left menu select quotas, then in the filter aas shown in the screenshot below type in "compute.googleapis.com/gpus_all_region" as this is the quota you will need to request to increase to say 1. (you can try for more and they may or many not allow). This can take 15 minutes to 2 days to make happen
@
STEP 4:Create a VM-virtual machine in Compute Engine(uses GPU and has software like Tensorflow Installed)
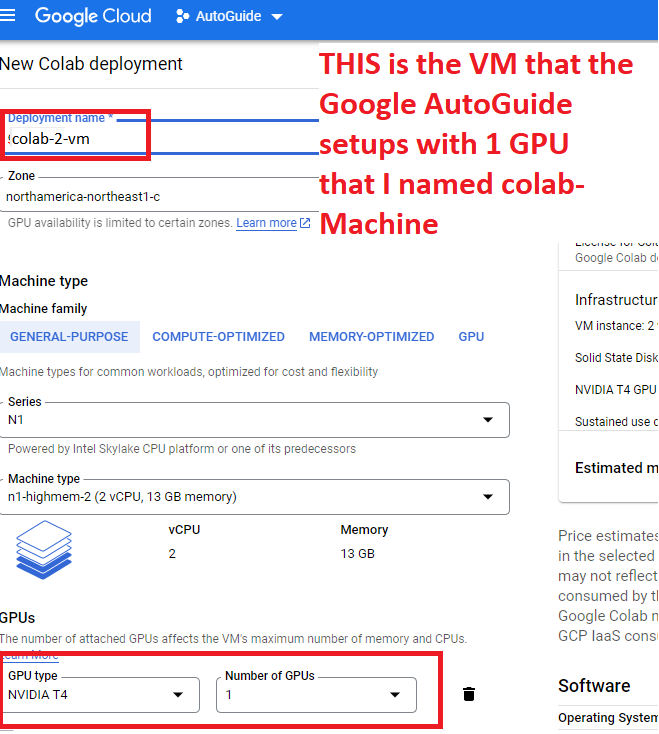
There are a LOT of ways you could do this. We are going to use the EASIEST method below that uses an AutoGuide that setups up a VM so you can connect your Colab to it.
>> EASIEST: Follow this Google Setup Link that Specifically creates a 1 GPU w/ Tensorflow SPECIFICALLY for Colab us
>>MORE DIFFICULT read here on how to do it more manually --but specifying VMs that have tensorflow installed
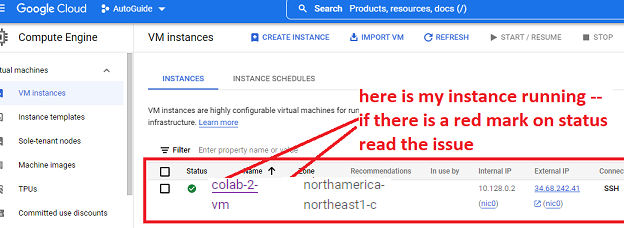
Here it is in the midst of deployment when it is running....note you MAY HAVE TO CHANGE the ZONE to accomodate the vm
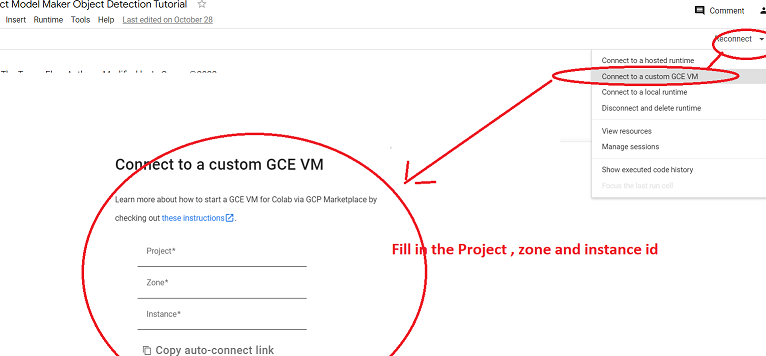
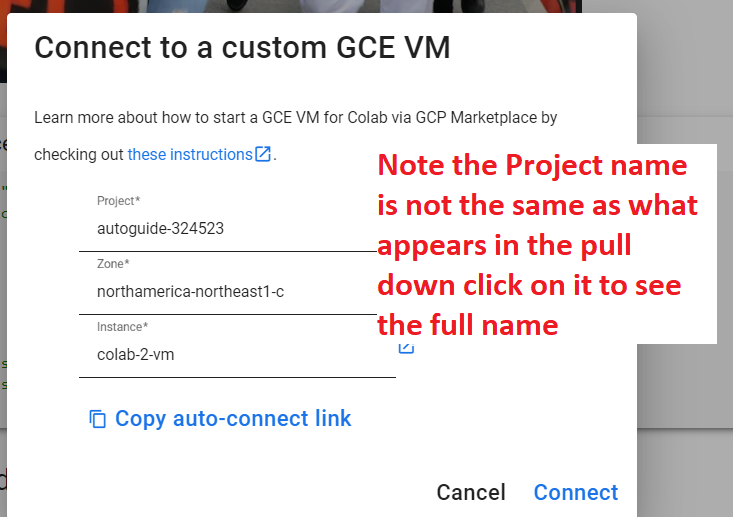
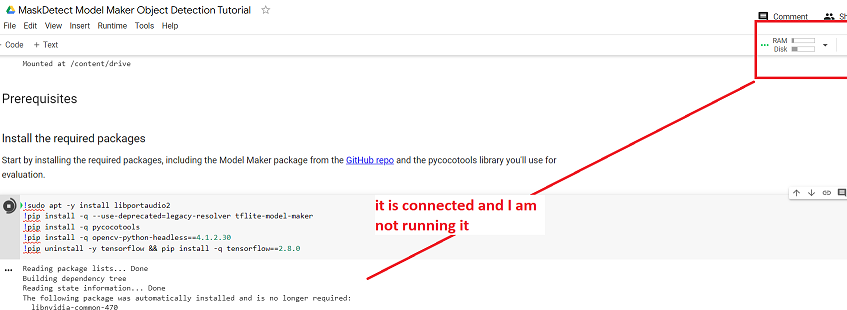
STEP 5: Connect yourColab to run on your VM instance ---as long as the VM runs, your Colab will run AND NOT TIME OUT
Here you can see me connecting, you will need to specify the name of the project (click on the project to find out its full name), the regsion the Vm is deployed and finally the vm name.
