Training Example - with Python, Tensorflow 2+ w/Keras and also OpenCV is used for resizing data
Cat and Dog example - Kaggle Competition
modified from this codelab example
and also https://www.tensorflow.org/tutorials/images/classification
Link to Jupyter Notebook CatDog classifier code
Link to corresponding Python code
Link to zip of Data
There are tons of tutorials surrounding the 2 class Dog / Cat classification problem proposed as a Kaggle Competition called Dog versus Cat
https://www.kaggle.com/c/dogs-vs-cats/data
Here is an example of a tutorial that I modified https://medium.com/@harsathAI/cats-and-dogs-classifier-convolutional-neural-network-with-python-and-tensorflow-9-steps-of-6259c92802f3
Cat versus Dog- The Data
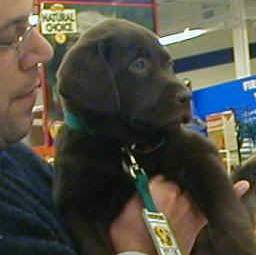
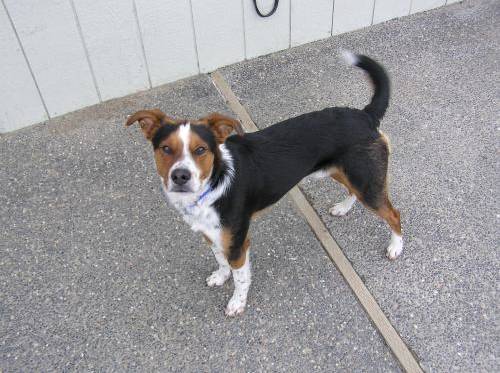
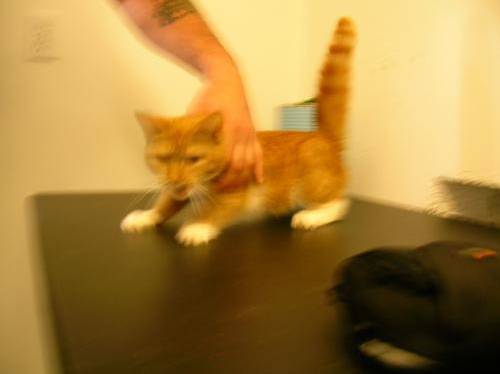
Here are some samples of data that are used in training our 2 class Convolutional Neural Network
Some interesting things about this data:
1) the images are NOT the same size (so we will have to resize them to same input size for our CNN) --we will use OpenCV in python to do this
2) the images do NOT locate the cat or dog but, mostly the cat and dog are ther main subject --but, note there are some examples of multiple animals and other figures/objects in the scene.
The Tools and why
1) Python - well we could use other languages but, for training which we will run on a computer or in the cloud not a device, Python is well supported language for training Deep Learning Networks. In fact for training I would say it is number 1 followed remotely by other languages like Java.
As part of this you will use the pip or pip3 install software that typically comes with python install on your machine.
2) Tensorflow - this is a great framework for Machine Learning (okay I am biased). There are others. What I like is that it is well supported (Google) and is often listed as #1 used and supports running on different platforms - desktop/laptop, cloud, mobile. Thats great!!!
You can ussually use the pip or pip3 install tool from python to insall Tensorflow
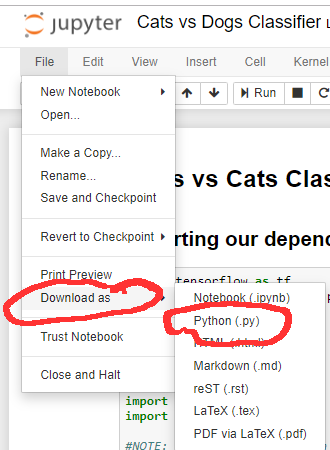
3) Jupyter notebook - okay to be honest I did not start my foray into Deep Learning using Jupyter notebooks. In fact it started after Deep Learning began. It is a web-based tool that lets you interactively develop and run code and allows for the insertion of output in the display--wait and see. It is very popular with ML folk and maybe even more so "data scientists" than computer scientists. Why? It is easy. However, I think there is a price --and that may be in performance. You are not going to run though very large data sets on a laptop with Jupyter notebook --but, you would probably run just the underlying python code in a cloud/distributed computing fashion. Guess what you can save your Jupyter notebook fie (.ipynb extension) as a python file (File ->Download and the format there is .py)
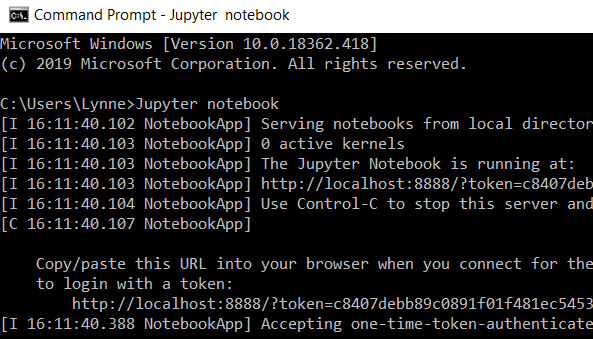
Read to understand how to install and run Jupyter notebook on your computer (e.g. to run on windows after installing: jupyter notebook)
how to save the python code
4) OpenCV -this is an open framework for computer vision that supports many languages including OpenCV for python. We are using the basic resize operation (an image processing function) that will let us resize our images to the same size. NOTE: there are different VERSIONS so pay attention to what the code is using. For us it is cv2 (notice the import cv2 at the top of the notebook/python files) --so typically you will do for desktop/laptop:
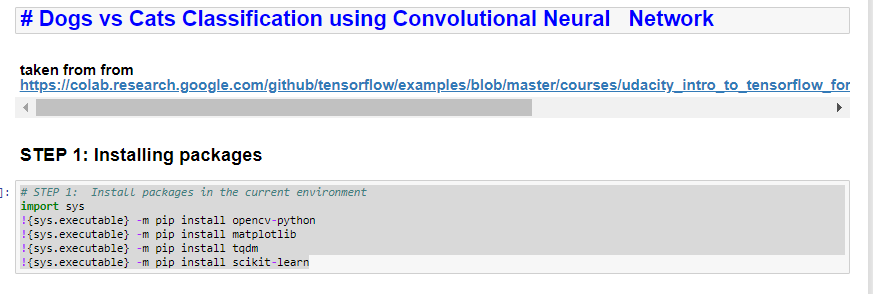
pip install opencv-python
if you need only main modulespip install opencv-contrib-python
if you need both main and contrib modules (check extra modules listing from OpenCV documentation)
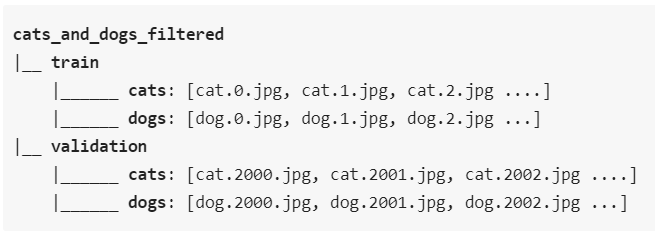
5) Data - Extract from the following zip file (which is a slightly different layout than the one you find on Kaggle site)
Jupyter Notebook Code explained-step by step
STEP 1 of code -install software if needed
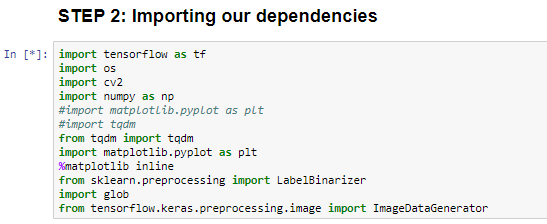
STEP 2 of code -import modules
This code contains a number of items including importing the different modules (like libraries) In this code we:import: tensorflow, matlib's plotting module, tdqm (progress bar module), numpy (popular scientific computing package), os (operating system functionality), sklearn.preprocessing (used for creating binary vector for labeling), cv2 (version of OpenCV), glob (small module for pattern matching in pathnames).
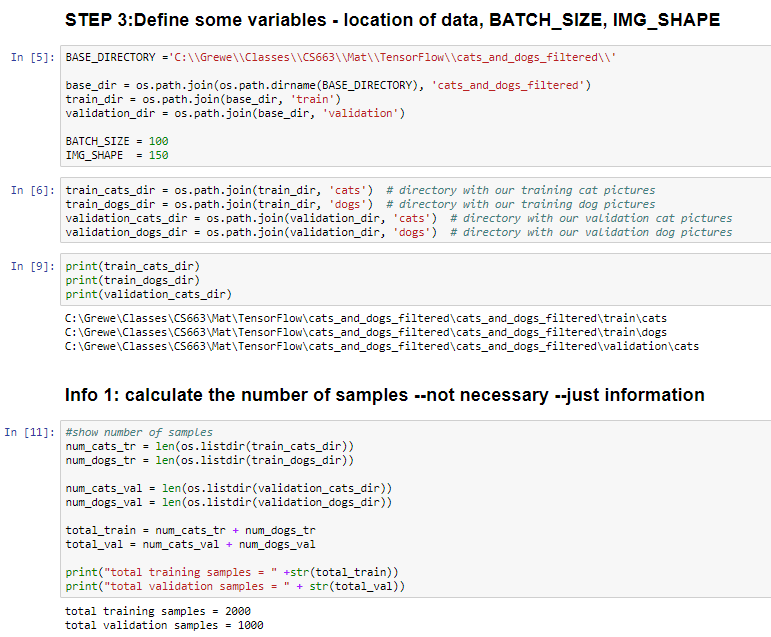
STEP 3 - setup various variables and count # of samples
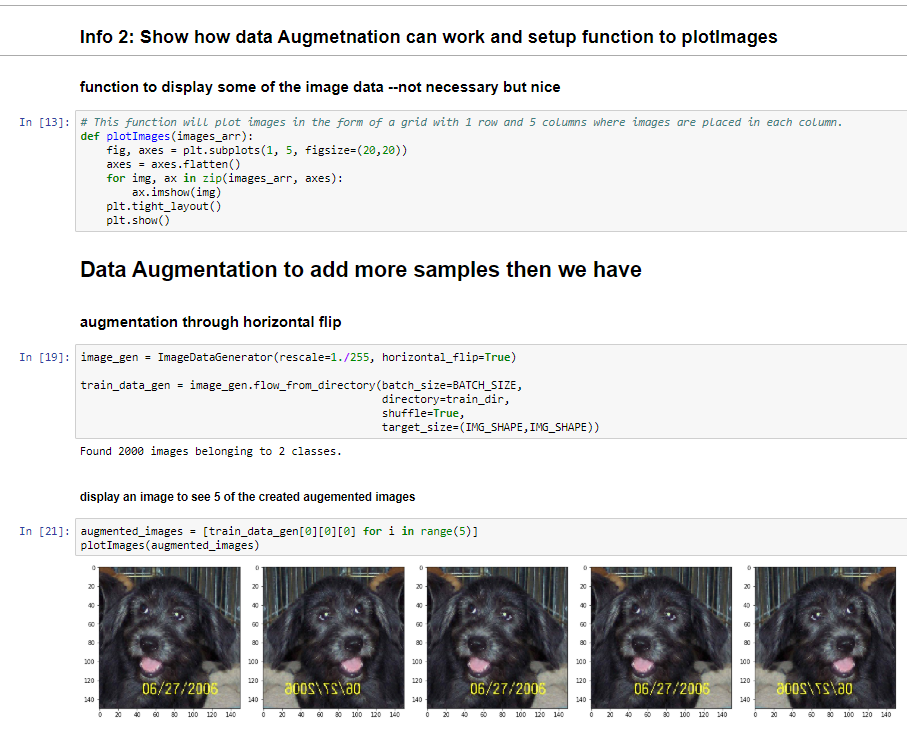
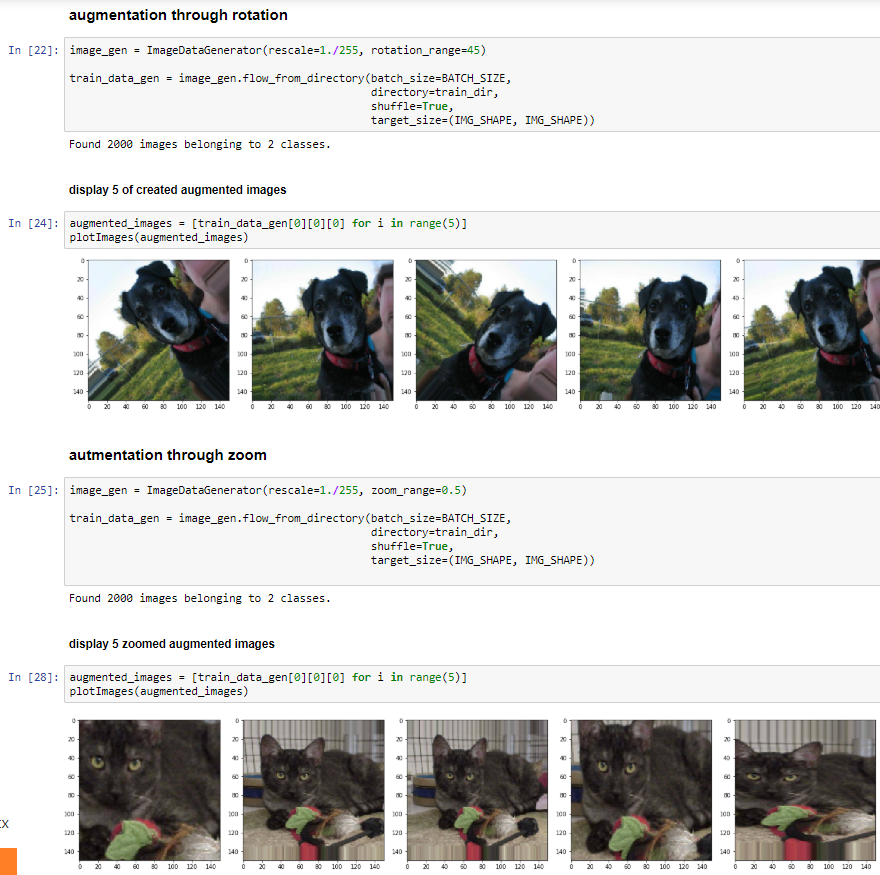
INFO step --- show how Data Augmentation works (used to generate training data from existing training data)
AND ImageDataGenerator which:
Format the images into appropriately pre-processed floating point tensors before feeding to the network:
- Read images from the disk.
- Decode contents of these images and convert it into proper grid format as per their RGB content.
- Convert them into floating point tensors.
- Rescale the tensors from values between 0 and 255 to values between 0 and 1, as neural networks prefer to deal with small input values. -- this is rescale parameter
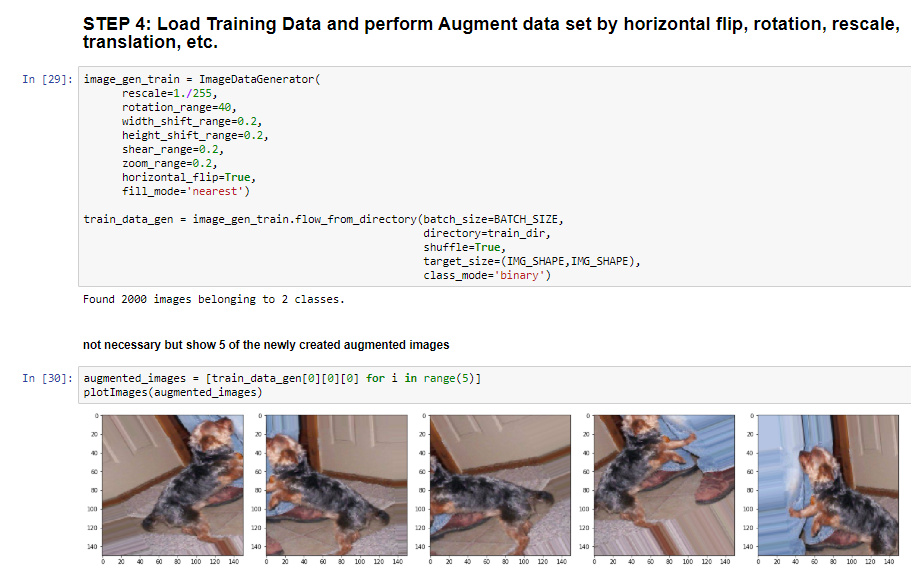
STEP 4: Loading Training Data - original and Augmented (via flip, rotation, rescale, translation..)
STEP 5: Load the Validation Data Set (you do not do augmentation on this)
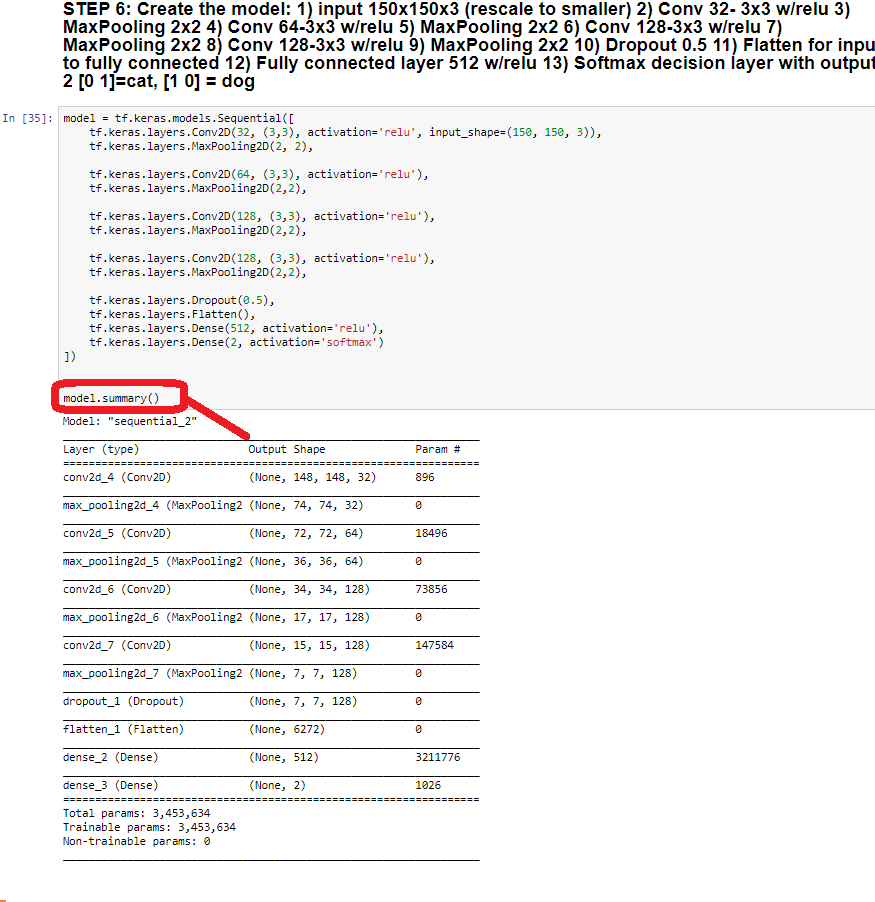
STEP 6: - Define the Model & print out summary of what the model looks like.
Our CNN has over 3 million parameters to learn!!!
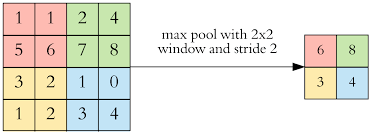
max_pool_2d(convnet, 2) = means perform max pooling on
input=convnet
kerne size = 2x2
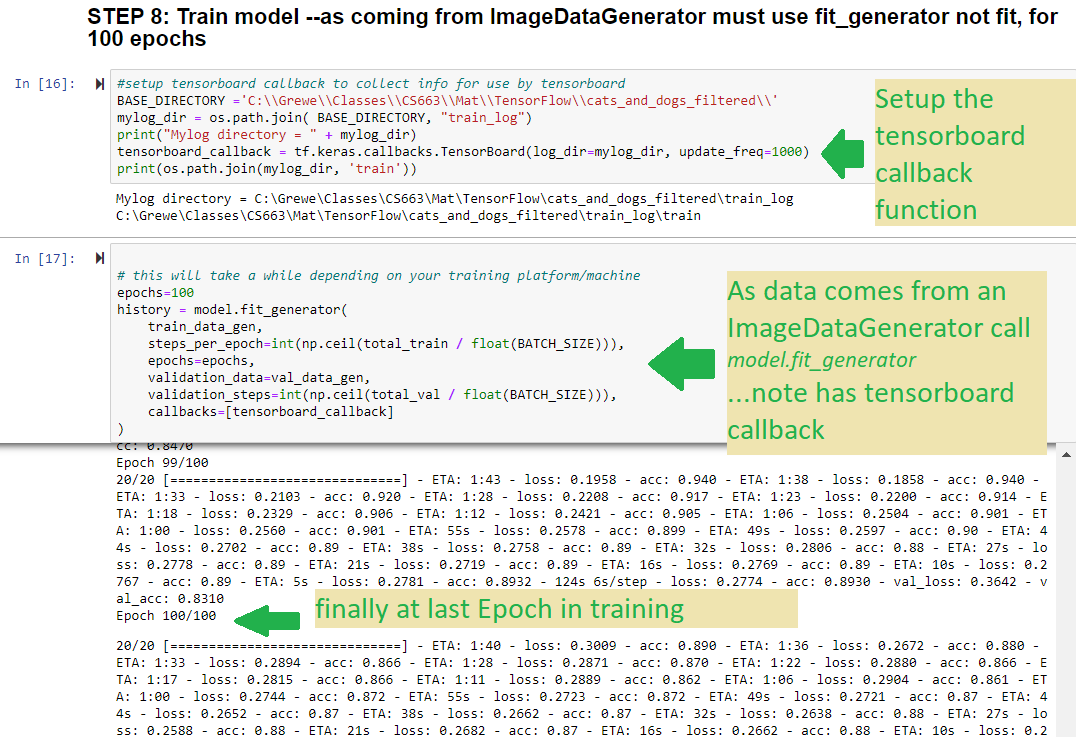
STEP 7 & 8: setup the compile parameters & call fit_generator (when doing ImageGenerator you
call fit_generator rather than the fit method to perform training)
-- specify adam optimizer and for measuring loss the sparse_categorical_crossentropy
-- measure accuracy as train-- train for 100 Epoch & specify a TensorBoard callback
EPOCH 100
Epoch 100/100
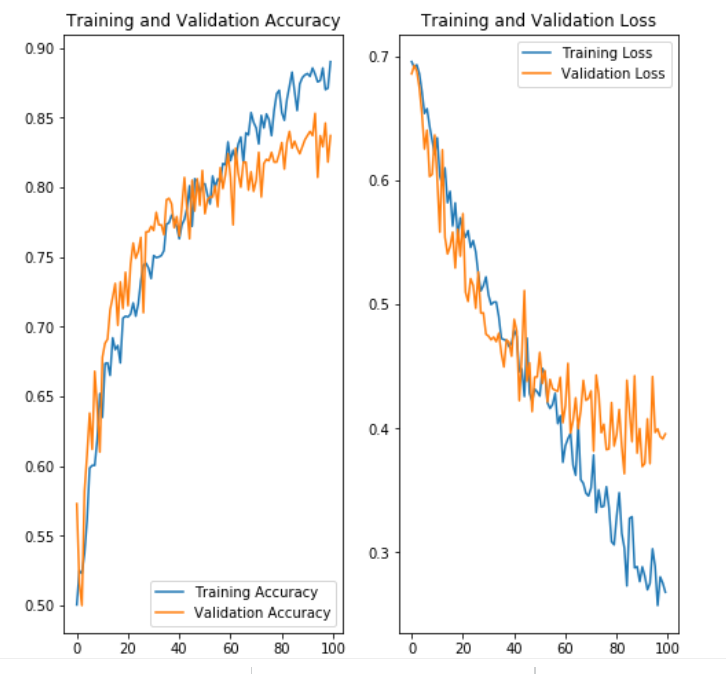
20/20 [==============================] - ETA: 1:20 - loss: 0.4220 - accuracy: 0.83 - ETA: 1:18 - loss: 0.3217 - accuracy: 0.88 - ETA: 1:13 - loss: 0.3241 - accuracy: 0.88 - ETA: 1:08 - loss: 0.3090 - accuracy: 0.87 - ETA: 1:03 - loss: 0.3095 - accuracy: 0.88 - ETA: 58s - loss: 0.2912 - accuracy: 0.8833 - ETA: 54s - loss: 0.2809 - accuracy: 0.882 - ETA: 49s - loss: 0.2830 - accuracy: 0.883 - ETA: 45s - loss: 0.2877 - accuracy: 0.881 - ETA: 40s - loss: 0.2832 - accuracy: 0.883 - ETA: 36s - loss: 0.2845 - accuracy: 0.886 - ETA: 32s - loss: 0.2758 - accuracy: 0.890 - ETA: 27s - loss: 0.2739 - accuracy: 0.890 - ETA: 23s - loss: 0.2731 - accuracy: 0.889 - ETA: 19s - loss: 0.2757 - accuracy: 0.888 - ETA: 15s - loss: 0.2743 - accuracy: 0.888 - ETA: 11s - loss: 0.2693 - accuracy: 0.889 - ETA: 7s - loss: 0.2657 - accuracy: 0.890 - ETA: 3s - loss: 0.2705 - accuracy: 0.89 - 95s 5s/step - loss: 0.2680 - accuracy: 0.8900 - val_loss: 0.3957 - val_accuracy: 0.8370
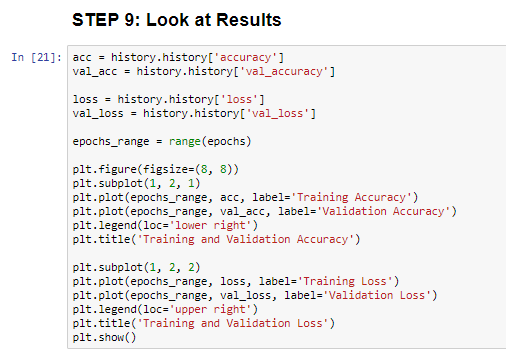
STEP 9- Visualize the results
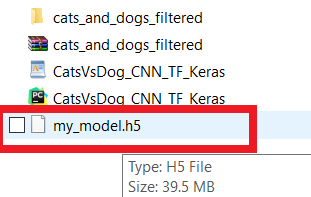
STEP 10 - read here to see how you can save your model to a File
resulting file
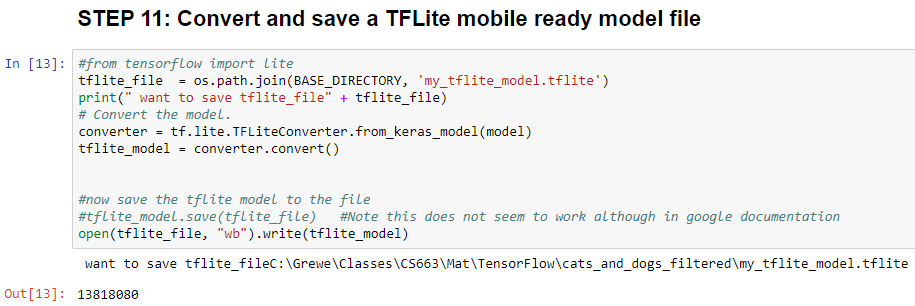
STEP 11 - read here to see how you can save to a converted TFLite file for running on mobile
SAVE AS tflite file extension
resulting file
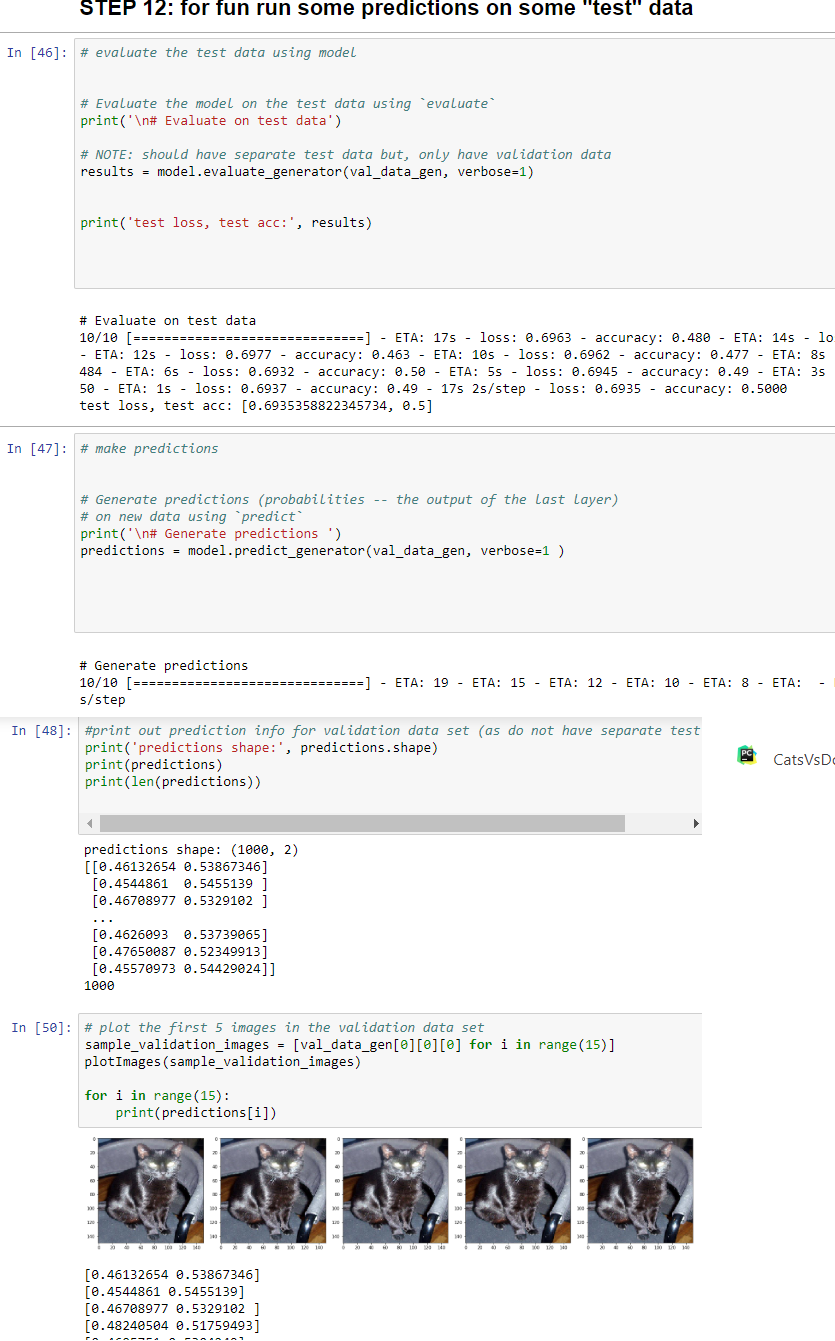
STEP 12 - make predictions/run inference from python on some testing data--NOTE: we have just the validation data--but, wanted you to see how this works on some images after model done training
SPECIAL NOTE: Typically you split data into Training, Validation and Testing ---if you want pull out half the validation data and put in a different directory for use as testing data
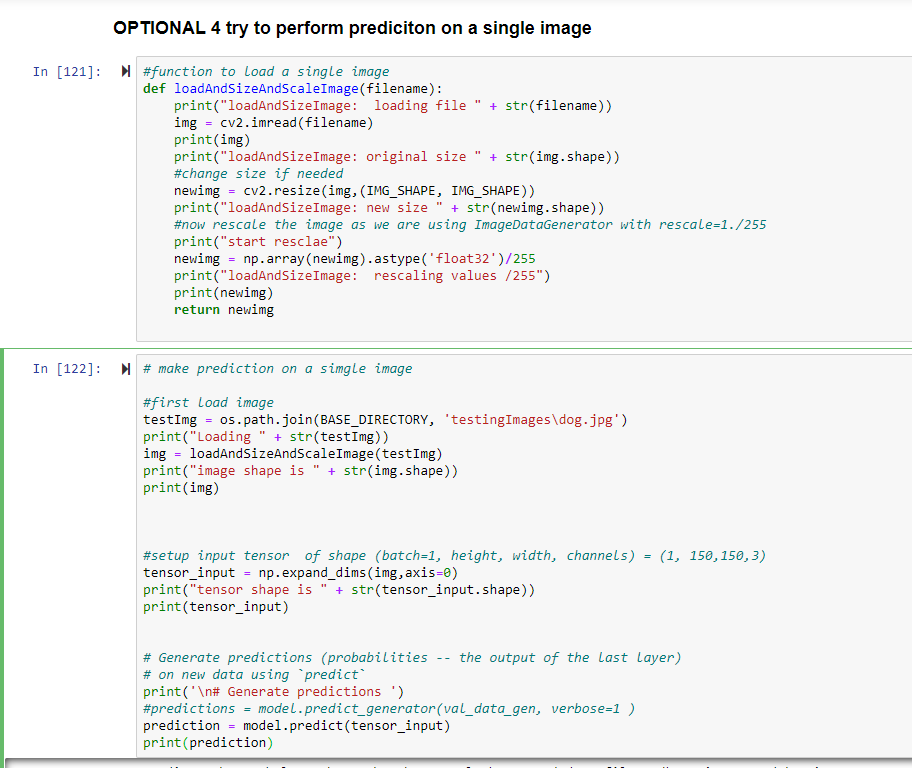
OPTIONAL - make prediction on a SINGLE Image and preparing it --creating a tensor of correct shape for input into our CNN
-
-FIRST: we have a function loadAndSizeAndScaleImage that takes as input the filename of an image. It loads the image with cv2.imread
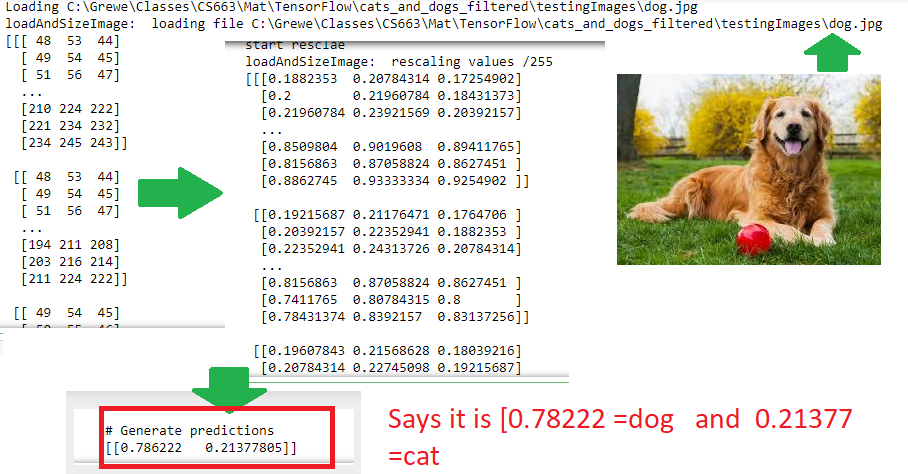
and then it resizes the image to the IMG_SHAPExIMG_SHAPE (150x150) that our CNN requires. This is loaded into a np array and then we rescale by 255 and this is necessary as you see above when we created our ImageDataGenerator in step8 we did this rescaling on the training images. Look at the output below to understand.
-SECOND: after loading the function with the processing described above, we create a
tensor = (number_samples, 150, 150, 3)
where number_samples = 1 for our single image
150x150 is the height xwidth of our input
3 indicates there are 3 channels - 1 for red, 1 for green and 1 for blue at each pixel in the image.
This tensor is what is expected as input into the prediction call (mode.predict)
INPUT Dog image
OUTPUT of this is
OPTIONAL - save model to a SavedModel directory--you use this to deploy to cloud --pay attention to create model using Tensorflow version that you will host in the cloud (cloud may not support latest Tensorflow)for TensorFlow 2.*
#TENSORFLOW 2.* VERSION (see next block for 1.14 atlernative)
#Save the entire model as a SavedModel.
#create directory to save the SavedModel
#setup directories
saved_model_dir1 = os.path.join(BASE_DIRECTORY, 'saved_model')
print(" path exists=" + str(os.path.exists(saved_model_dir1)))
if(os.path.exists(saved_model_dir1) == False):
print(" creating" + str(saved_model_dir1))
os.mkdir(saved_model_dir1)
saved_model_dir = os.path.join(BASE_DIRECTORY, 'saved_model\catsdogsCNN')
if(os.path.exists(saved_model_dir) == False):
print(" creating" + str(saved_model_dir))
os.mkdir(saved_model_dir)
model.save(saved_model_dir)
for TensorFlow 1.1.4
#TENSORFLOW 1.14 this seems to work for tensorflow 1.14
print(saved_model_dir1)
tf.keras.experimental.export_saved_model(model, saved_model_dir1)
OUTPUT for above
OPTIONAL - loading model SavedModel directory--
print("Loading model from saved model at: " + str(saved_model_dir))
new_modelw = tf.keras.models.load_model(saved_model_dir)
# Check its architecture
new_modelw.summary()
OPTIONAL - launching TensorBoard from Jupyter notebook (I usually do from command line)ASSUMES: that you have installed TensorBoard in your environment AND when you trained you have specified a TensorBoard callback to save necessary files
%load_ext tensorboard
print(mylog_dir)
%tensorboard --logdir=mylog_dir --host=local


