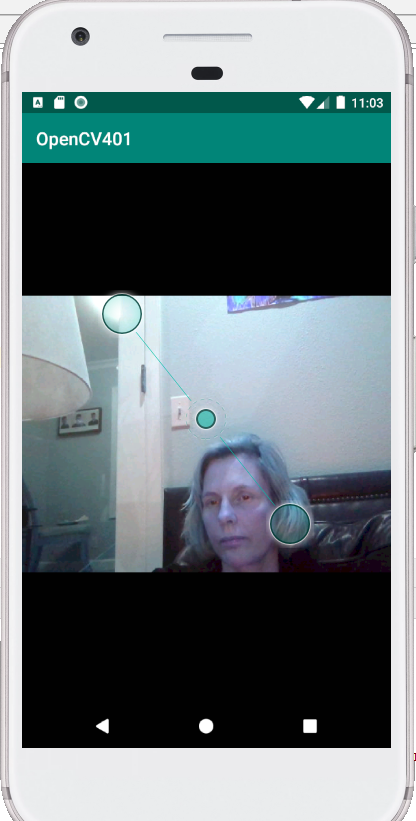
How to add OpenCV module and dependency for Android Project AND
create basic OpenCV application (capture and displays image)
**** WORKS for version 4.0.1 but, seems there is a problem with 4.1.1 ********
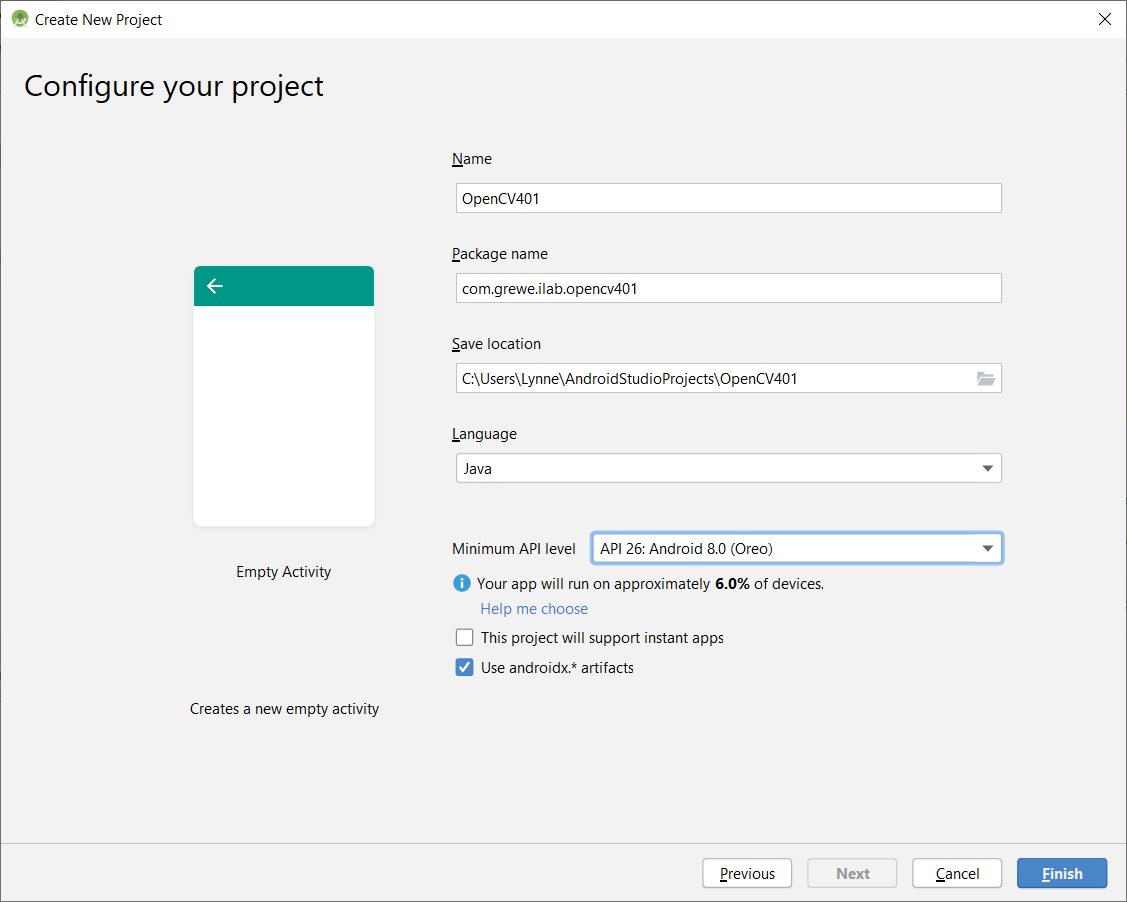
STEP 0) create project or open existing project(see example on previous page)
File-> New Project
STEP 1) Download the current OpenCV for ANDROID version you wish.
-
remember where you stored it on your local machine
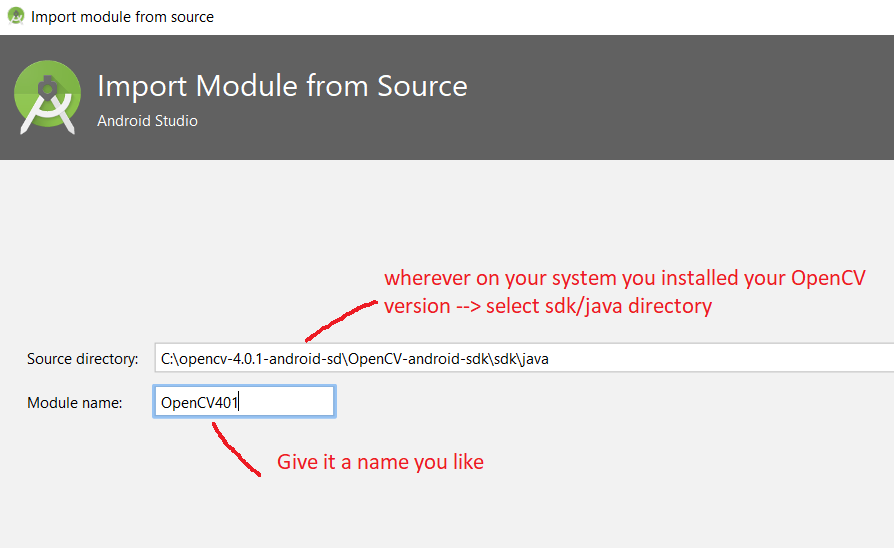
STEP 2) File->New -> Import Module
(SELECT the directory sdk/java under the directory you downloaded OpenCV for Android from)
STEP 3) MODIFY the gradel build file for this module ....see changes in BLUE... to set compile and min and target sdk's to
be the same as the app's build gradel file (don't change them to MY values below but to the values in YOUR projects gradel file for the
app
. AND to change the res directory to a local one in module
apply plugin: 'com.android.library'

android {
    compileSdkVersion 28
    //buildToolsVersion "x.y.z" // not needed since com.android.tools.build:gradle:3.0.0

    defaultConfig {
        minSdkVersion 24
        targetSdkVersion 28
    }

    buildTypes {
        release {
            minifyEnabled false
            proguardFiles getDefaultProguardFile('proguard-android.txt'), 'proguard-rules.txt'
        }
    }
    compileOptions {
        sourceCompatibility JavaVersion.VERSION_1_6
        targetCompatibility JavaVersion.VERSION_1_6
    }

    sourceSets {
        main {
            jniLibs.srcDirs = ['../../jni']
            java.srcDirs = ['src']  // TODO Use original files instead of copied into build directory
            aidl.srcDirs = ['src']
            res.srcDirs = ['res']
            manifest.srcFile 'AndroidManifest.xml'
        }
    }
}

dependencies {
}
Sync or do a Project->Clean...try to compile to make sure no errors.
STEP 4) Now add the library to the project as a dependency
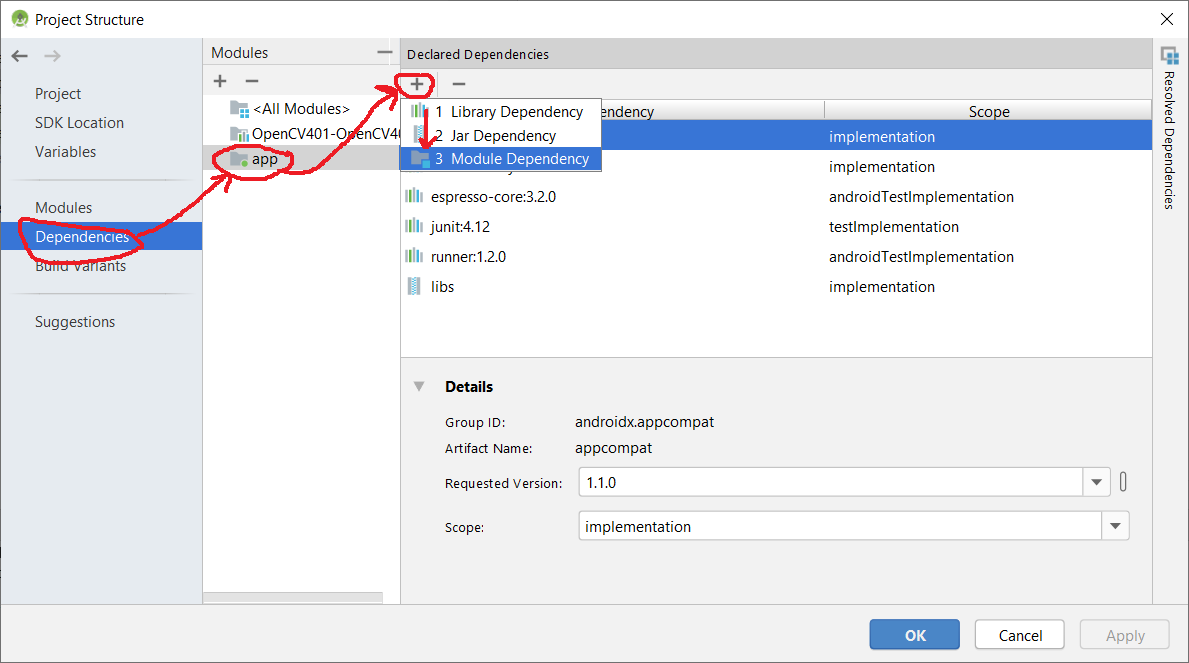
File->Project Structure
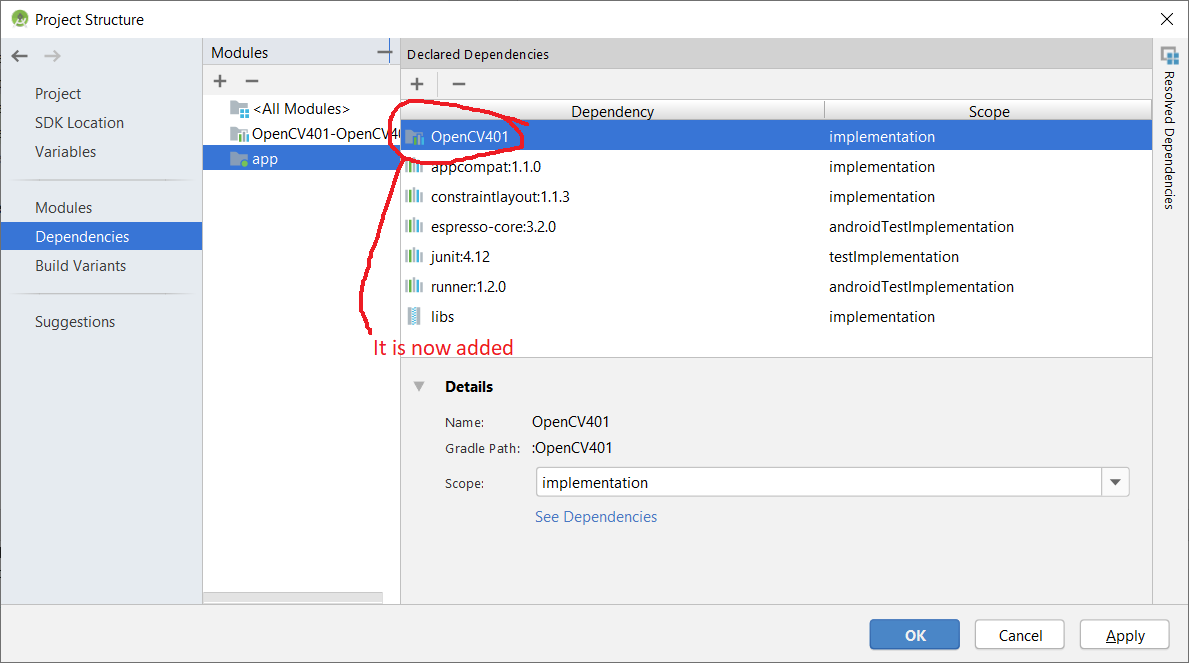
In Module section on left select "app" and go to dependencies tab, then hit + button to add MOdule Dependency
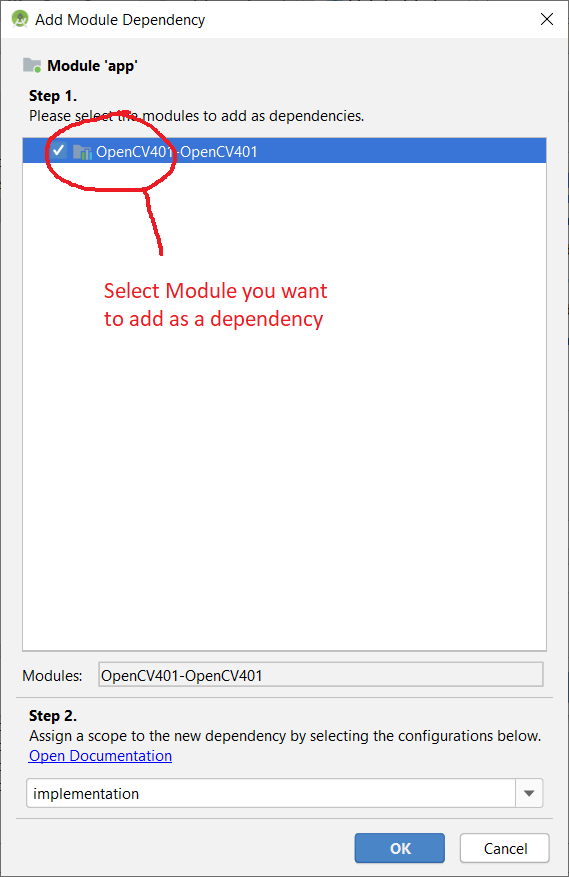
Now select the OpenCV Module
Here is the result -showing the added dependency of openCV
STEP 5) Add Native Libraries to your Project
Some files within OpenCV are native. This means they aren’t written in Java but C++. These files are available within the libs folder.
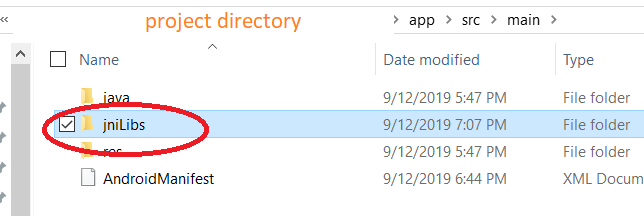
Copy the libs folder in the native folder over to your project app module main folder (Usually ProjectName/app/src/main).
Rename the libs folder you just copied into your project to jniLibs.
In android file view mode
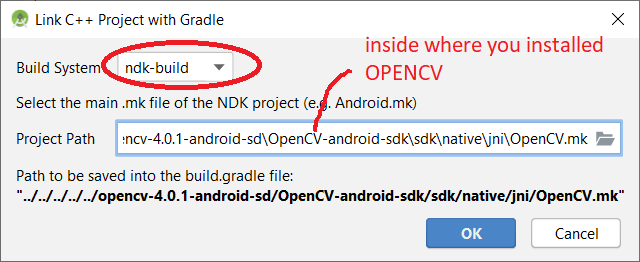
Right Click on app-> “Link c++ project with gradle”

Now specify a ndk-build AND th make file that is shown below and located inside where you installed the OpenCV software on your system.
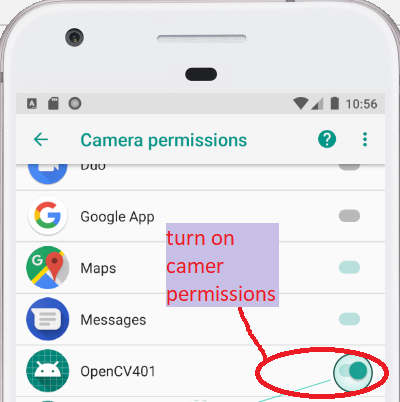
STEP 6) Update your Manifest File to have permissions to use camera
Add the following permission to use camera and using feature tags
<uses-permission android:name="android.permission.CAMERA"/>
<uses-feature android:name="android.hardware.camera" android:required="false"/>
<uses-feature android:name="android.hardware.camera.autofocus" android:required="false"/>
<uses-feature android:name="android.hardware.camera.front" android:required="false"/>
<uses-feature android:name="android.hardware.camera.front.autofocus" android:required="false"/>

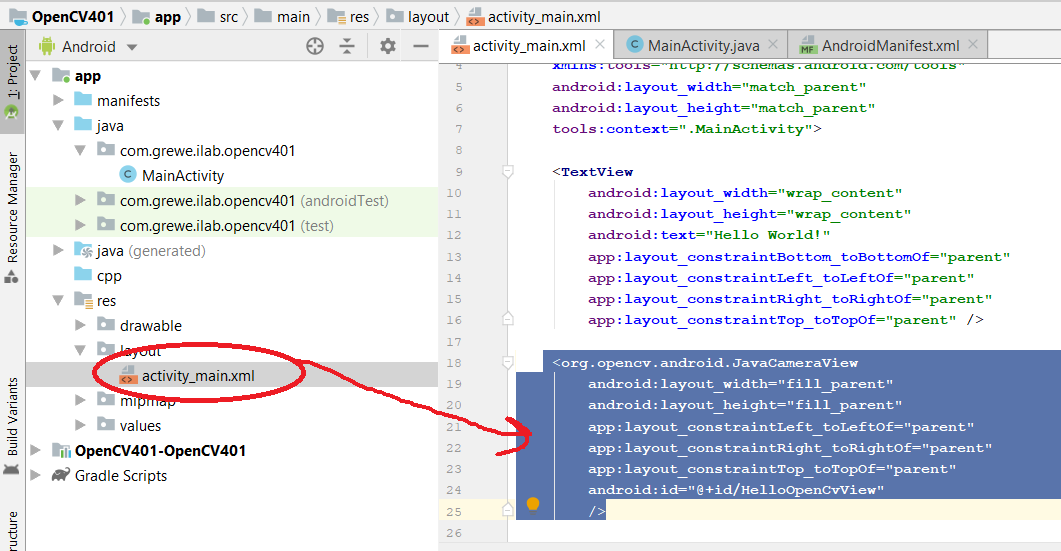
STEP 7) Modify the XML layout file to contain a JavaCameraView widget to display the image being captured
(and later you can add code to process it too) by OpenCV framework
<org.opencv.android.JavaCameraView
    android:layout_width="fill_parent"
    android:layout_height="fill_parent"
    app:layout_constraintLeft_toLeftOf="parent"
    app:layout_constraintRight_toRightOf="parent"
    app:layout_constraintTop_toTopOf="parent"
    android:id="@+id/HelloOpenCvView"
    />
STEP 8) Use the following beginning Activity code instead of the default beginning Main Activity project code
(or modify your existing Activity to add the code
in the methods shown below to what you already have).
NOTE: this code is if you are using OpenCV for image capture. If you are using Java api for image capture the code will be different and you will integrate your
OpenCV code in an Activity that does Java api based image capture(see class website or search web for sample for java based image capture Activites)
>>the code in blue below signifies the OpenCV code for loading the OpenCV module and the comments in Green indicate what you would do in a Java api based image capture activity
package com.grewe.ilab.opencv401;    //THIS will change and be YOUR package name
import androidx.appcompat.app.AppCompatActivity;

import android.os.Bundle;

import androidx.appcompat.app.AppCompatActivity;
import android.os.Bundle;
import android.util.Log;
import android.view.SurfaceView;
import android.view.WindowManager;
import android.widget.Toast;

import org.opencv.android.OpenCVLoader;
import org.opencv.android.CameraBridgeViewBase;
import org.opencv.core.Mat;
import org.opencv.android.CameraBridgeViewBase.CvCameraViewListener2;

public class MainActivity extends AppCompatActivity implements CvCameraViewListener2 {

    // will point to our View widget for our image
    private CameraBridgeViewBase mOpenCvCameraView;
    private static final String TAG = "OCVSample::Activity";

    @Override
    protected void onCreate(Bundle savedInstanceState) {
        Log.i(TAG, "called onCreate");
        super.onCreate(savedInstanceState);

        //Load in the OpenCV dependency module code from the jni files you linked in this project
        // inside the OpenCV module
        if (!OpenCVLoader.initDebug()) {
            Toast.makeText(MainActivity.this, "Unable to load OpenCV", Toast.LENGTH_LONG).show();
        }
        getWindow().addFlags(WindowManager.LayoutParams.FLAG_KEEP_SCREEN_ON);
        setContentView(R.layout.activity_main);

        // grab a "handle" to the OpenCV class responsible for viewing Image
        // look at the XML the id of our CameraBridgeViewBase is HelloOpenCVView
        mOpenCvCameraView = (CameraBridgeViewBase) findViewById(R.id.HelloOpenCvView);
        //set it visible, register the listener and enbale the view so connected to camera
        mOpenCvCameraView.setVisibility(SurfaceView.VISIBLE);
        mOpenCvCameraView.setCvCameraViewListener(this); // the activity will listen to events on Camera -call onCameraFrame
        mOpenCvCameraView.enableView();
    }

    // disable JavaCameraView if app going on pause
    @Override
    public void onPause() {
        super.onPause();
        if (mOpenCvCameraView != null)
            mOpenCvCameraView.disableView();
    }

    //enable the JavaCameraView if app resuming
    @Override
    public void onResume() {
        super.onResume();
        if (mOpenCvCameraView != null)
            mOpenCvCameraView.enableView();
    }


    //Disable view of JavaCameraView if app is being destoryed
    @Override
    public void onDestroy() {
        super.onDestroy();
        if (mOpenCvCameraView != null)
            mOpenCvCameraView.disableView();
    }


    //method invoked when camera view is started
    public void onCameraViewStarted(int width, int height) {

    }


    //method invoked when camera view is stoped
    public void onCameraViewStopped() {

    }

    // THIS IS THE main method that is called each time you get a new Frame/Image
    // Implement to be a CVCameraViewListener2
    public Mat onCameraFrame(CameraBridgeViewBase.CvCameraViewFrame inputFrame) {

        //store in the imageMat (instance of OpenCV's Mat class, a 2D matrix) the RGB(A=alpha) image
        Mat imageMat = inputFrame.rgba();

       /* note in an Java API based capture Activity you will have a method that is invoked when a
          new frame is digitized and you will need to convert the image frame datastructure  object
          from Java api to an OpenCV Mat object instance so it can be processed with OpenCV calls
          Typically this means converting a Bitmap to an OpenCV Mat.
             Mat  openCVMatImage =  new Mat (bmp.getWidth(), bmp.getHeight(), CvType.CV_8UC1);
             Utils.bitmapToMat(bmp, openCVMatImage);
          Then you can process it like  the following line that converts an rgb image to greyscale
           in this call I am storing the results in the same Mat object
              mgproc.cvtColor(openCVMatImage,openCVMatImage, Imgproc.COLOR_RGB2GRAY);
       */


        //Process Image as desired --note the following is commented out but gives you an idea
        // now you use the Mat class to represent the Image and you can use method calls
        // like imageMat
        // make calls like to get a pixel at i,j imageMat.get
        // double pixel[] = new double[3];
        // pixel = imageMat.get(20,10); this wil retrieve pixel and column = 20, row =10
        // similarly can set a pixel in Mat via imageMat.set(i,j,pixel);
        // read API on Mat class for OPenCV
        // A VERY USEFUL class to call image processing routines is ImagProc
        // This code in comments shows how to do the Sobel Edge Detection on our image in imageMat
        /*
            Mat gray = inputFrame.gray();
            Mat mIntermediateMat = new Mat();
            Imgproc.Sobel(gray, mIntermediateMat, CvType.CV_8U, 1, 1);
            Core.convertScaleAbs(mIntermediateMat, mIntermediateMat, 10, 0);
            Imgproc.cvtColor(mIntermediateMat, imageMat, Imgproc.COLOR_GRAY2BGRA, 4);
        */


        //Return the Mat you want to be displayed in the JavaCameraView widget which invoked this method
        return imageMat;
    }

}
