Heroku --MongoDB on mLab.com
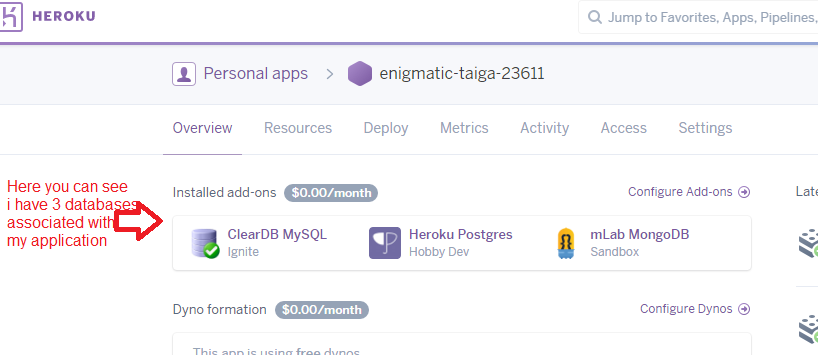
Heroku addons 
- Add any add-on to the app, even if the add-on is free. The only exceptions to this are the free plans for the Heroku Postgres and Heroku Connect add-ons, which can be added without verification.
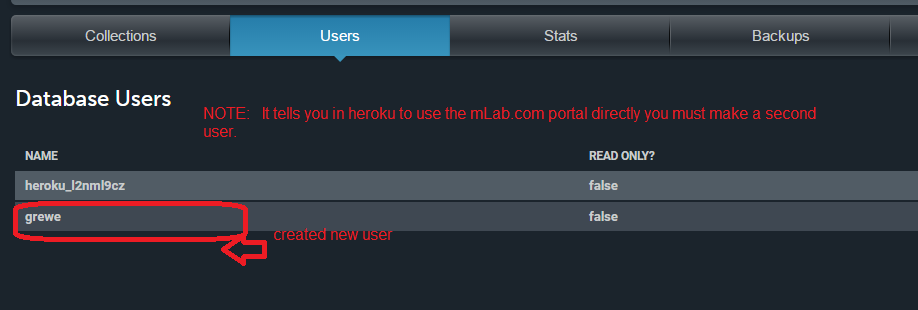
- Log in to the management portal via Heroku (steps above)
- Click “Account” in the upper right-hand corner to open the Account Settings page
- If the “Users” tab is not already highlighted, click it to show the list of Account Users
- Click the “Add account user” button
- Fill in the new account user’s information (a unique username, email, and password)
- Click the “Add” button to add the new user
-
the above url will need to be YOUR mongo database url created when you did addon.% mongo ds012345.mlab.com:56789/dbname -u dbuser -p dbpasswordWARNING: your local mongodb version must be the same as the mLab server or you will get the following error
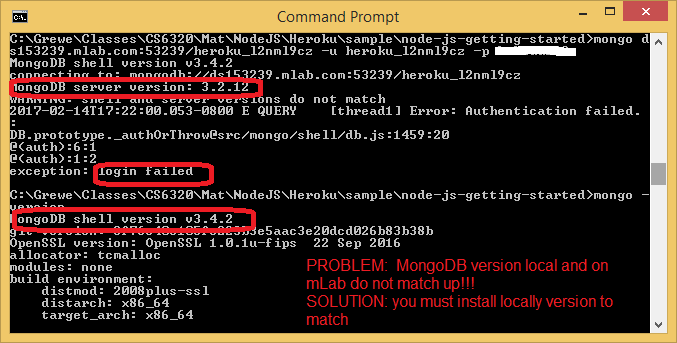
NOW CONNECTED SUCCESSFULLY

-
for example I have a collection called Routes so to add something it would be> db.mynewcollection.insert({ "foo" : "bar" }) -
db.Routes.insert({ name:"ToCSUEB", BIKER_ID:"123", frequency:0, START_Longitude: 37.660791, START_Latitude:-122.064356, END_Longitude:37.657903,END_Latitude:-122.056589 })
-
for example for my Routes collection I type
> db.mynewcollection.find() { "_id" : ObjectId("526705b4a3559a176784b4af"), "foo" : "bar" }
db.Routes.find() and the results are 
STEP 1: Setting up your application to use MongoDBNOTE: at this time you must put credit card on account (even if using the free tier ignite level of MySQL) -- this is called verification see https://devcenter.heroku.com/articles/account-verification.... THESE POLICIES ARE SET BY HEROKU AND CAN CHANGE AT ANY TIME
|
Accessing the management portal via mlab.comTo access the mLab management portal directly through mlab.com, you will need to create a new account user. Add a new account user: If you’d like to use the mLab Account User that was automatically created when your mLab add-on was created (should look like “heroku_xxxxxxxx”) you can use our Reset Password form to set a new password. |
STEP 3: Create "TABLE = Collection"
Follow mLab's quick start guide on how to setup your MongoDB instance --read here (quick start or similar)
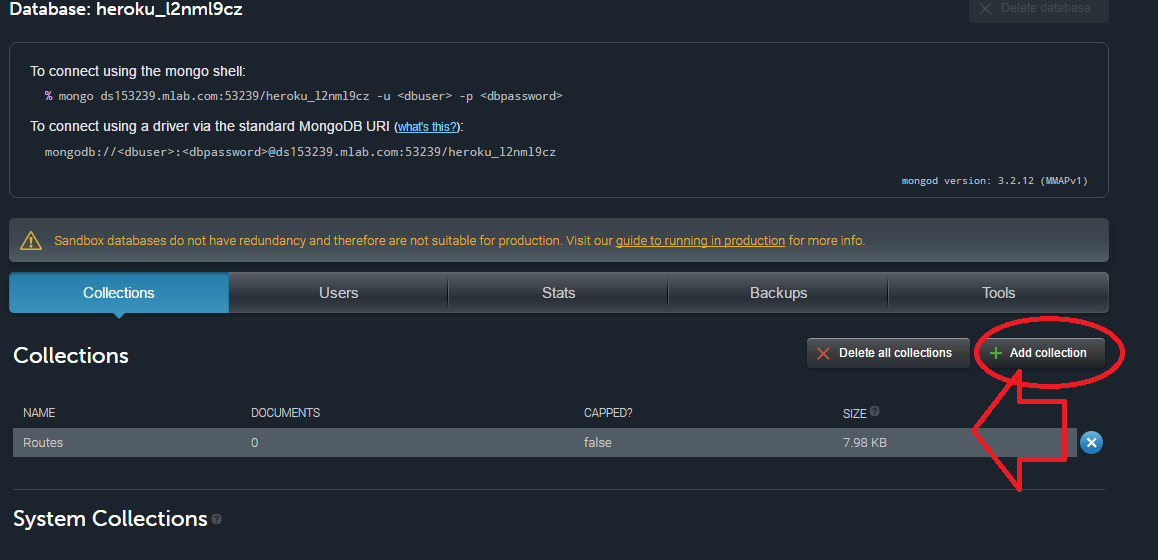
here you can see I have added a collection (think database table)
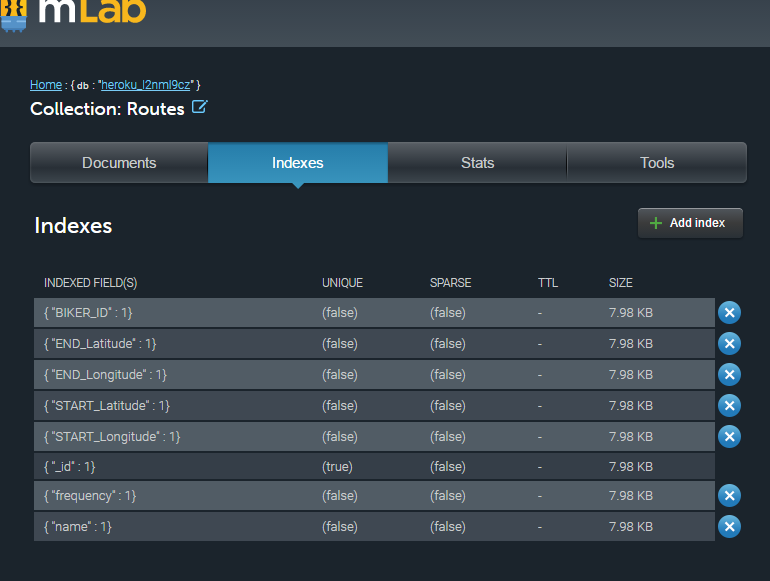
Now click on the collection (mine is called Routes) and added indices representing the Route of: _id(default for every collection), name, START_longitude, START_latitude, STOP_longitude, STOP_latitude, frequency, BIKER_ID
STEP 4: adding data to mLab MongoDB collection
option 1: do manually --must have mongodb installed locally
Load some data
Here’s a quick exercise that tests an insertion into your new database
1) In a terminal window, connect to your database using the mongo shell (the command will look similar to the following example):2) Assuming you successfully connected using the mongo shell in the previous step, run the following command:

3) Next, run the command in the first line below and confirm that the shell output matches the second line (your “_id” value will be different):
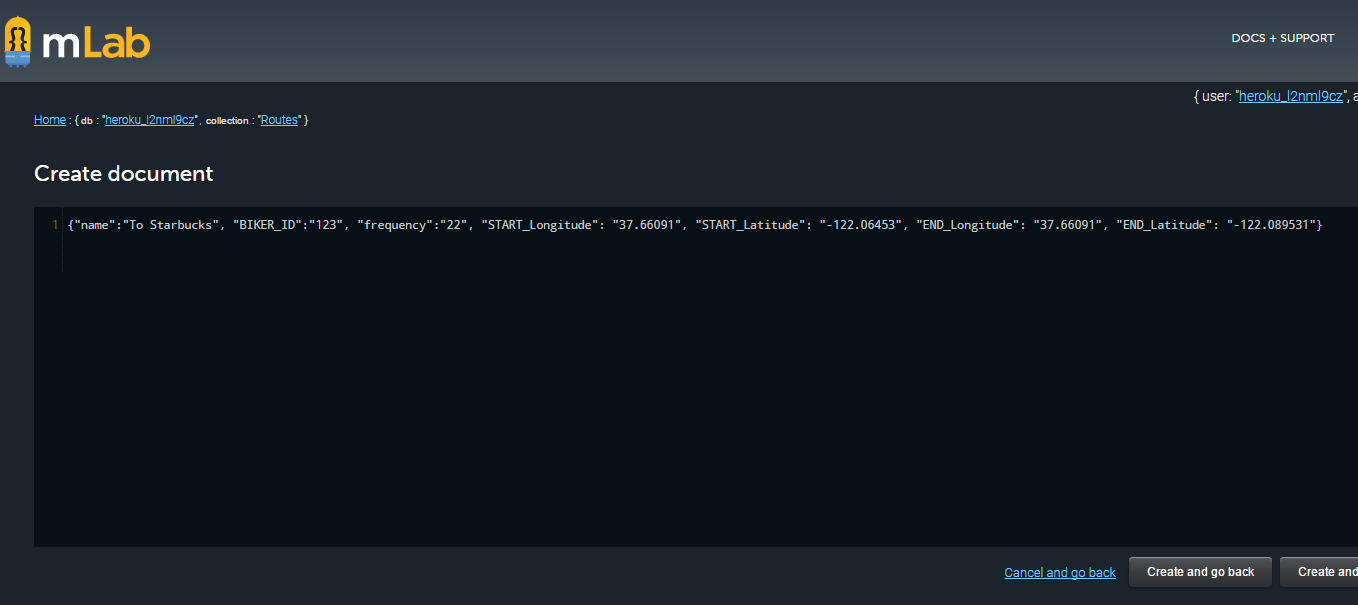
option 2: use mLab console to enter in JSON formatted documents (entries) one at a time
option 3: import from various formats JSON, CSV, etc.must have mongodb installed locally
Import / Export Helper
mongoimport and mongoexport utilities. These allow you to import and export JSON and CSV representations of your data. The other way is with mongorestore and mongodump utilities which deal with binary dumps. In this tab we provide pre-filled strings for the commands that we find most useful. Copy and paste from below to import or export from this database. For a full list of options that can be used with these commands, please see MongoDB's documentation on this subject. Binary
Import collection
mongorestore -h ds153239.mlab.com:53239 -d heroku_l2nml9cz -c Routes -u <user> -p <password> Routes.bsonExport collection
mongodump -h ds153239.mlab.com:53239 -d heroku_l2nml9cz -c Routes -u <user> -p <password> -o <output directory>JSON
Import collection
mongoimport -h ds153239.mlab.com:53239 -d heroku_l2nml9cz -c Routes -u <user> -p <password> --file <input file>Export collection
mongoexport -h ds153239.mlab.com:53239 -d heroku_l2nml9cz -c Routes -u <user> -p <password> -o Routes.jsonCSV
Import collection
mongoimport -h ds153239.mlab.com:53239 -d heroku_l2nml9cz -c Routes -u <user> -p <password> --file <input .csv file> --type csv --headerlineExport collection
mongoexport -h ds153239.mlab.com:53239 -d heroku_l2nml9cz -c Routes -u <user> -p <password> -o Routes.csv --csv -f <comma-separated list of field names>STEP 5: modifying your code to connect from NodeJS to retrieve or insert new data
STEP 5.1: Get MongoDB NodeJS Driver here: https://docs.mongodb.com/v3.0/applications/drivers/
we install the mongodb driver and it's dependencies by executing the following `NPM` command from inside your application directory
npm install mongodb --save
This will download the MongoDB driver and add a dependency entry in your `package.json` file.

STEP 5.2: You will use the MONGODB_URI configuration variable that was setup in STEP 1
 heroku config:get MONGODB_URI
  MONGODB_URI => mongodb://heroku_12345678:random_password@ds029017.mLab.com:29017/heroku_12345678
STEP 5.3: Alter the code in index.js to add the URI /mongodb that reads from the Routes collection made in STEP 2,3 above to get all of the Routes with frequency >=1
AND create a mongodb.ejs file to display the info retrieved
//**************************************************************************
//***** mongodb get all of the Routes in Routes collection where frequence>=1
//      and sort by the name of the route.  Render information in the views/pages/mongodb.ejs
app.get('/mongodb', function (request, response) {

     mongodb.MongoClient.connect(process.env.MONGODB_URI, function(err, db) {
         if(err) throw err;
          //get collection of routes
          var Routes = db.collection('Routes');
          //get all Routes with frequency >=1
          Routes.find({ frequency : { $gte: 0 } }).sort({ name: 1 }).toArray(function (err, docs) {
              if(err) throw err;

              response.render('pages/mongodb', {results: docs});

          });

           //close connection when your app is terminating.
            db.close(function (err) {
                     if(err) throw err;
             });
});//end of connect });//end app.get
|
the views/pages/mongodb.ejs file
<!DOCTYPE html>
<html>
<head>
</head>
<body> <div class="container"> <h2>Database Results getting Routes frequency >=1</h2> <ul>
<% results.forEach(function(r) { %>
<li><%= r.name %> - <%= r.frequency %>
</div> </body> </html> |
STEP 5.4: Run it at the URL /mongodb


