Heroku --MongoDB on mLab.com
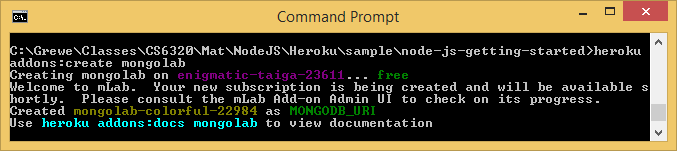
Heroku addons 
- Add any add-on to the app, even if the add-on is free. The only exceptions to this are the free plans for the Heroku Postgres and Heroku Connect add-ons, which can be added without verification.
- Log in to the management portal via Heroku (steps above)
- Click “Account” in the upper right-hand corner to open the Account Settings page
- If the “Users” tab is not already highlighted, click it to show the list of Account Users
- Click the “Add account user” button
- Fill in the new account user’s information (a unique username, email, and password)
- Click the “Add” button to add the new user

-
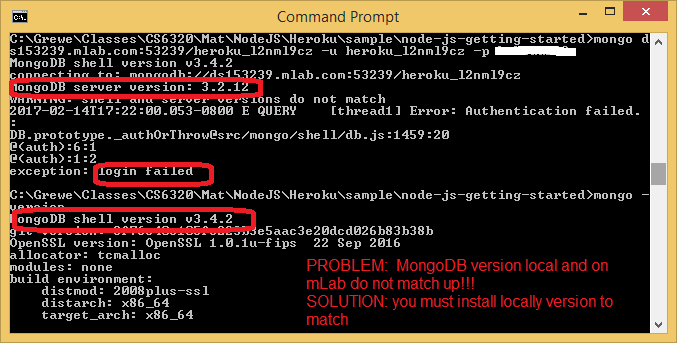
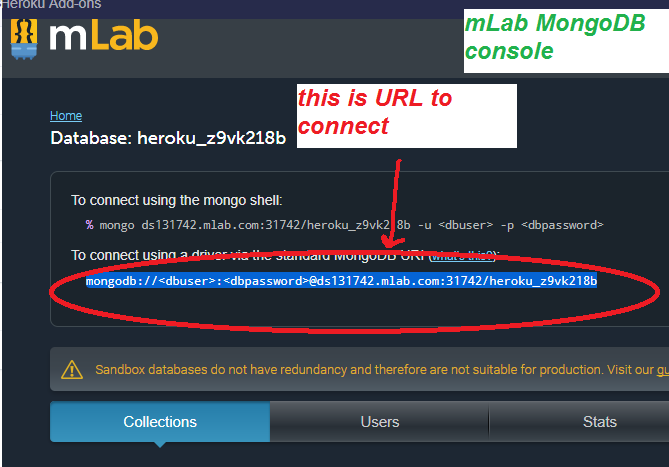
the above url will need to be YOUR mongo database url created when you did addon.% mongo ds012345.mlab.com:56789/dbname -u dbuser -p dbpasswordWARNING: your local mongodb version must be the same as the mLab server or you will get the following error
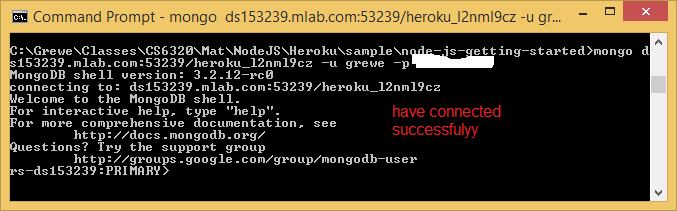
NOW CONNECTED SUCCESSFULLY
-
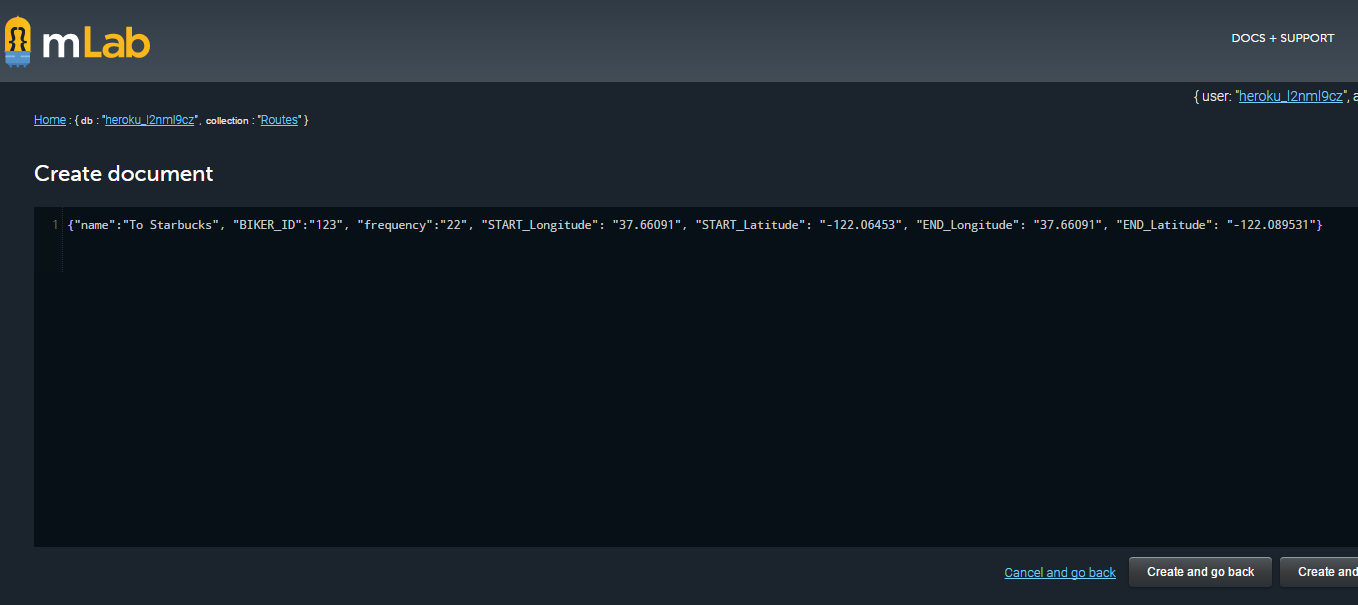
for example I have a collection called Routes so to add something it would be> db.mynewcollection.insert({ "foo" : "bar" }) -
db.Routes.insert({ name:"ToCSUEB", BIKER_ID:"123", frequency:0, START_Longitude: 37.660791, START_Latitude:-122.064356, END_Longitude:37.657903,END_Latitude:-122.056589 })
-
for example for my Routes collection I type
> db.mynewcollection.find() { "_id" : ObjectId("526705b4a3559a176784b4af"), "foo" : "bar" }
db.Routes.find() and the results are 
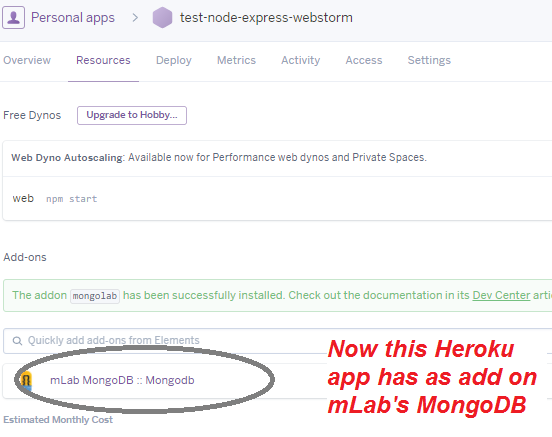
STEP 1: Setting up your application to use MongoDB
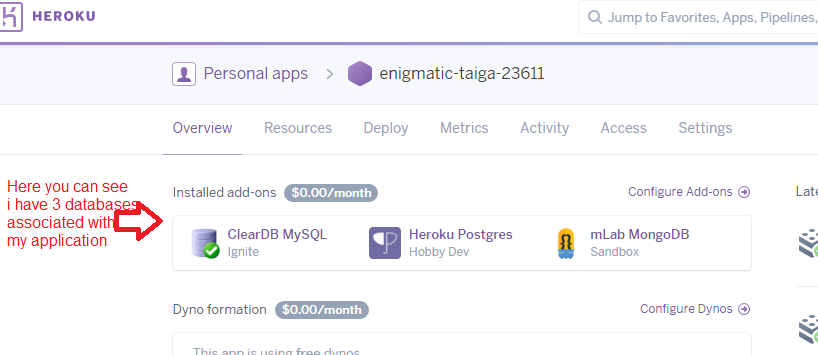
STEP 2: Using mLab console create new user --You can click on the database for MongoDB and use the portal inside Heroku that looks like
STEP 3: Create "TABLE = Collection"
STEP 4: adding data to mLab MongoDB collection
STEP 5: modifying your code to connect from NodeJS to retrieve or insert new data
|


STEP 5.2: Alter the code in index.js to add the URI /mongodb that reads from the Routes collection made in STEP 2,3 above to get all of the Routes
AND create a mongodb.ejs file to display the info retrieved
the routes/index.js file add the following
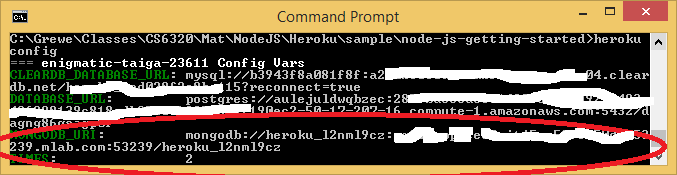
AND you must alter the MongoDBURI value to fit your database
var express = require('express');
var XXX = express.Router();
var mongoDBURI = process.env.MONGODB_URI || 'mongodb://your_user_id:your_password@YOURHost.mlab.com:YOURPORT/YOUR_DB_NAME';
//************************************************************************** //***** mongodb get all of the Routes in Routes collection where frequence>=1 // and sort by the name of the route. Render information in the views/pages/mongodb.ejs XXX.get('/mongodb', function (request, response) { mongodb.MongoClient.connect(mongoDBURI, function(err, db) { if(err) throw err;//get collection of routes var Routes = db.collection('Routes');//get all Routes Routes.find({ }).sort({ name: 1 }).toArray(function (err, docs) {if(err) throw err; response.render('pages/mongodb', {results: docs}); }); //close connection when your app is terminating. db.close(function (err) { if(err) throw err; });});//end of connect});//end XXX.getthe views/pages/mongodb.ejs file
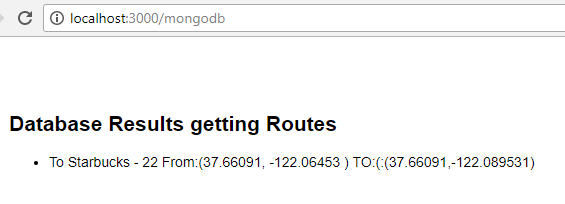
<body><div class="container"> <h2>Database Results getting Routes </h2><ul> <% results.forEach(function(r) { %> <li><%= r.name %> - <%= r.frequency %>
From:(<%=r.START_Longitude %>, <%=r.START_Latitude %> )
TO:(:(<%=r.END_Longitude %>,<%=r.END_Latitude %>) </li> <% }); %> </ul></div></body> </html>
STEP 5.4: Run it at the URL /mongodb ---well we only have 1 entry in our table(collection)
Other examples of finds
Routes.find({name: "To Starbucks" }).sort({ name: 1 }).toArray(function (err, docs) { ......       <==== THIS gives all entries wither name = To Starbucks


Routes.find({frequency: {$eq:"22"} }).sort({ name: 1 }).toArray(function (err, docs) { .....       <==== THIS gives all entries with frequency = 22

Routes.find({frequency: {$gte:"22"} }).sort({ name: 1 }).toArray(function (err, docs) { ....       <==== THIS gives all entries with frequency >= 22
