Creating a new Database cluster to create a new MongoDB on the Cloud
PREREQUISITE:Create an account on mongodb.com ( you should sign up with your horizon google email). Follow the instructions for a FREE account.
OBJECTIVE: The instructions below will create a Database with a Shared Cluster on a low end machine in a project.
FOLLOW: The Atlas instructions online (below is a dated approximation of what you will do) to creation a project and MogoDB that runs on Google Cloud as a server.
-
APPROXIMATE (possibly dated) STEPS
STEP 1 : Create your organization and projectstep 1.1: Create an organization (for this class you need to do this only once but, you have the option of doing it more) - Give it a meaningful name. I gave mine "LYNNE'S ORG-XXX" where XXX is the date of origin. Organizations can contain multiple projects. If you have a team or company or some kind of group you might name it after the group.
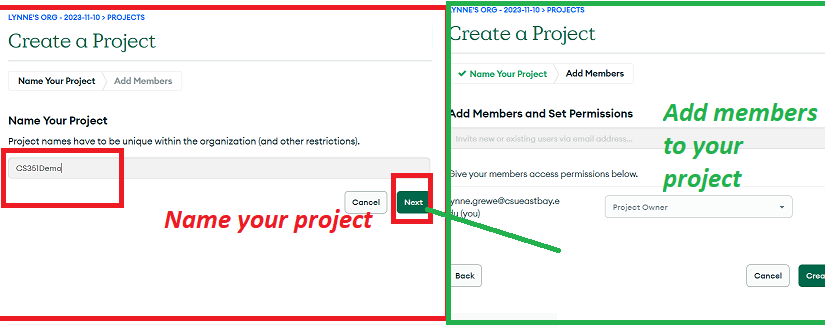
step 1.2: Create a new project - give it a name and add members to your project as desired (you will automatically be added). Below I show the creation of a project I called CS351Demo which involves naming the project and then the option to add others (they must have MongoDB Atlas accounts) to a project.
For existing Atlas users, enter their username. Usually, this is the email the person used to register.
-
For new Atlas users, enter their email address to send an invitation.
STEP 2 : Create a Deployment ---> Specify the Cloud Service the MongoDB is to run on ++
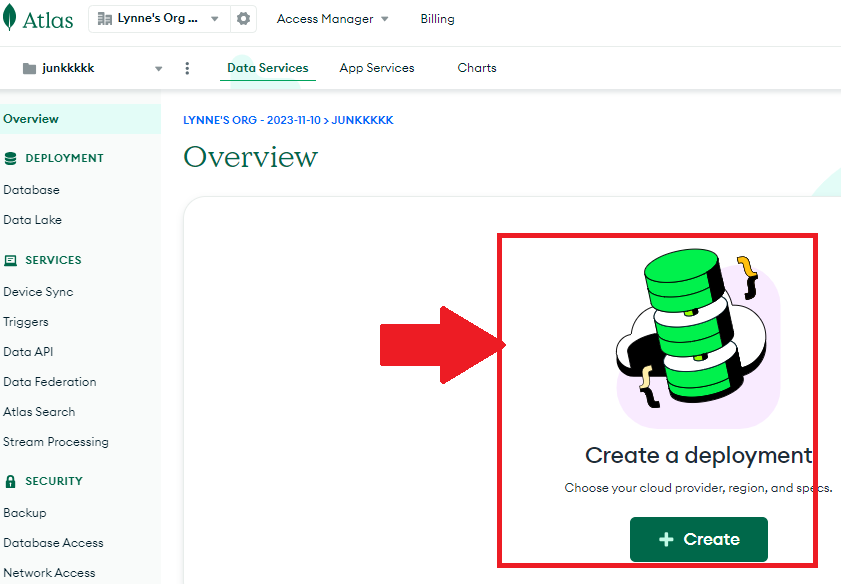
After the creation of your project you should be launched into the MongoDB Atlas console which looks like:
step 2.1 Cluster configuration
Select "CREATE" button to create a new deployment and you will get the following interface. It will ask you for
>>> Machine option for your database cluster --> We will choose the FREE option (currently M0)
>>> Provider = select Google (or whatever provider you have credits on).
>>> Region = this is the region in the world the deployment will be running in (keep whatever is default and free)
>>> Cluster Name = you can change this if you want (or keep default)NOTE: clusters in Databases have a specific menaing (like horizontal sharding cluster, replica clusters, etc). However here a MongoDB Atlas cluster simply is a NoSQL Database-as-a-Service offering in the public cloud
>>> OTHER options ---there are more options but, we will not use them in this beginning class (you can go to mongodb.com to read up on any you might be interested in).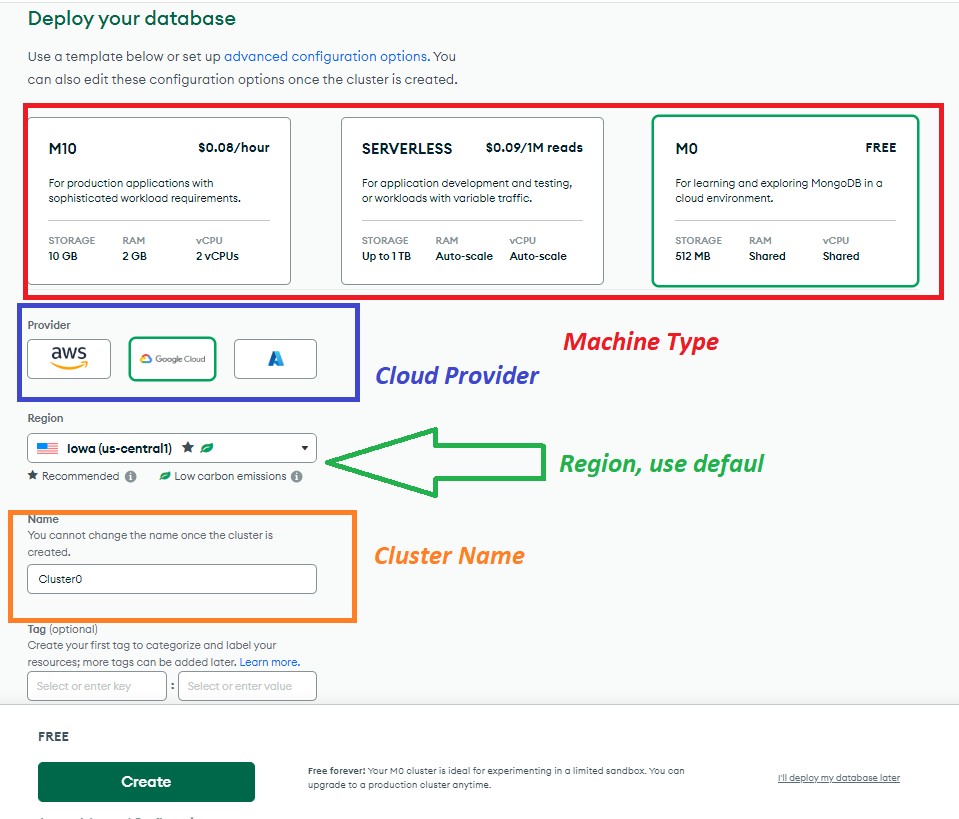
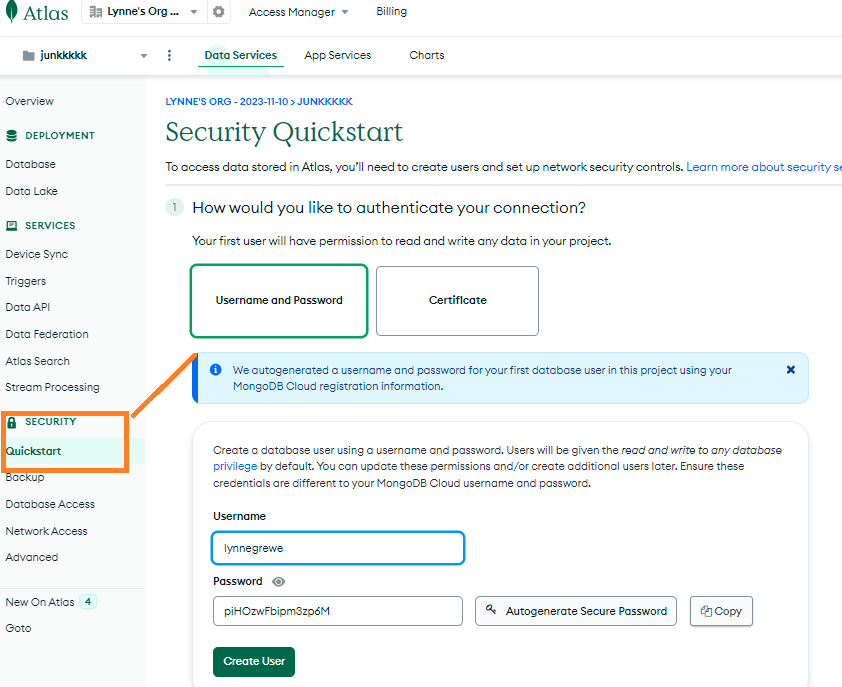
step 2.2 Basic (login based) Security Configuration of Your cluster:Next, you will need to specify how you will access the database. We are going to initially set it up with a login/password access as follows:
>> Select Username + Password Option AND specify a username and password. MAKE SURE TO save this although you can go back to the console under Security Quickstart link to view this or change or add.
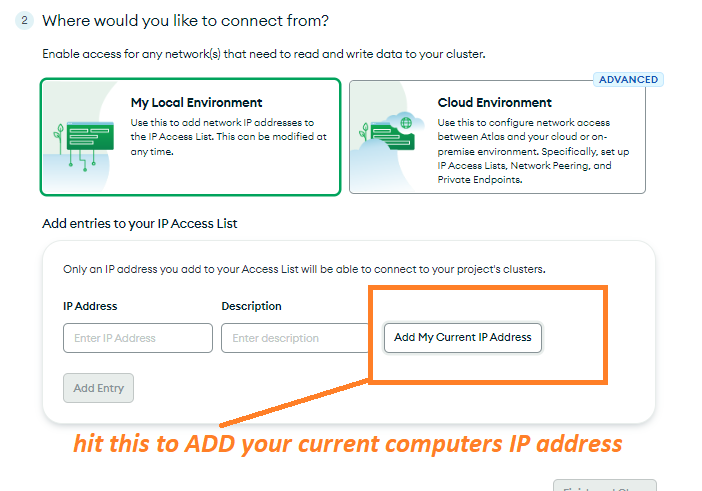
You will also need to enable what networks you want to access the database. For now we are going to specify the Local Environment but, clicking on the option to "Add My Current IP Address". But you can enter it in manually as well as add other IP addresses. We are specifying this for administration purposes to our database at this point.
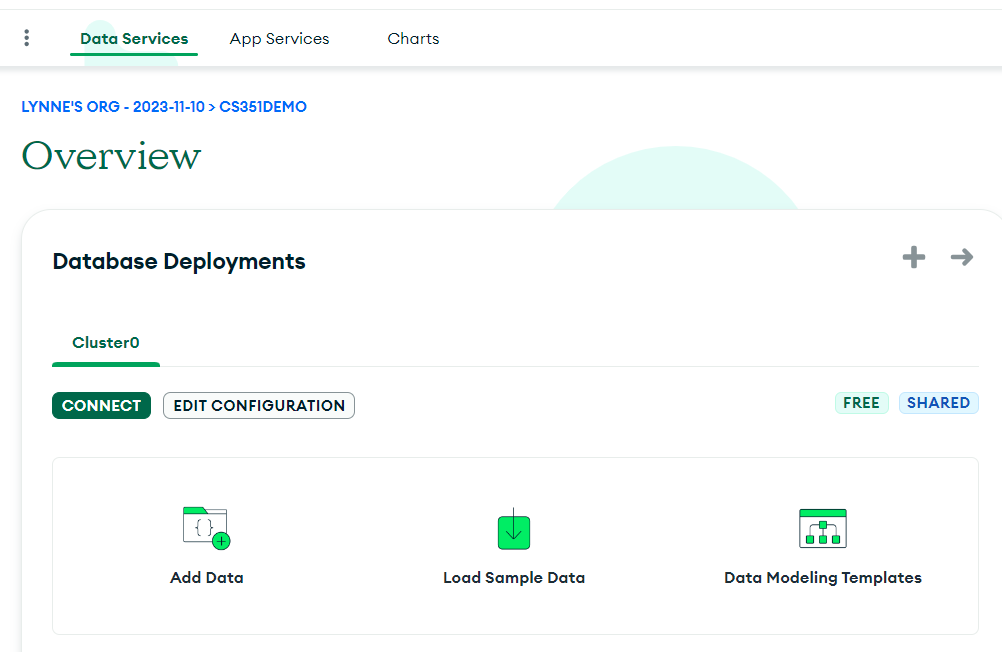
The result will look like the following where my cluster which I kept as the default name Cluster0 is up:
STEP 3: Create a Collection in your Project
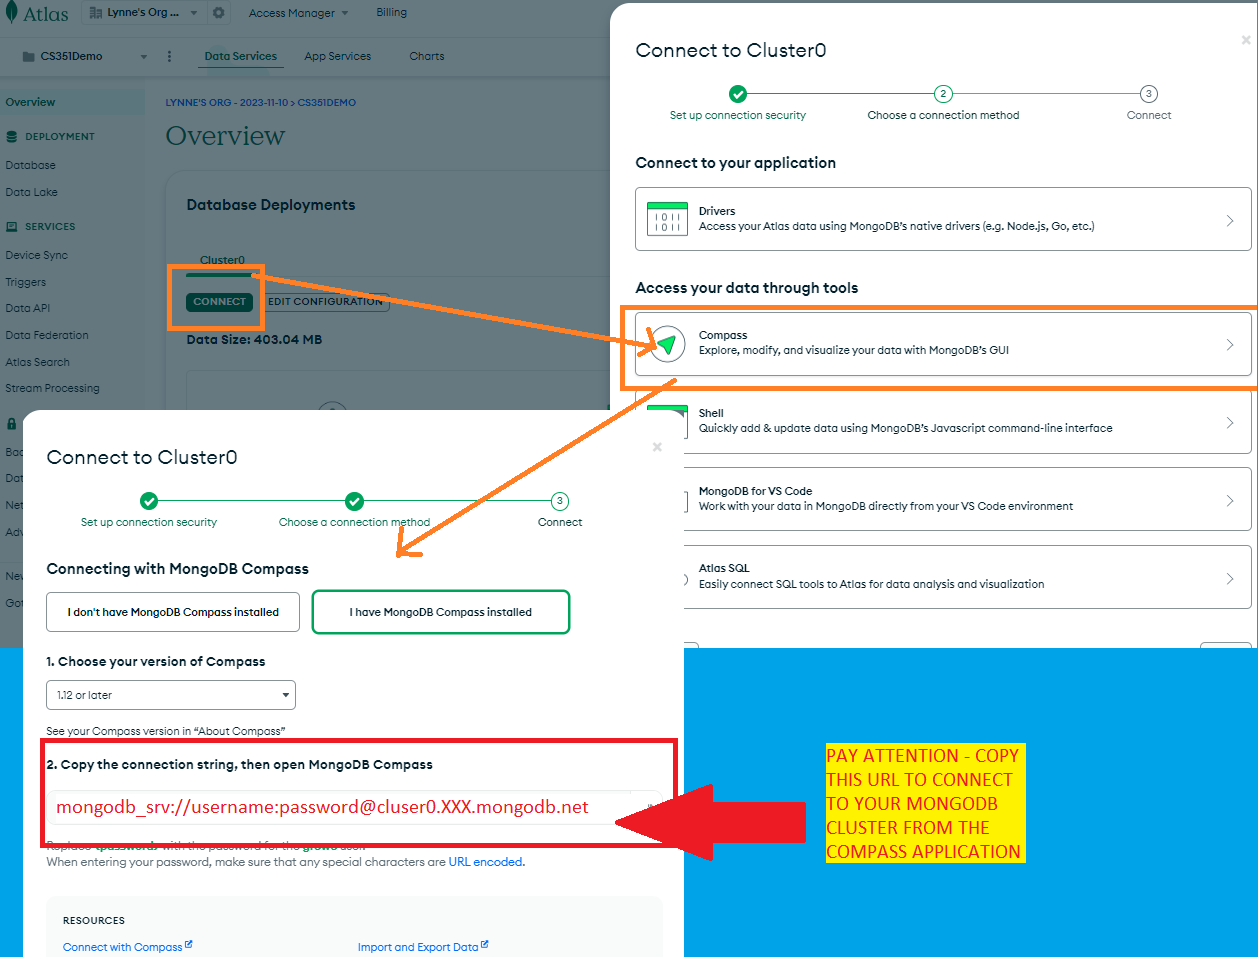
The MongoDB Atlas console will look something like shown below. This is showing in the background the Overview of the Project and Deployet you setup for your Project. Now we are going to use the MongoDB Compass Application to create a database. The MongoDB Compass is a desktop application you will need to follow the instructions to download. There are other options to connect including from a shell command line but, I find this is more difficult than using the GUI Compass application. If you want to learn about the shell you should go to mongdb.com to learn more.
NOTE - you can choose to say you don't have the Canvas application and it will take you through the process of downloading.
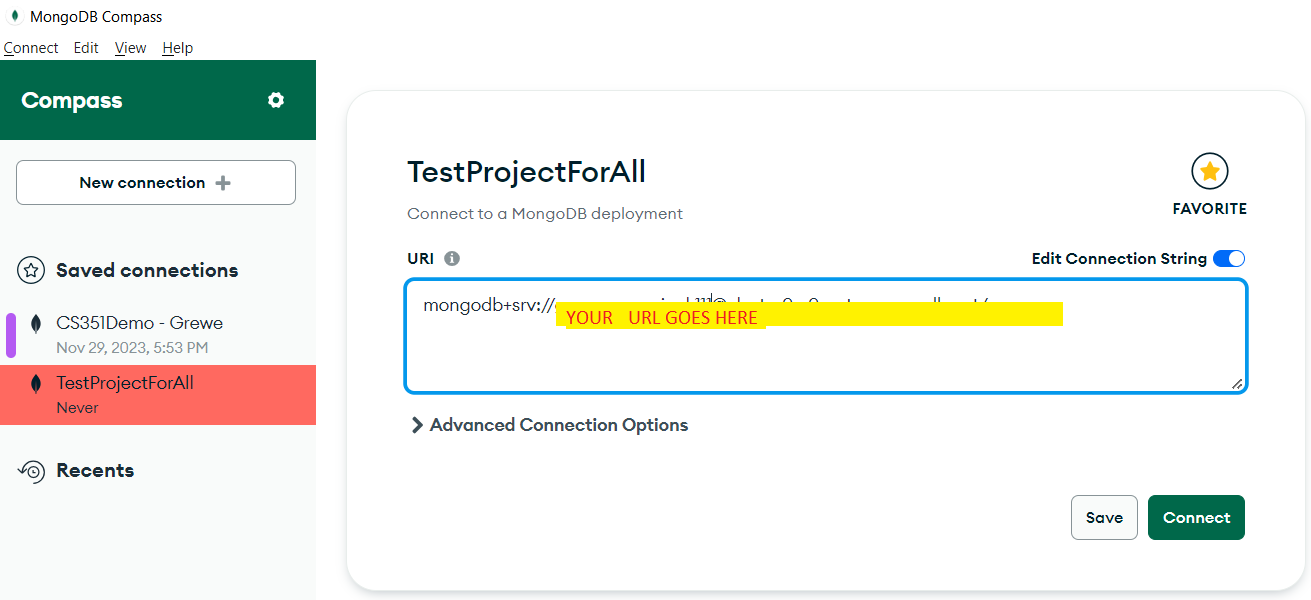
PAY attention to the connection URL that is generated. YOU WILL Need to put the correct username and password from step 2.2 above
mongodb_srv://username:password@cluser0.XXX.mongodb.net
-
Now connect to your MongoDB cluster on the cloud (i.e. Google) using the Compass application AND your URL. After you connect it will look like the following. Now you can create a Database Collection by hitting the Create Database (or +) as shown in the screenshot below.
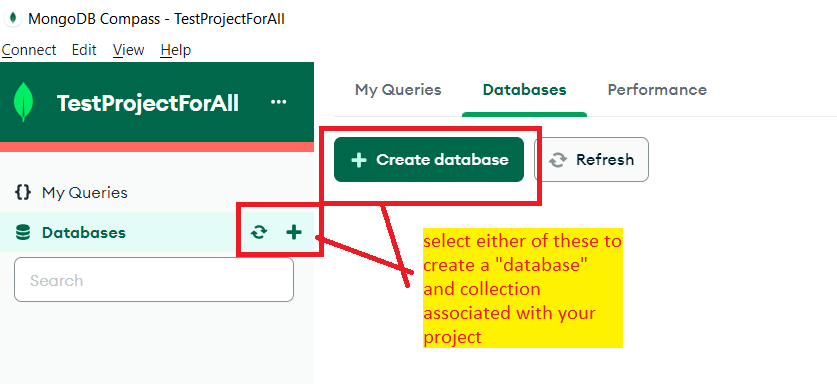
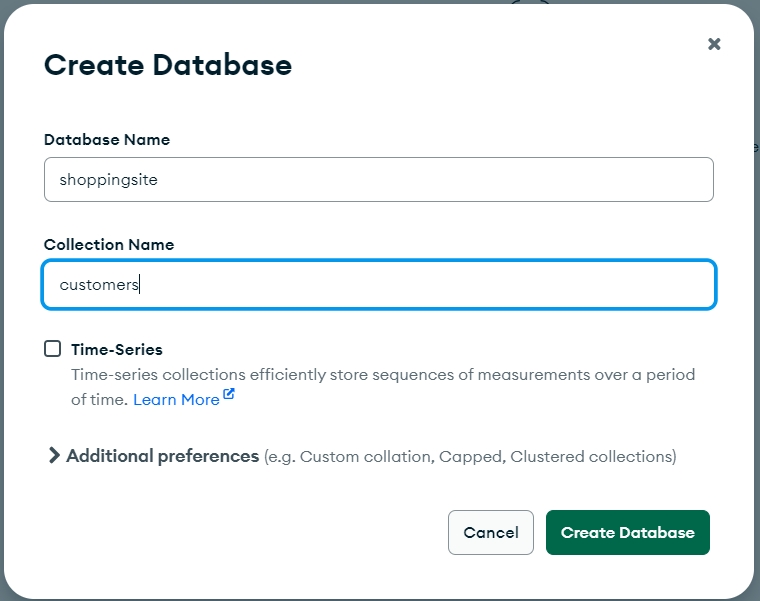
Here I am creating a Collection called customers inside a database called shoppingsite
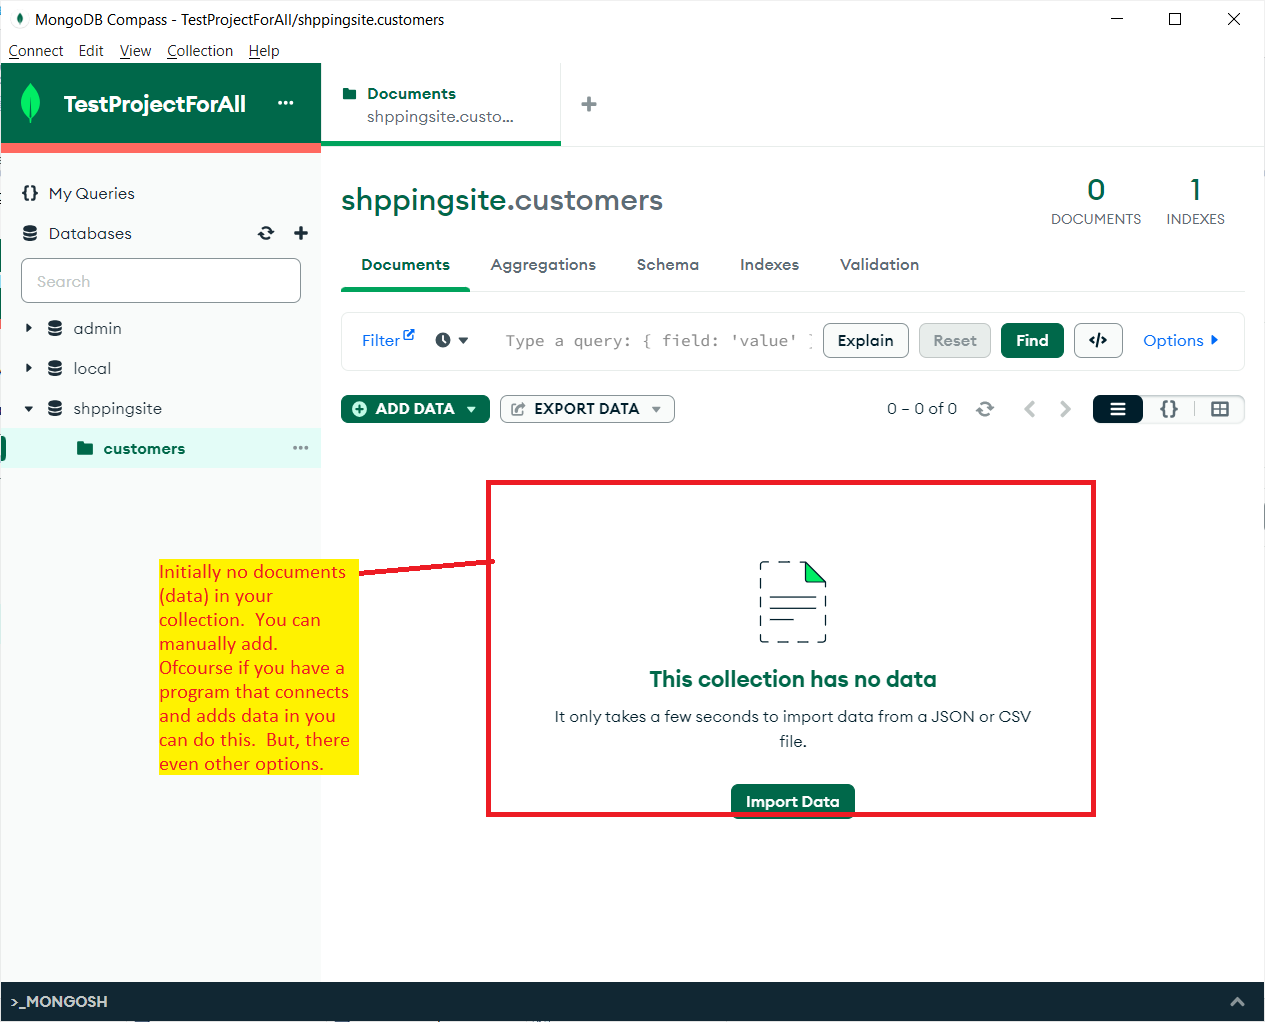
STEP 4: Add data to your collection
There are a numbrer of ways to add data --one way is to do it manually with the Canvas Application and I will show this now. Another way (which you will learn later) is to have a web request sent in to add data to your collection, you can also upload CSV files ,etc (but, this I will not teach you.). In the Canvas application you will need to hit the Add data button AND we are going to select to "Insert a Document" manually.
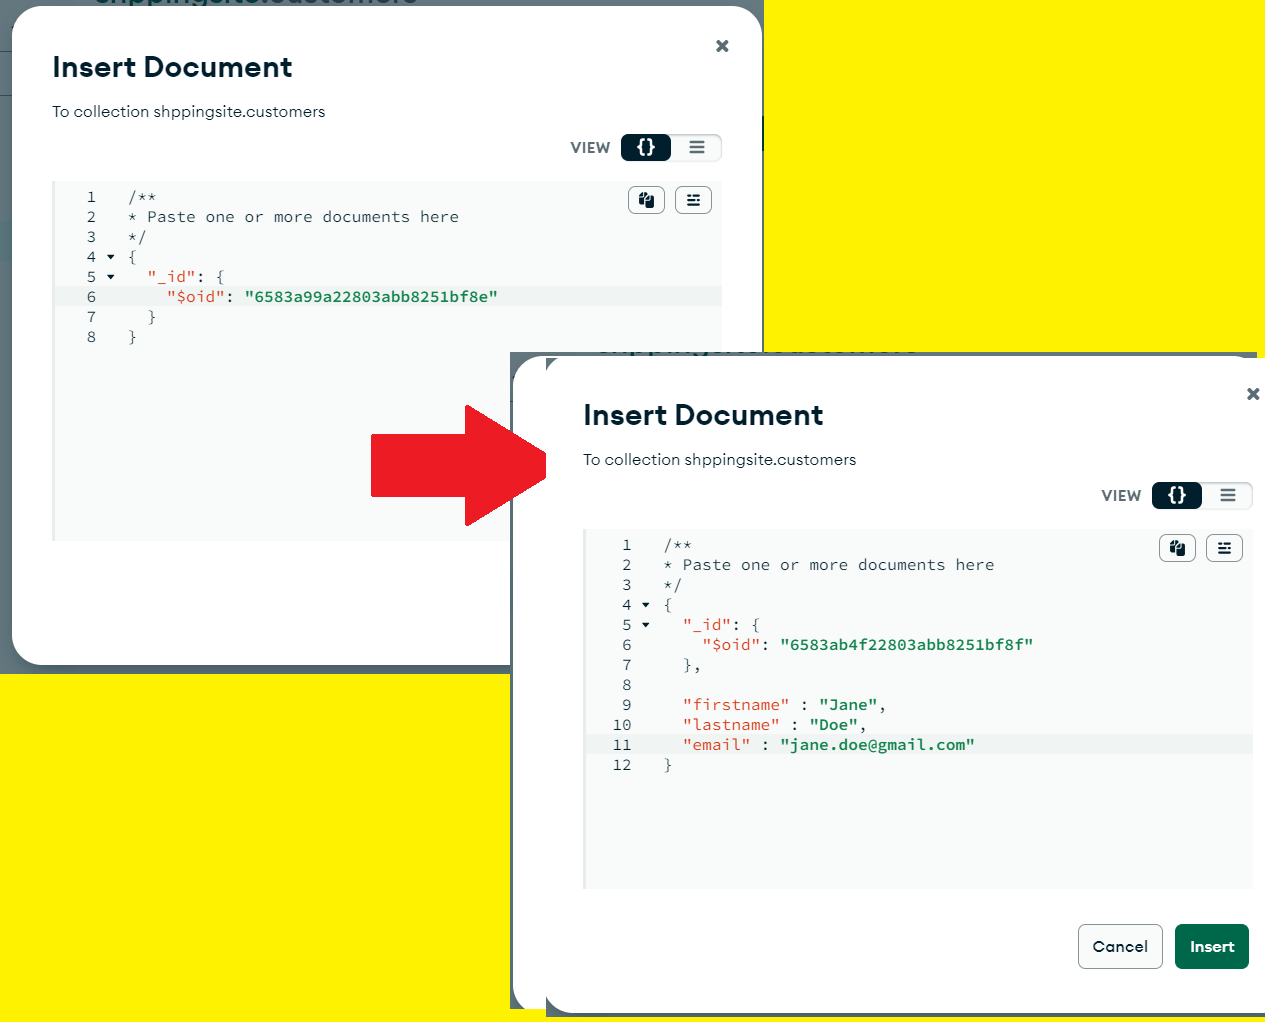
You will see now that when you select to manually insert a document it comes up with a starting JSON object to work with that has as ID associated with it. We want to add more information about our customer, like their first and last name and their email. I do this by adding to the JSON object with name value pairs seperated as follows and
"name" : "value"
AND here is the complete JSON object I will add
{
      "_id": {
            "$oid": "6583ab4f22803abb8251bf8f"
            },
      "firstname": "Jane",
      "lastname": "Doe",
      "email": "jane.doe@gmail.com"
 }
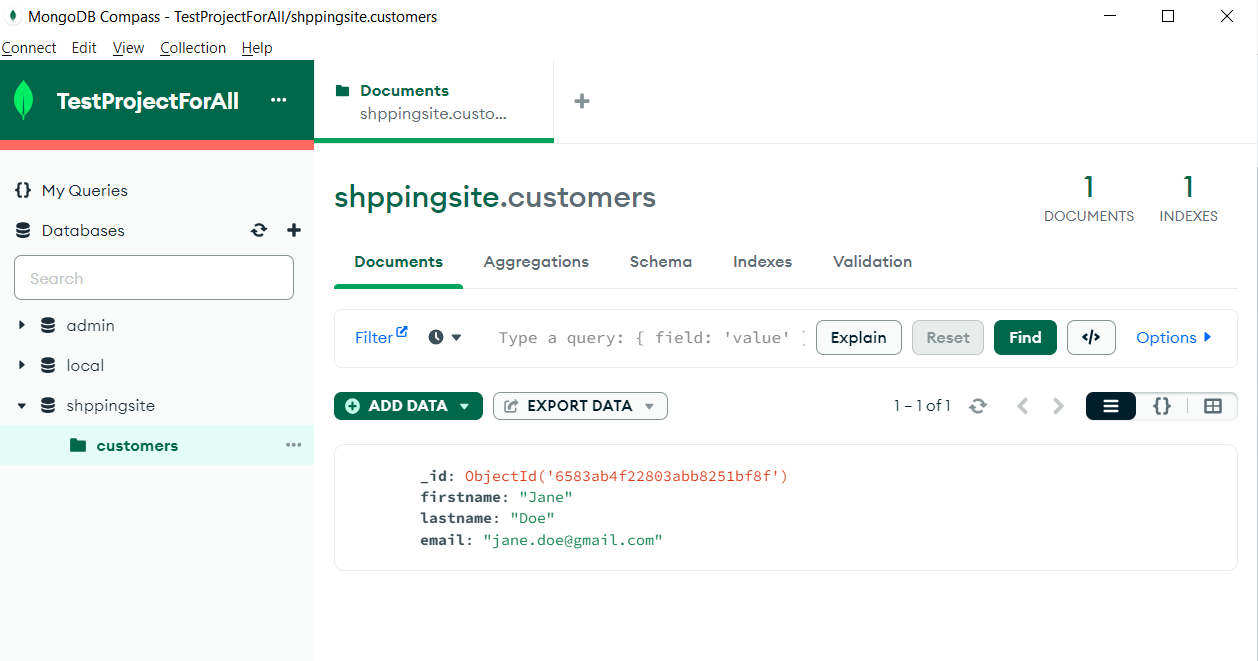
HERE are the results showing the document inside of the collection
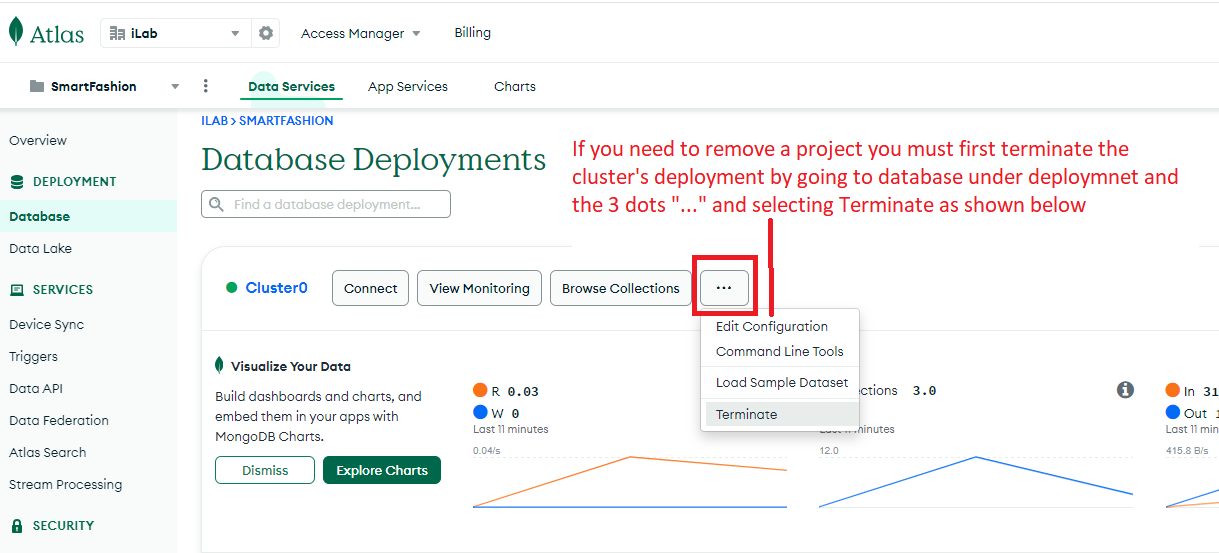
SPECIAL NOTE: if you want to remove a deployed cluster or its project, you must first terminate the deployment.
