Glashfish deployment using the Glassfish Web Admin Console
1) Go to http://YOURSEVER:4848
-
if you installed it locally it would be localhost for the server name. Note the default is 4848 for the admin console for Glassfish but, this can be changed.
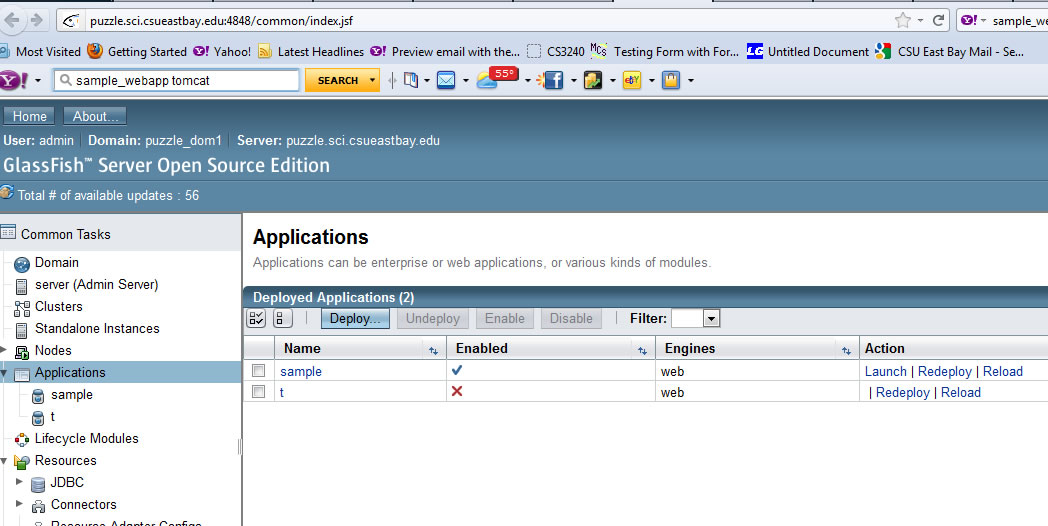
2) Go to Applications Link then click on Deploy button
NOTE: I am doing this on my remote server, the URL will reflect where your server is installed(local or ?).
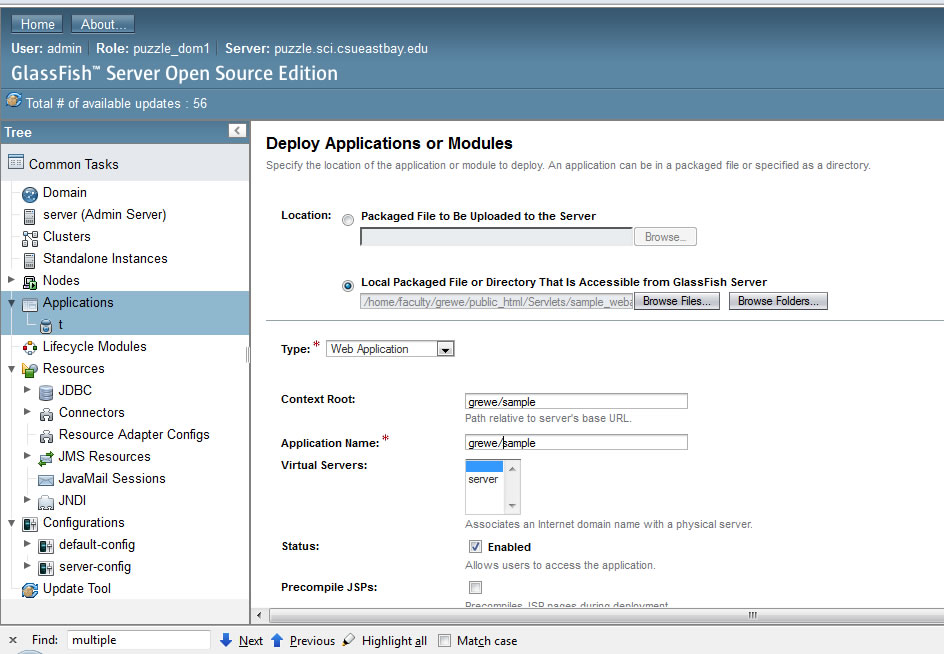
3) You can deploy a directory or a war file Here is an example of war file
-
you can either upload it from your personal HD or as I have done here I have already uploaded it to my remote Glassfish server account
-
YOU MUST specify a UNIQUE Context Root and Applciation NAME -----you don't want
to override another existing applicationNOTE: you must know the location on the server of your war file (in my case I am running on a Unix server)
4)NOTE: what is in my WAR file -- is a single Servlet in the directory mypackage/Hello.class
that by the web.xml file that is included and listed below maps to /hello
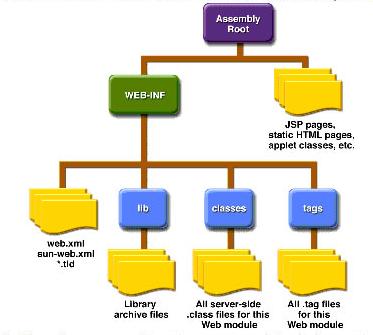
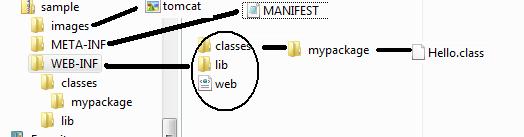 War file or Directory Contents
<?xml version="1.0" encoding="ISO-8859-1"?>
<web-app xmlns="http://java.sun.com/xml/ns/j2ee"
 xmlns:xsi="http://www.w3.org/2001/XMLSchema-instance"
 xsi:schemaLocation="http://java.sun.com/xml/ns/j2ee http://java.sun.com/xml/ns/j2ee/web-app_2_4.xsd"
 version="2.4">
<display-name>Hello, World Application</display-name> <description> This is a simple web application with a source code organization based on the recommendations of the Application Developer's Guide. </description><servlet> <servlet-name>HelloServlet</servlet-name> <servlet-class>mypackage.Hello</servlet-class> </servlet><servlet-mapping> <servlet-name>HelloServlet</servlet-name> <url-pattern>/hello</url-pattern> </servlet-mapping></web-app>GENERAL DIRECTORY STRUCTURE
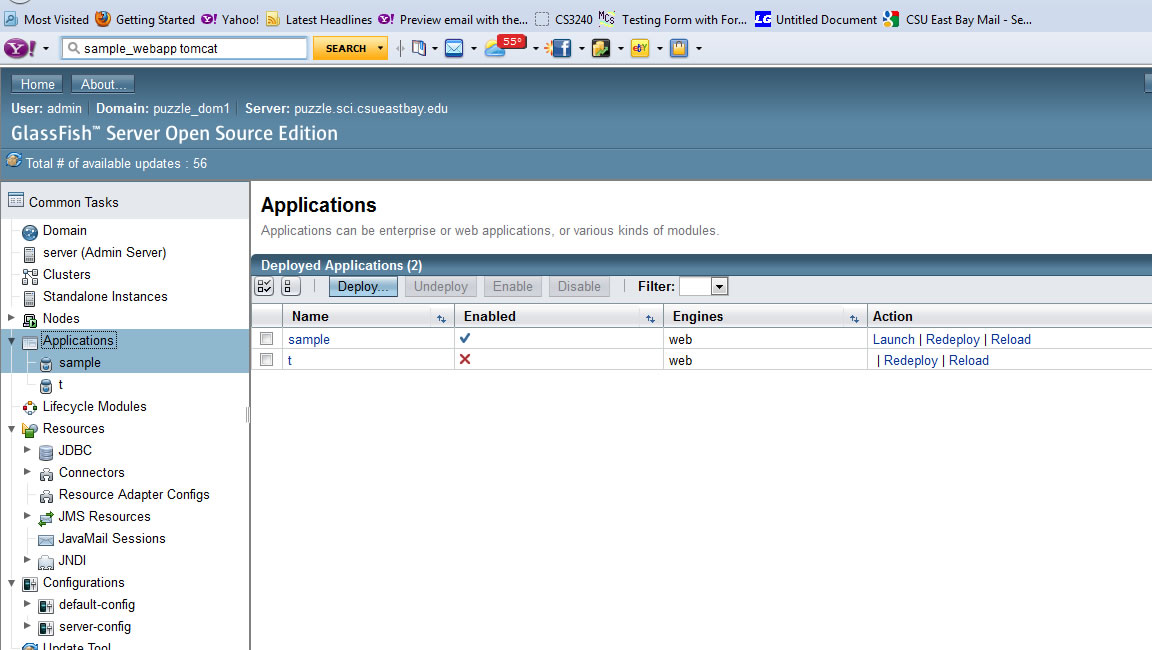
5) After you hit submit on step # 3 the GlassFish Admin counsole will show the application as enabled
NOTE: the application we just deployed "sample" is Enabled and Deployed --- we can redeploy OR reload with the button next to it
-
if it does not show as enabled there was a problem with deployement which may include:
- you did not upload (as is this case) the war file or web application directory correctly
- there are missing files
- your web.xml file has errors (validate it at validator.w3.org)
- you forgot to compile your code and put it in the appropriate directory
- you compiled with an incorrect SDK version
NOTE: the other web application "t" deployed is not enabled because the directory where the war file (or directory path) no longer exists.
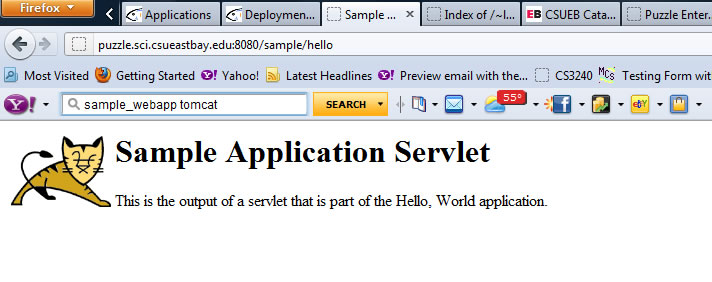
6) http://puzzle.sci.csueastbay.edu:8080/sample/hello -- Replace for your server name!! (localhost or?)
FORMULA = http://SERVER_NAME:8080/YOUR_CONTENT_PATH/SERVLET_OR_JSP_OR_HTML_PATH
-
Note: if we had an index.html or index.jsp file in our top level sample directory of our sample.war file we could invoke them with:
http://SEVER_NAME:8080/sample -
Note: to get the "tomcat.gif" file in our images folder (see above directory structure) we would type in:
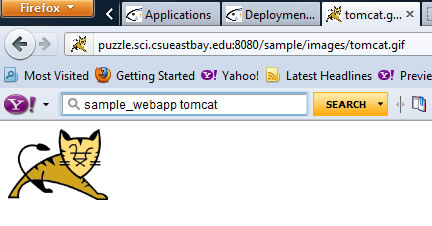 http://puzzle.sci.csueastbay.edu:8080/sample/images/tomcat.gif
http://puzzle.sci.csueastbay.edu:8080/sample/hello
Simple Hello.class servlet that displays some text and the image "tomcat.gif" in the images directory of are WAR file (or if we had un archived directory)