NOTE: at this time you must put credit card on account (even if using the free tier ignite level of MySQL) -- this is called verification see https://devcenter.heroku.com/articles/account-verification.... THESE POLICIES ARE SET BY HEROKU AND CAN CHANGE AT ANY TIME
- Add any add-on to the app, even if the add-on is free. The only exceptions to this are the free plans for the Heroku Postgres and Heroku Connect add-ons, which can be added without verification.
If you choose to do a credit card this is YOUR REPONSIBILITY not mine. I suggest buying a $5 visa gift card to limit your risk
There are MULTIPLE options for MongoDB addon -- we will show mLab
You can add mLab to your app either through the add-on catalog or through the heroku command.
For example, to add currently free, Sandbox plan (the default)
Via Heroku Console
Go on Heroku app and go to resources and go to Add-Ons and search and find mLab MongoDB and select it

Now heroku app has as add-on mLab's MongoDB

To discover the URL to click on the mLab MongoDB link and will take you to mLab console --where you can see URL

NOTE: the username and passwork and the username and password created for
the mLab add on.
|
Via Command Line
(NOTE: you must first be logged into heroku with command:
heroku login
Next Navigate to your application directory and type: TIP : read here for info on the heroku Command Line Interface
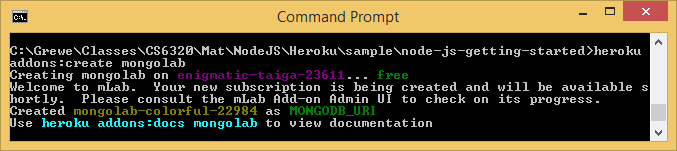
$ heroku addons:create mongolab
Please note that Sandbox databases should not be used in production, as they are intended for development/testing environments that do not require high availability.
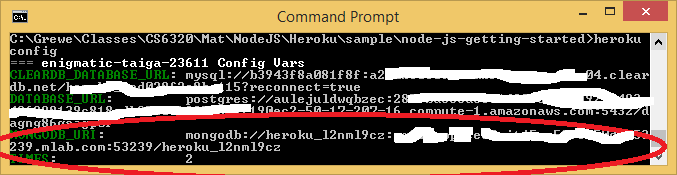
This creates a database, and sets a DATABASE_URL environment variable (you can check by running heroku config (when I run this I get the following --I have both a Postgres and MySQL database for this app specified but, not setup yet)
Use the heroku config command to view your app’s config variables.
$ heroku config:get MONGODB_URI --app NAME_OF_YOURAPP
  MONGODB_URI => mongodb://heroku_12345678:random_password@ds029017.mLab.com:29017/heroku_12345678
|
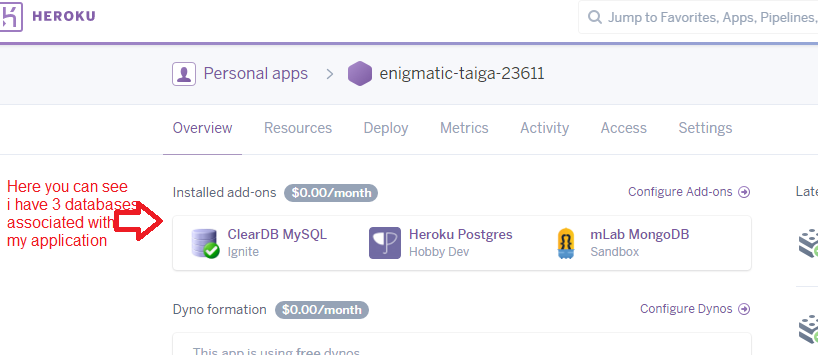
Here is the view in the heroku console -- I have MongoDB and 2 other databases

OR you can follow the follow instuctions from here on how to create a password for the login that was created for you when you added the addon
|
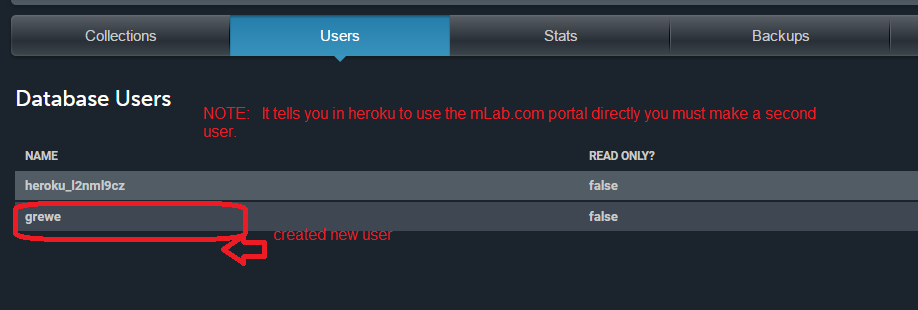
To access the mLab management portal directly through mlab.com, you will need to create a new account user.
Add a new account user:
- Log in to the management portal via Heroku (steps above)
- Click “Account” in the upper right-hand corner to open the Account Settings page
- If the “Users” tab is not already highlighted, click it to show the list of Account Users
- Click the “Add account user” button
- Fill in the new account user’s information (a unique username, email, and password)
- Click the “Add” button to add the new user
If you’d like to use the mLab Account User that was automatically created when your mLab add-on was created (should look like “heroku_xxxxxxxx”) you can use our Reset Password form to set a new password.
|
Follow mLab's quick start guide on how to setup your MongoDB instance --read here (quick start or similar)
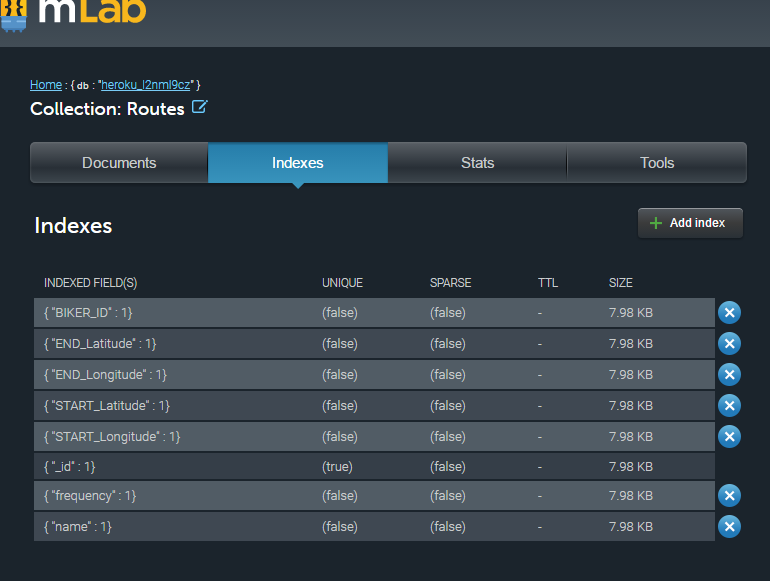
here you can see I have added a collection (think database table)

Now click on the collection (mine is called Routes) and added indices representing the Route of: _id(default for every collection), name, START_longitude, START_latitude, STOP_longitude, STOP_latitude, frequency, BIKER_ID
option 1: do manually --must have mongodb installed locally
Load some data
Here’s a quick exercise that tests an insertion into your new database
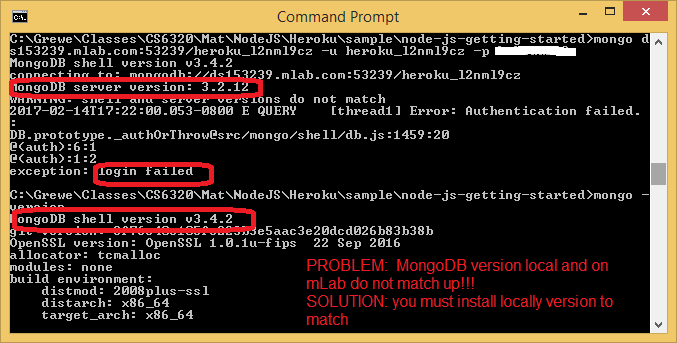
1) In a terminal window, connect to your database using the mongo shell (the command will look similar to the following example):
-
% mongo ds012345.mlab.com:56789/dbname -u dbuser -p dbpassword
the above url will need to be YOUR mongo database url created when you did addon.
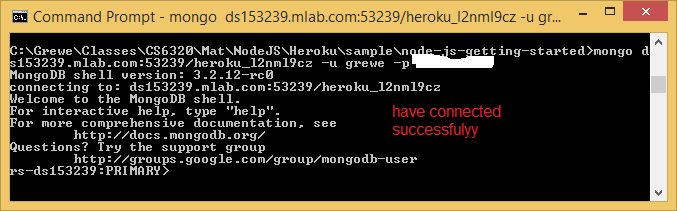
WARNING: your local mongodb version must be the same as the mLab server or you will get the following error
NOW CONNECTED SUCCESSFULLY
2) Assuming you successfully connected using the mongo shell in the previous step, run the following command:
-
> db.mynewcollection.insert({ "foo" : "bar" })
for example I have a collection called Routes so to add something it would be
-
db.Routes.insert({ name:"ToCSUEB", BIKER_ID:"123", frequency:0, START_Longitude: 37.660791, START_Latitude:-122.064356, END_Longitude:37.657903,END_Latitude:-122.056589 })

3) Next, run the command in the first line below and confirm that the shell output matches the second line (your “_id” value will be different):
-
> db.mynewcollection.find() { "_id" : ObjectId("526705b4a3559a176784b4af"), "foo" : "bar" }
for example for my Routes collection I type
db.Routes.find() and the results are

option 2: use mLab console to enter in JSON formatted documents (entries) one at a time
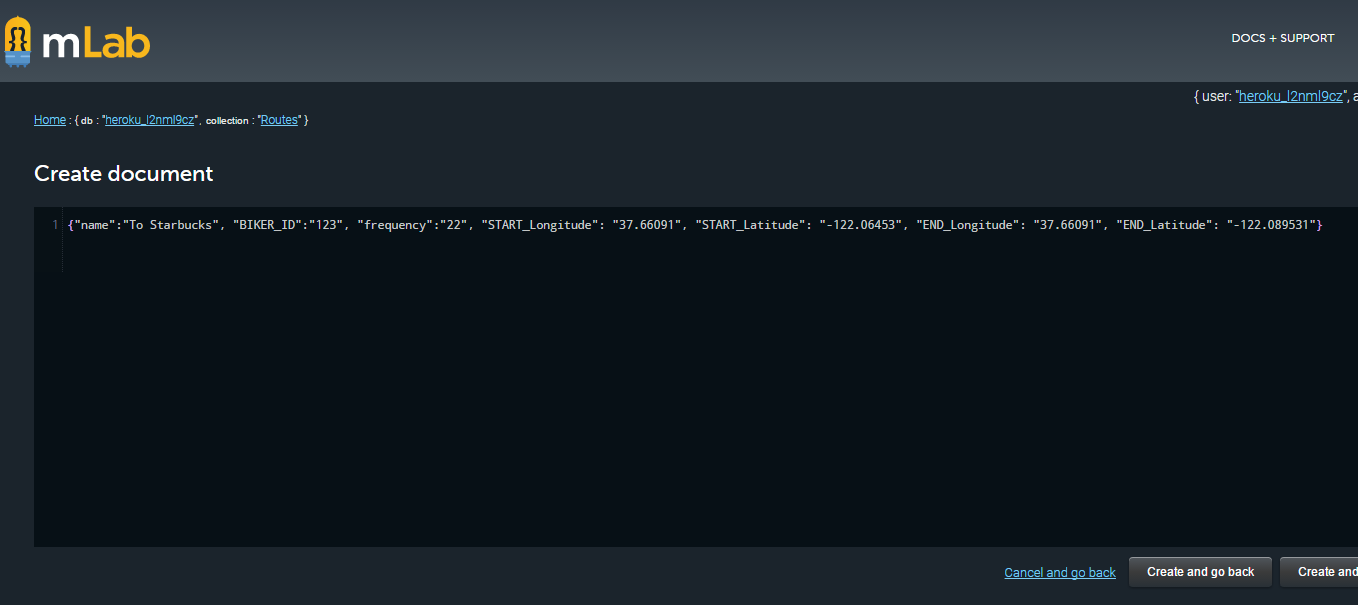
option 3: import from various formats JSON, CSV, etc.must have mongodb installed locally
Import / Export Helper
MongoDB provides two mechanisms for importing and exporting data. One way is via the mongoimport and mongoexport utilities. These allow you to import and export JSON and CSV representations of your data. The other way is with mongorestore and mongodump utilities which deal with binary dumps. In this tab we provide pre-filled strings for the commands that we find most useful. Copy and paste from below to import or export from this database. For a full list of options that can be used with these commands, please see MongoDB's documentation on this subject.
Binary
Import collection
mongorestore -h ds153239.mlab.com:53239 -d heroku_l2nml9cz -c Routes -u <user> -p <password> Routes.bson
Export collection
mongodump -h ds153239.mlab.com:53239 -d heroku_l2nml9cz -c Routes -u <user> -p <password> -o <output directory>
JSON
Import collection
mongoimport -h ds153239.mlab.com:53239 -d heroku_l2nml9cz -c Routes -u <user> -p <password> --file <input file>
Export collection
mongoexport -h ds153239.mlab.com:53239 -d heroku_l2nml9cz -c Routes -u <user> -p <password> -o Routes.json
CSV
Import collection
mongoimport -h ds153239.mlab.com:53239 -d heroku_l2nml9cz -c Routes -u <user> -p <password> --file <input .csv file> --type csv --headerline
Export collection
mongoexport -h ds153239.mlab.com:53239 -d heroku_l2nml9cz -c Routes -u <user> -p <password> -o Routes.csv --csv -f <comma-separated list of field names>
STEP 5.0: Install MongoDB locally so have access to shell, etc. Install from http://www.mongodb.org/downloads
STEP 5.1: Get MongoDB NodeJS Driver/Plugin and setup
Via WebStorm Console
1) go to Settings, go to pluggins and search for mongo --nothing is found as the pugin not installed so click on search repositories and it will find it and now install it ---will prompt you to restart Webstorm
\st
2) now configure project to point to your mLab mongoDB server.
a) bringup MongoExplorer tool (View-> Tools Windo->MongoExplorer)

b) specify the path to your locall installed mongo
c) click + to add new remote server pointing to your mLab MongoDB.
under the general tab give host:port, and database name (see step 1 for the url that gives this info)
AND under the Authentication tab give the username and password you created in step 2 and also for Auth mechanism specify SCRAM-SHA-1

result...

Now can connect form our WebStorm app directly
to our mLab MongoDB

3) Install mongodb driver and its dependencies in the project.
here: https://docs.mongodb.com/v3.0/applications/drivers/
Bring up the terminal window in WebStorm (go to View->Tools Window-> Terminal) AND execute the following `NPM` command
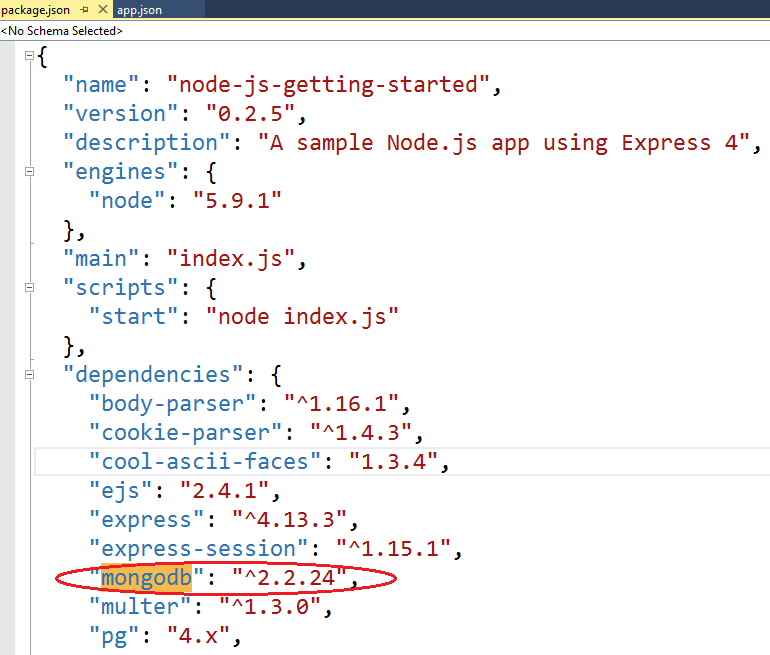
npm install mongodb --save
This will download the MongoDB driver and add a dependency entry in your `package.json` file.
|
STEP 5.2: Alter the code in index.js to add the URI /mongodb that reads from the Routes collection made in STEP 2,3 above to get all of the Routes
AND create a mongodb.ejs file to display the info retrieved
the routes/index.js file add the following
AND you must alter the MongoDBURI value to fit your database
var express = require('express');
var XXX = express.Router();
var mongoDBURI = process.env.MONGODB_URI || 'mongodb://your_user_id:your_password@YOURHost.mlab.com:YOURPORT/YOUR_DB_NAME';
//**************************************************************************
//***** mongodb get all of the Routes in Routes collection where frequence>=1
//      and sort by the name of the route.  Render information in the views/pages/mongodb.ejs
XXX.get('/mongodb', function (request, response) {

     mongodb.MongoClient.connect(mongoDBURI, function(err, db) {
         if(err) throw err;
          //get collection of routes
          var Routes = db.collection('Routes');
          //get all Routes
          Routes.find({ }).sort({ name: 1 }).toArray(function (err, docs) {
              if(err) throw err;

              response.render('pages/mongodb', {results: docs});

          });

           //close connection when your app is terminating.
            db.close(function (err) {
                     if(err) throw err;
             });
});//end of connect
});//end XXX.get
|
the views/pages/mongodb.ejs file
<!DOCTYPE html>
<html>
<head>
</head>
<body>
<div class="container">
<h2>Database Results getting Routes </h2>
<ul>
<% results.forEach(function(r) { %>
<li><%= r.name %> - <%= r.frequency %>
  From:(<%=r.START_Longitude %>, <%=r.START_Latitude %> )
  TO:(:(<%=r.END_Longitude %>,<%=r.END_Latitude %>) </li>
<% }); %>
</ul>
</div>
</body>
</html>
|
STEP 5.4: Run it at the URL /mongodb ---well we only have 1 entry in our table(collection)

Other examples of finds
Routes.find({name: "To Starbucks" }).sort({ name: 1 }).toArray(function (err, docs) { ......       <==== THIS gives all entries wither name = To Starbucks


Routes.find({frequency: {$eq:"22"} }).sort({ name: 1 }).toArray(function (err, docs) { .....       <==== THIS gives all entries with frequency = 22

Routes.find({frequency: {$gte:"22"} }).sort({ name: 1 }).toArray(function (err, docs) { ....       <==== THIS gives all entries with frequency >= 22
|