CS4521: Mobile and Topics in Web Programming |
||||||
|
XCode 4.2+ and iOS5+ : changing location in simulator
Since Xcode 4.2 and iOS 5 you can select from preset locations or add routes to your project while you’re running your simulated app. Visit Apple’s web site for details from here.
Your options:
1. Preset a single Location in your Scheme.
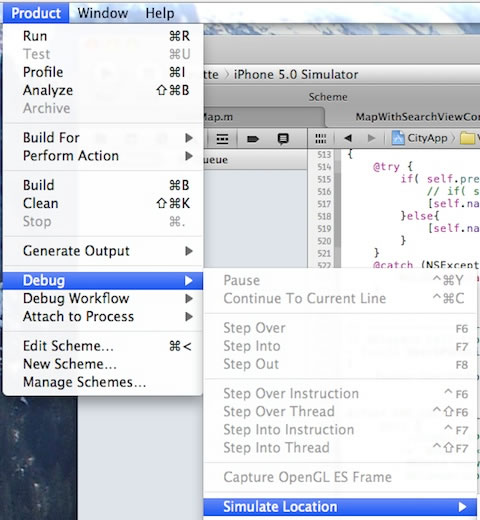
2. Choose a Location from the Program -> Debug -> Simulate Location menu
3. Choose a Location from the Debug Bar. if you are not running iOS 5.0 or later, these options can’t be used. Switch to iPhone 5.0 Simulator to allow selection:
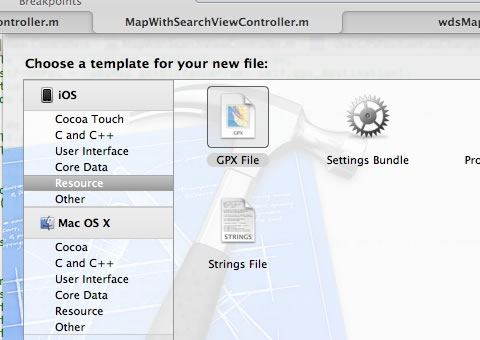
4. Create a GPX formatted file that describe a series of locations (with timestamps) that is an XML file that can be added to project to simulate movement.
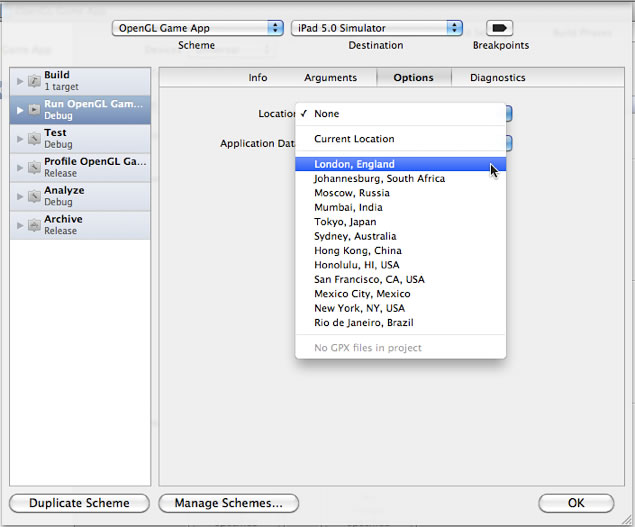
OPTION 2: Select location from set of Preset locations
In Xcode 4.*++, to preset a default location for your project, choose Product -> Edit Scheme – or from the scheme selector in the toolbar find Your project name > Edit Scheme… – and select the Run action. Click the Options tab. Allow Location Simulation and choose one city from the the drop-down list.
While testing your app in the iOS Simulator, you can select Product -> Debug -> Simulate Location from the menu bar and choose any point from the preset locations:
'iPhone 5.0' (aka iOS 5) location simulating in Xcode 4.2
OPTION 3: Select location DEBUG Bar when running application in debug mode

Choose a Location from the Debug Bar
Option 4: Create GPX file that has a series of locations (to mimic movement)
Create/Edit a GPX file and add it to your project to establish single or multiple custom waypoints(locations). GPX (GPS eXchange Format) is an xml data format for exchanging GPS data between programs. You can add one or more GPX file to your project. These files look like:
1 2 3 4 5 6 7 8 9 10 11 12 13 14 15 |
For: Cupertino.GPX: <?xml version="1.0"?> <gpx version="1.1" creator="Xcode"> <wpt lat="37.331705" lon="-122.030237"> <name>Cupertino, USA</name> </wpt> </gpx> For: Munich.GPX: <?xml version="1.0"?> <gpx version="1.1" creator="Xcode"> <wpt lat="48.122101" lon="10.695933"> <name>Munich, Germany</name> </wpt> </gpx> |
You can edit and add it to your project like any other file(s) or resources:
Add your GPX file to your project
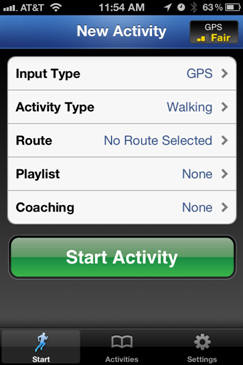
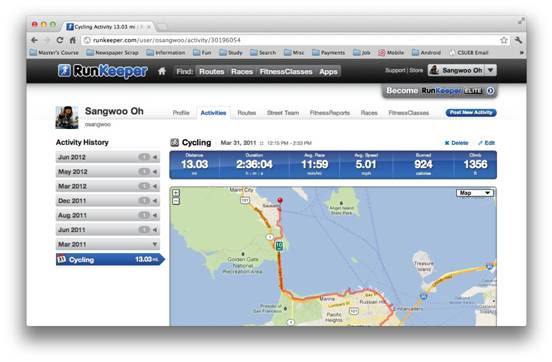
One trick to automate creating a GPX file using an App that gerneates them ---here using the "RunKeeper" app that is downloaded and used on real phone (that has GPS obviously). (curtosey of a student:>)
- Download ‘RunKeeper’ app from the app store, and run it.

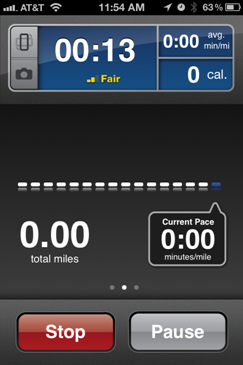
- After sign up for the app, you can start capturing GPS log. Press ‘Start Activity’ and walk around under an open sky.
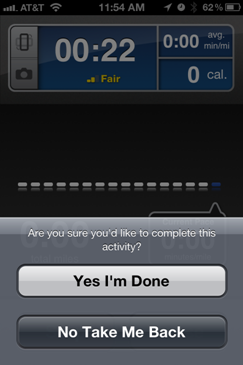
- After you logged GPS data enough, press ‘STOP’ button, and then ‘Yes I’m done’
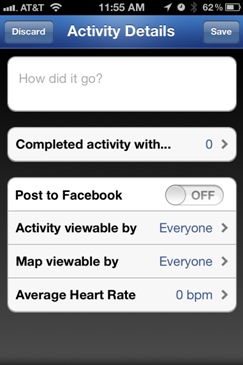
- Hit ‘Save’ to transfer GPS data to RunKeeper website.
- Log in to RunKeeper website with the account that you signed up from step 2
Then click on ‘Activities’
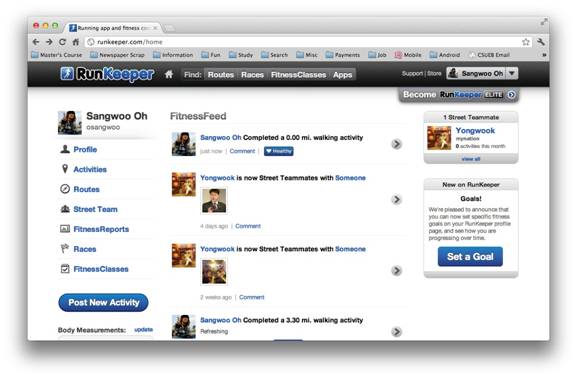
- Click on the activity that you just saved from your iPhone.
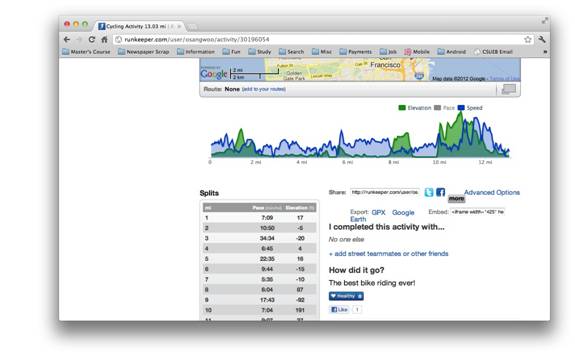
- Scroll down, and then you can find ‘Advanced Options’. Click on it, so you can download GPX file from the website.
- Open up your xCode project, and drag & drop the downloaded GPX file onto your project folder. Check on ‘Copy items into destination group’s folder’ and click Finish.
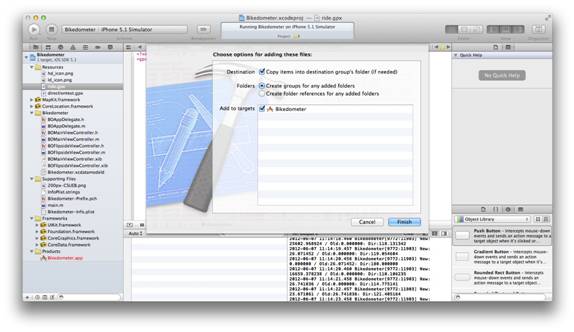
- You can see imported GPX file in your project folder.
Before use it, you should modify it for making it xCode-readable format.
Click on the GPX file.

- Remove all of <trk> and <trkseg> tags from the file. (Find and delete it)
Press Alt+Command+F, and replace the tag ‘trkpt’ into ‘wpt’.
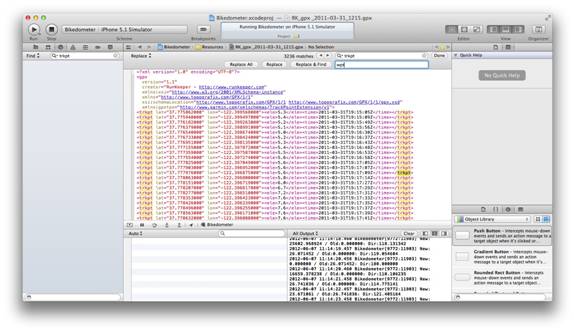
- Then the file is ready to use. J