CS4521: Mobile and Topics in Web Programming |
||||||
|
XCode Screens Explained
NOTE: there may be changes to your current version of Xcode see developer.apple.com for latest
Main Interface
w/Swift

NAVIGATION Window Source Code being Edited
(shown in "project navigator")
w/Objective-C
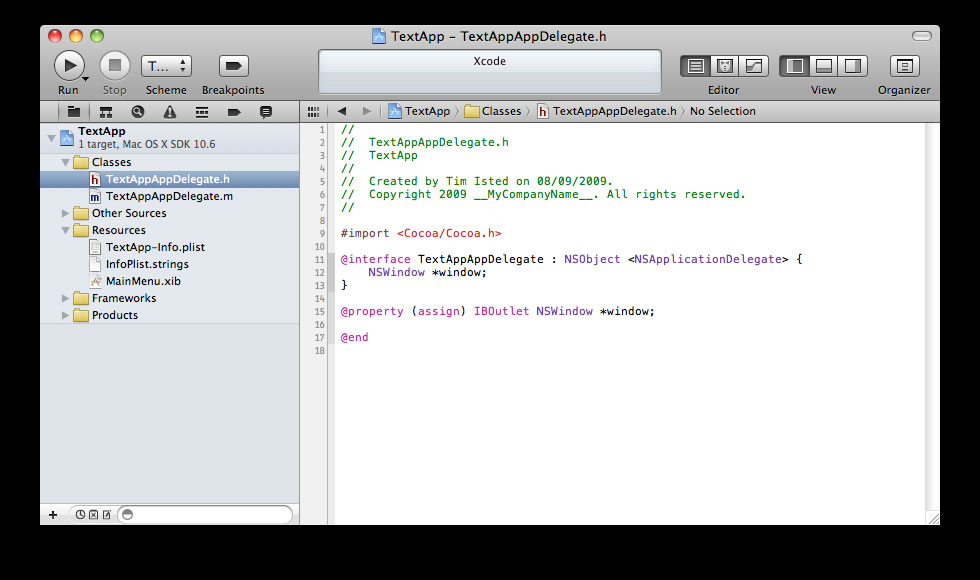
NAVIGATION Window Source Code being Edited
(shown in "project navigator")
Navigator Bar and Menu
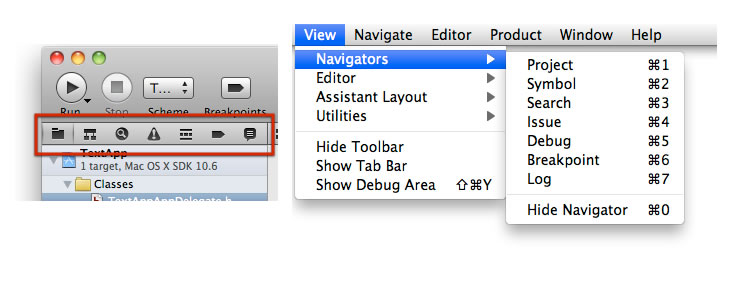
Navigator Bar Icons left to right in Red are:
1) Project Navigator  = shows directories and files in project
2) Symbol Navigator = show elements in hierarch
3) Search
4) Issue Navigator  = shows errors and warnings
5) Debug Navigator = shows debug session
6) Breakpoints Navigator  = shows breakpoints.
7) Logs Navigator = shows logs info
Upper Right Hand Editor Buttons and View Buttons

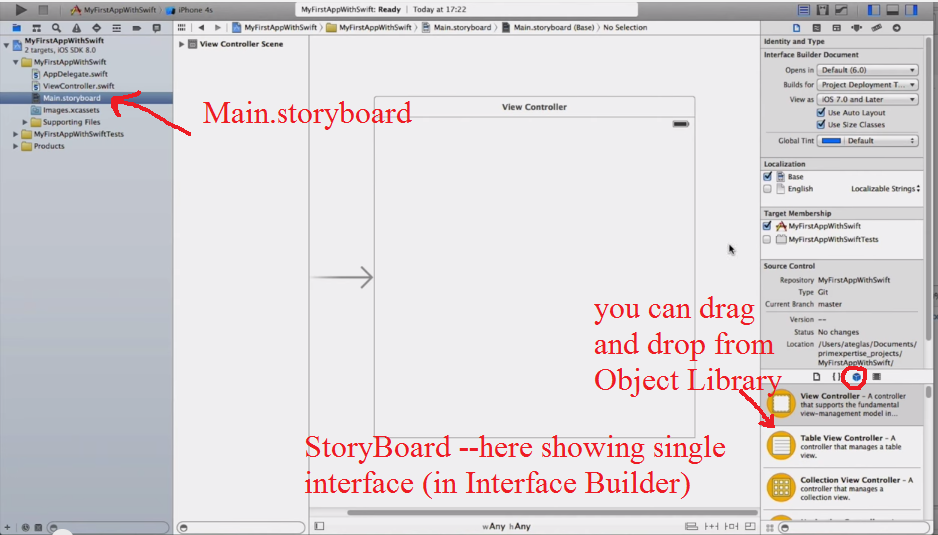
Viewing a GUI interface with Story Board (also see Interface Builder w/Objective-C)
-
Storyboard = where you can set up your multiple (or single as shown below) interfaces and edit each one by using Object Library in lower right to drag and drop GUI elements (like Buttons, etc).
-
a better conceptual overview of all the screens in your app and the connections between them.
It’s easy to keep track of everything because the entire design can be contained in a
single file rather than spread out over many separate nibs.
EXAMPLE : single view application, here see ViewController.swift GUI in storyboard
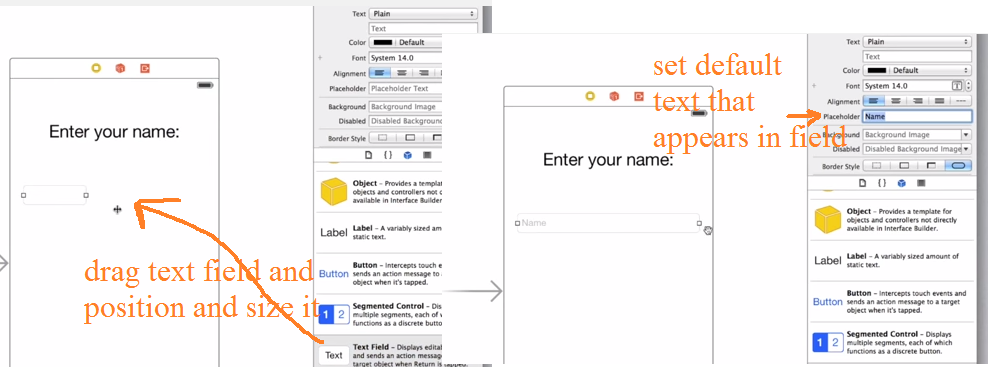
Example After adding some GUI elements

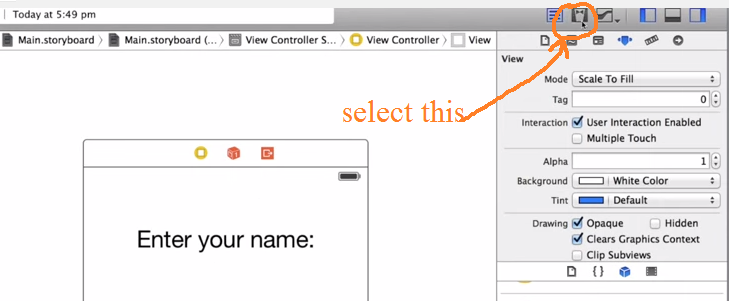
Setting up some properties (go to Attributre Inspector and Edit)
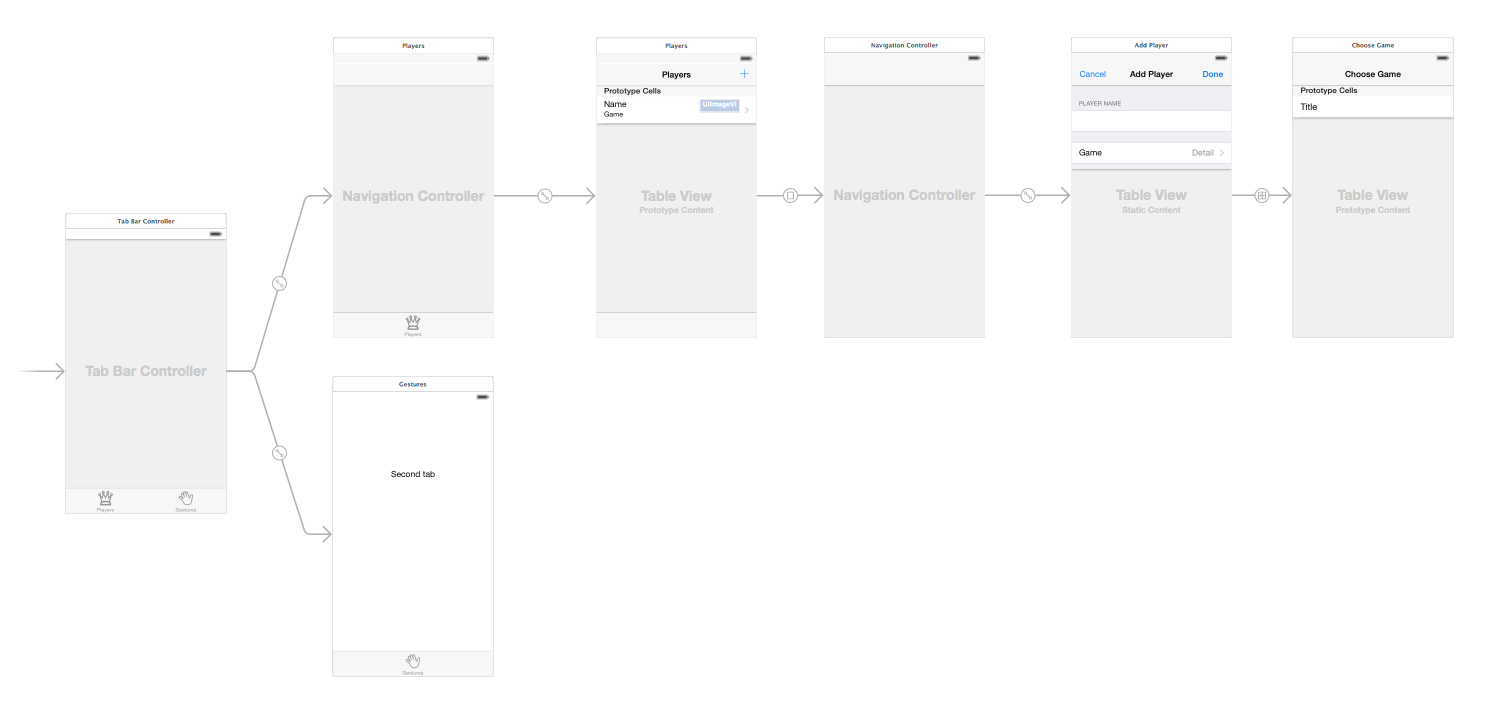
Example of multiple interfaces in Storyboard and their flow/connectivity
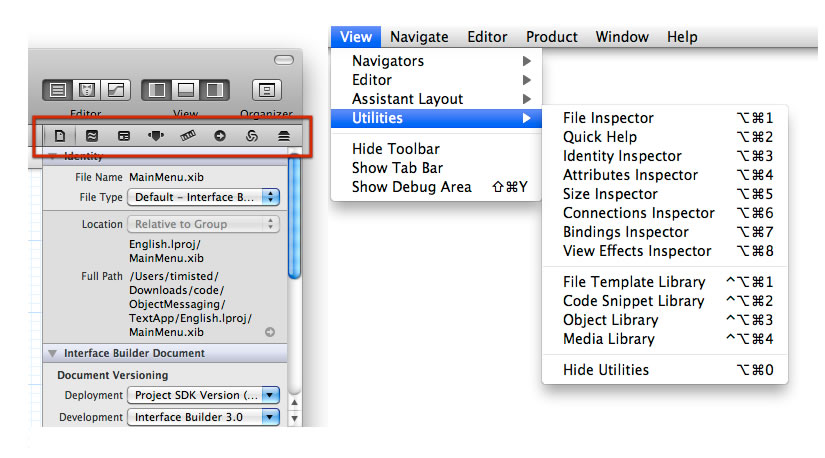
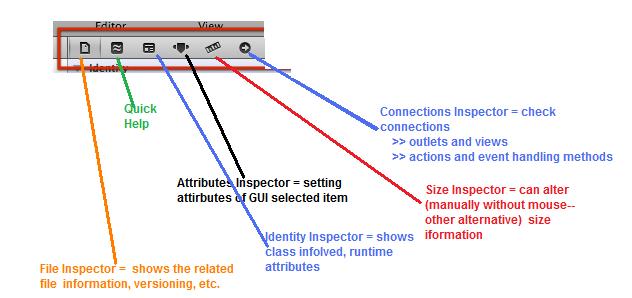
Inspector Selector Bar and Menu
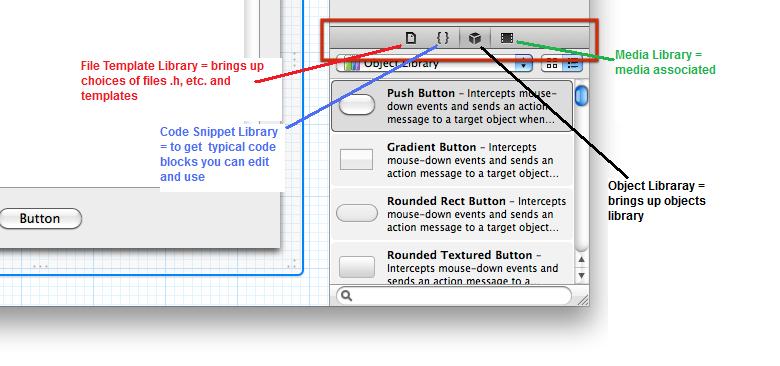
Library Selector Bar
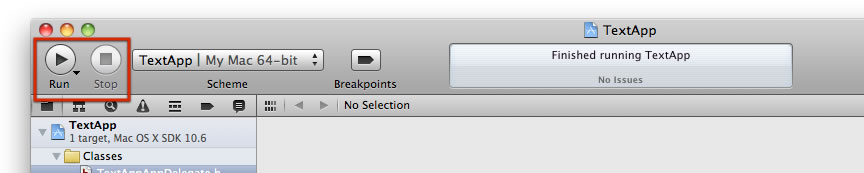
Run and Stop Buttons
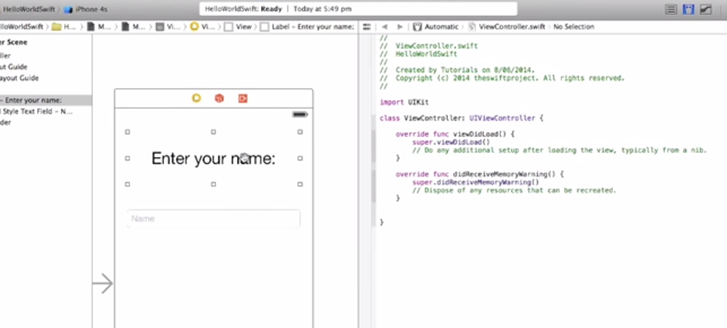
Assistant Editor -- Seeing Code associated with your GUI in StoryBoard
Now you get this-> See the code
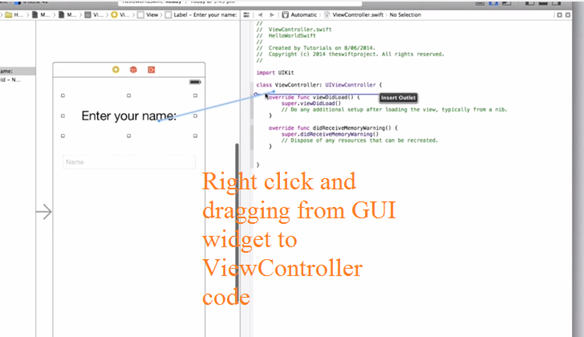
Making Connections: IBOutlet and IBAction
There are a few ways you can do this -- but, this is what I suggest
STEP 1: in StoryBoard editor with AssistantEditor up (so can see both GUI and code)
STEP 2: Right-click (or Ctrl-click)on GUI element and drag to ViewController code below the class statement and release
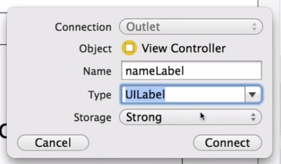
STEP 3: fill in pop-up ---give it a name (here "nameLabel") and hit Connect
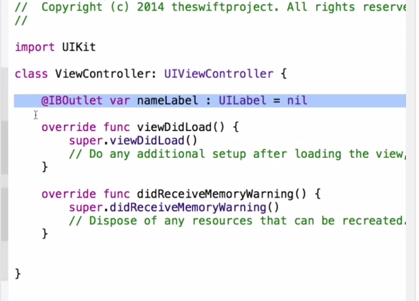
STEP 4: here is resulting code
XCode Dock "window"

The Dock shows the top-level objects in the scene.
Each scene has at least:
-
 View Controller object,
 -
 First Responder object,
 -
 Exit item