CS4521: Mobile and Topics in Web Programming |
||||||
|
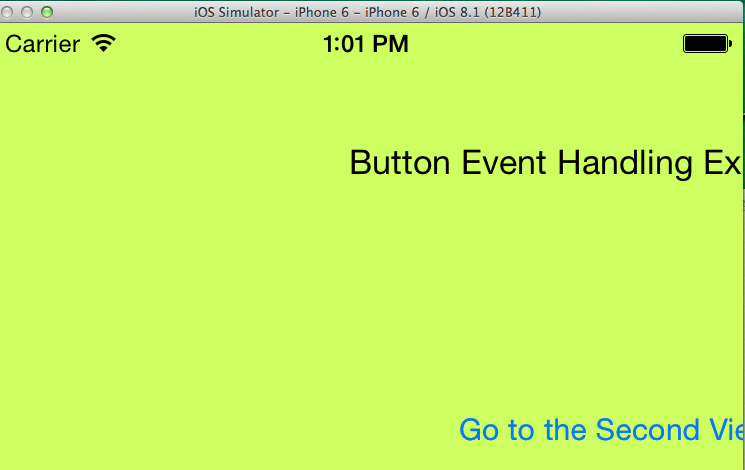
Button Event handling example
(examples here are shown with XCode 6.*)
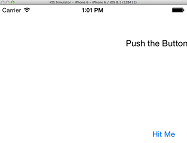
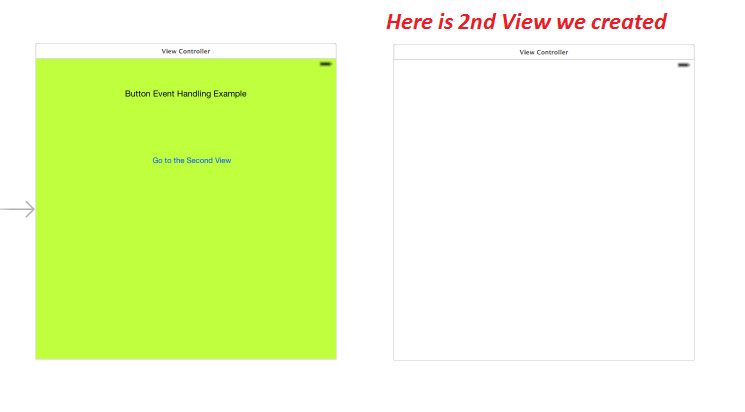
First Interfacehit "Go to the Second" button->
|
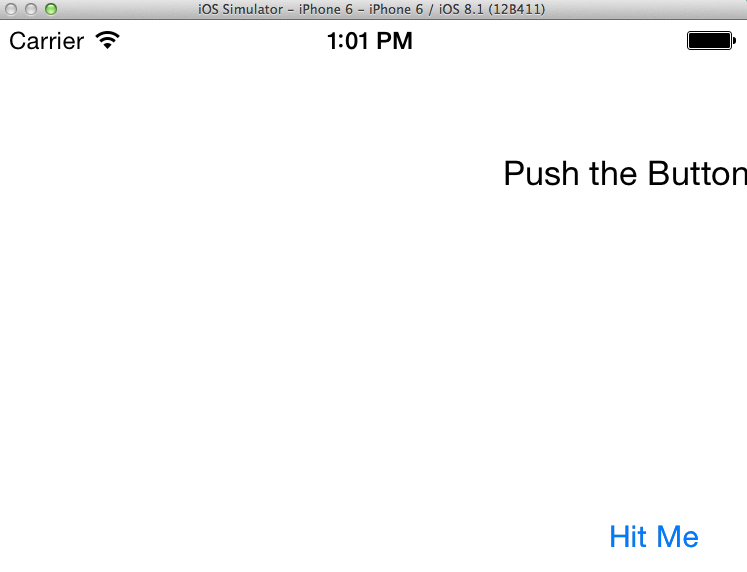
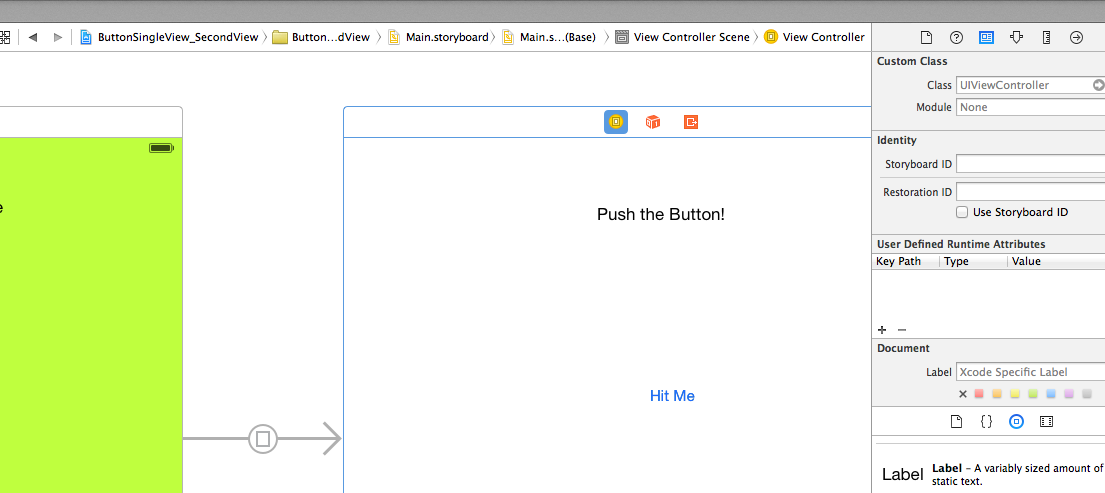
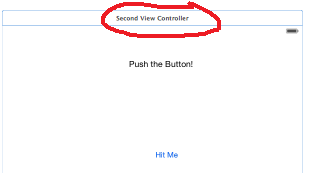
Second Interface
|
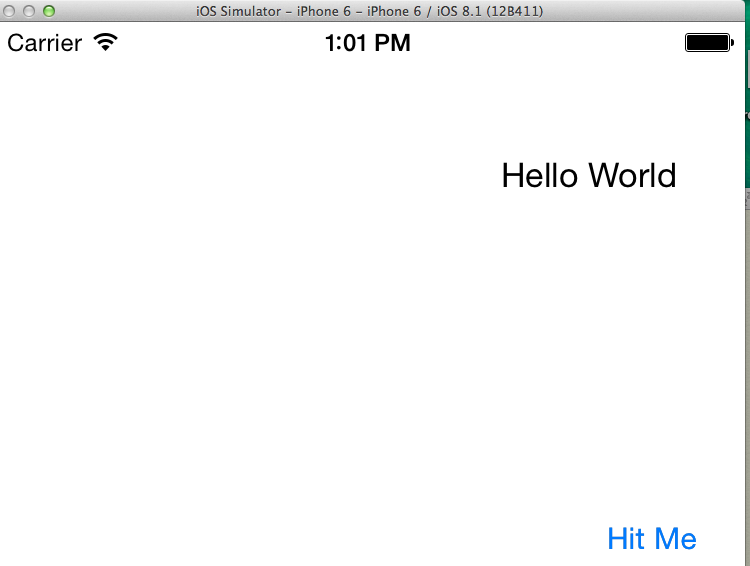
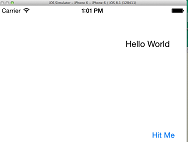
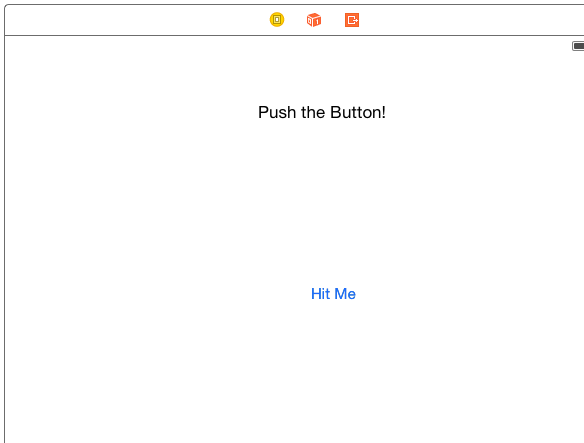
After hit the "Hit Me" button , label changes
|

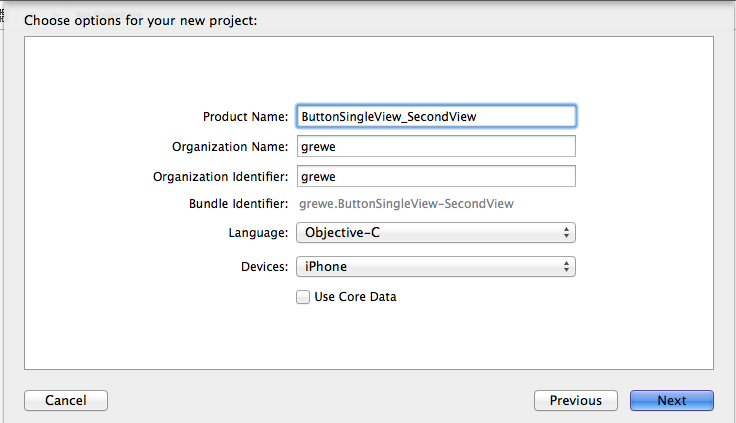
STEP 1: Create a Single View App: in XCode File->New->Project-> “Single View”
Name it, target for iPhone
Files Created
Meaning
AppDelegate.h
Header file for Applications Delegate class
AppDelegate.m
Implementation file for Applications Delegate class
ViewController.h
Header file for ViewController associated with Launched ("main") interface of our app
ViewController.m
Implementation file
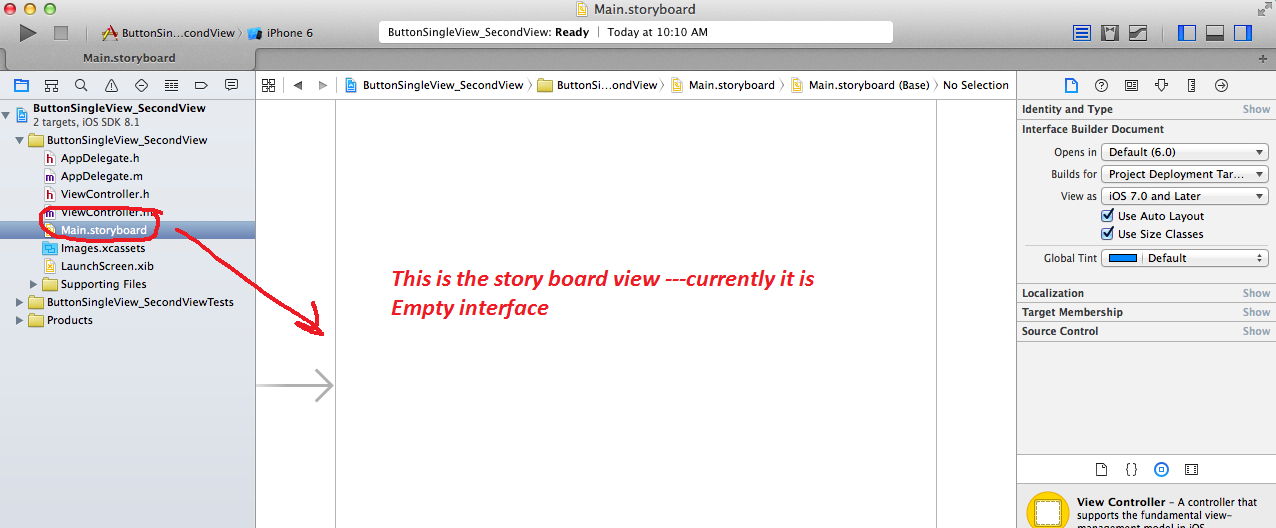
Main.storyboard
File showing Storyboard contianing intially a UIViewController Interface we can edit graphically with XCode
STEP 2: Go to the StoryBoard (Main.StoryBoard) to create your GUI for Main (Launch) Interface
-
This is what you use to design your main interface.
-
Drag and drop from the object library in the lower right hand corner your desired GUI
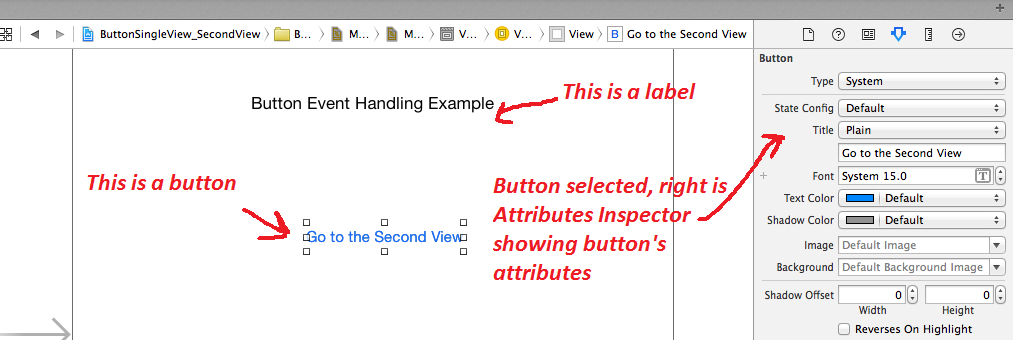
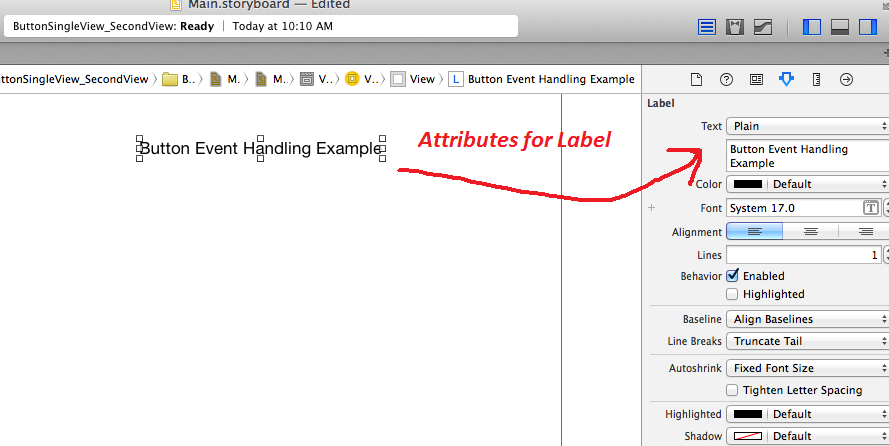
Add Label and Button
note the button is selected and properties in attribute inspector windowNote that Attributes Inspector Tab in far right hand side is where you alter the values/properties of each widgets
STEP 3: Create Second View Controller (Interface)
STEP 3.1 Go to Object Library and select “View Controller”
Drag the View Controller Object to the Story Board to the Right of our First View
TIP right click in the story board view to select to zoom out)
STEP 3.2 Add widgets to second view
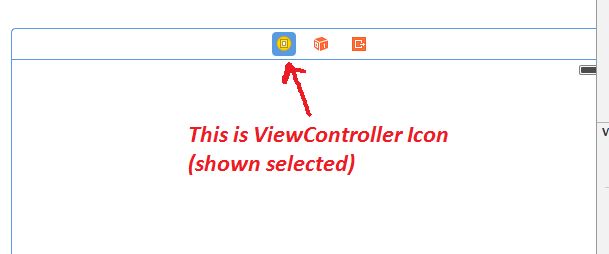
IMPORTANT - to be able to edit this second view Hit the top “View Contorller” Icon (top left) of the 2nd View. Now you can drag and drop from Object LibrarySee View controller icon on top left of 2nd view
Here we add a Label="Butt the Button" and Button="Hit Me"

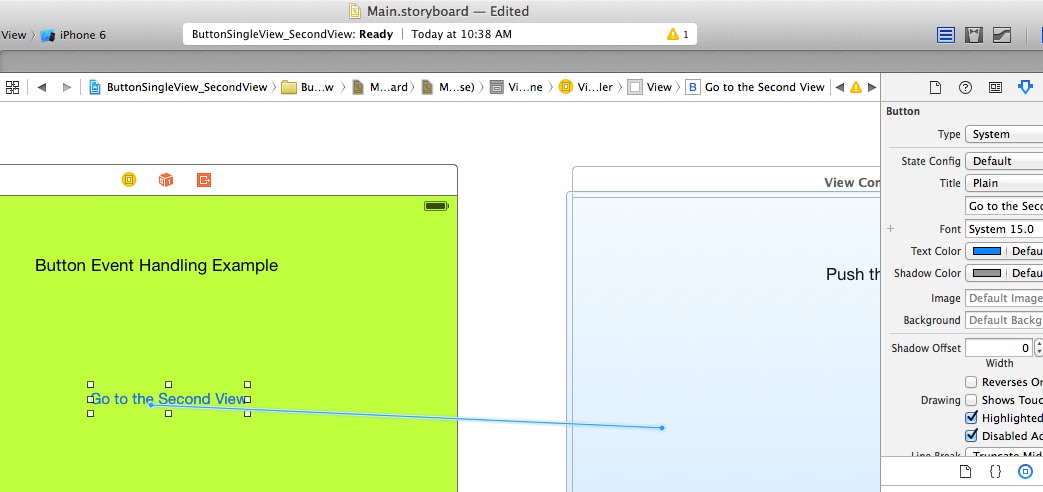
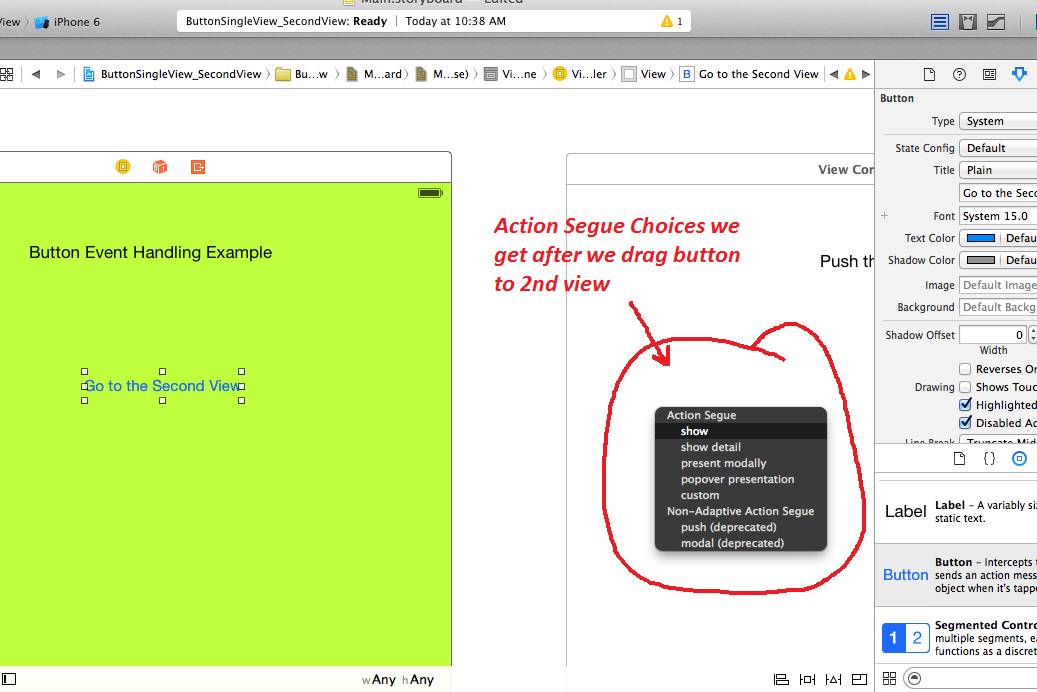
STEP 4: Event Handling Setup through Interface Builder Story Board
-
Using Option to Graphically setup Event Handling when Button in 1st view is hit will display the 2nd view
iOS Presenting and Dismissing View Controllers from Other ViewControllers
IN Story Board Interface Builder: Select Button in 1st Interface "right click"->drag to 2nd interface ->release->select "present modally"
STEP 5: Create 2nd View Controller (CODE)
If you had a dummy interface that just say showed the user something statically, you would not need to create some code to back up the 2nd View we created an Interface for in step 3. But, this is not usually the case. So, we need to create a .h and .m file representing the ViewController code we will later tie to the interface we made in step 3.
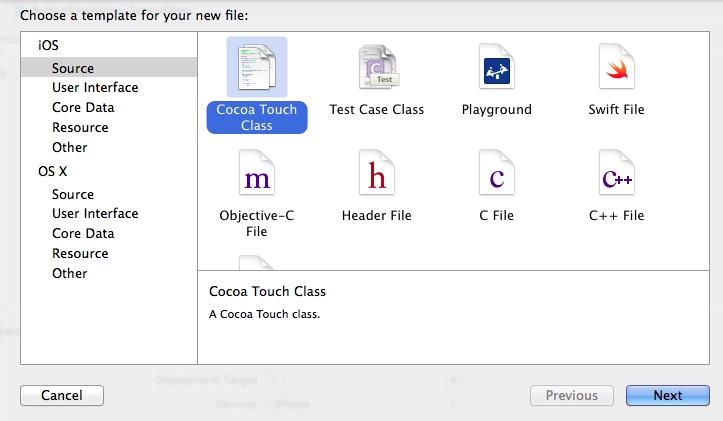
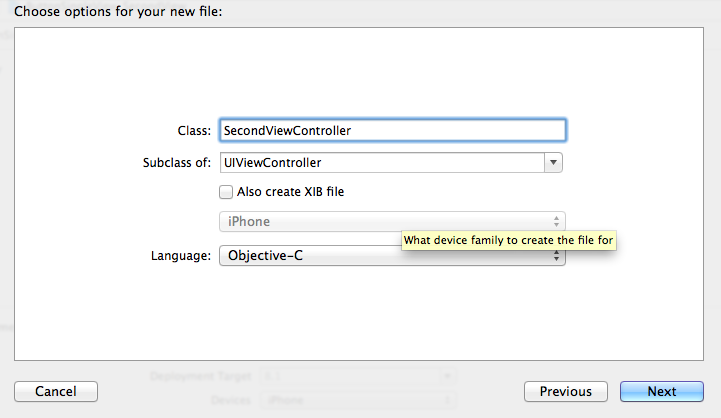
Step 5.1: Create Cocoa Touch Class that extends UIViewController
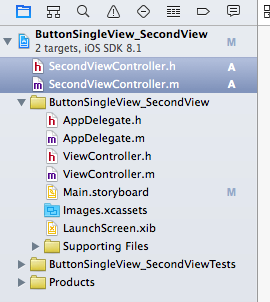
Step 5.2: Move Created Files into your Project code folder
->
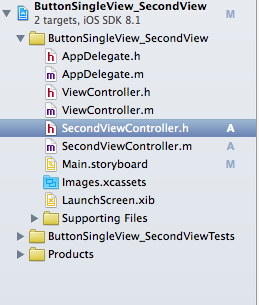
Step 5.3 Edit the SecondViewController.h
IBOutlet: associated with the Interface widgets (you want to manipulate in code) of the corresponding view you created in step 3.
IBAction: any actions you may receive from the View you can declare the triggered Event Handling Method code.
This means we create an IBOutlet for the Label (we want to change the value when hit the button)
//
// SecondViewController.h#import <UIKit/UIKit.h>
@interface SecondViewController : UIViewController
@end
->
Will implement the PressHitButton method which will look like the following. Basically it sets the text of the HelloWorldLabel UILabel to the string “Hello World”.
#import <UIKit/UIKit.h>
@interface SecondViewController : UIViewController
{
IBOutlet UILabel *HelloWorldLabel; //declaring Label
}
-(IBAction)PressHitButton:(id)sender; //declared IBAction which will be the button
@end
Step 5.4 Edit the SecondViewController.m - implement the event handling code methods
Will implement the PressHitButton method which will look like the following. Basically it sets the text of the HelloWorldLabel UILabel to the string “Hello World”.
#import "SecondViewController.h"
@interface SecondViewController ()
@end
@implementation SecondViewController
- (void)viewDidLoad {
[super viewDidLoad];
// Do any additional setup after loading the view.
}- (void)didReceiveMemoryWarning {
[super didReceiveMemoryWarning];
// Dispose of any resources that can be recreated.
}-(IBAction) ProcessHitButton:(id)sender {
HelloWorldLabel.text = [NSString stringWithFormat:@"Hello World"];
}
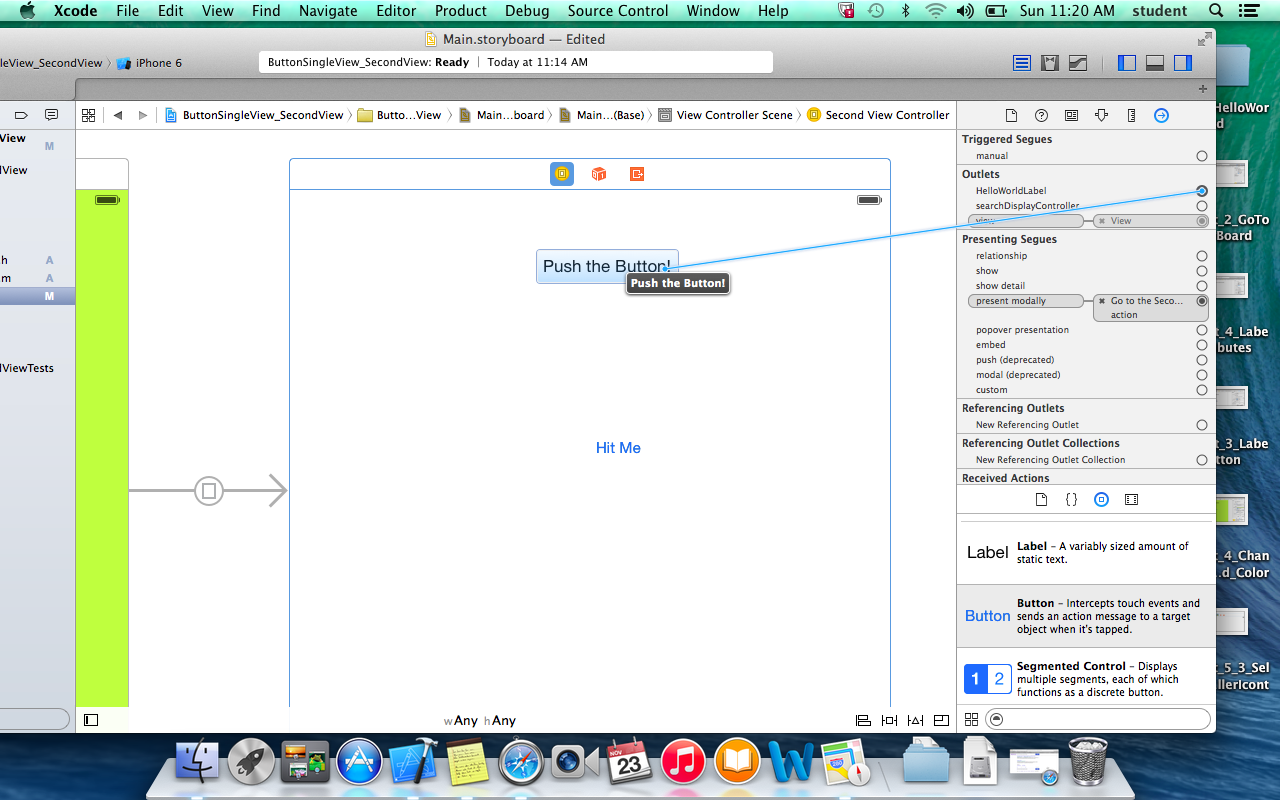
STEP 6: Associated View widgets (from step 3) with Appropriate IBOutlets and IBActions in ViewController Code (from step 5)
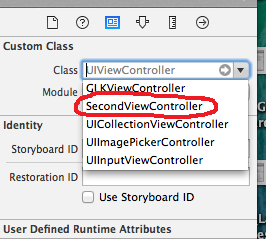
Step 6.1: Go to StoryBoard and select Second View & in right window the Identity Inspector
Step 6.2: Identity Inspector- select Custom Class = SecondViewController class you created in step 5
The result is now the Story Board shows the 2nd View is associated with SecondViewController
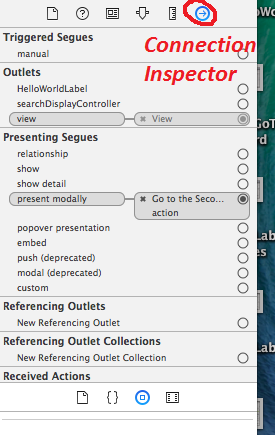
Step 6.3: switch to "Connections Inspector" (note far right arrow icon)
Step 6.4: Connect Outlets to Widgets (here we drag HelloWorldLabel ->Label)
Step 6.5 Register Events-- Connect Received Actions (IBActions in code) to Widgets that trigger this code
Here we connect the Action of "PressedHitButton" to the Button in the 2nd View that triggers this code
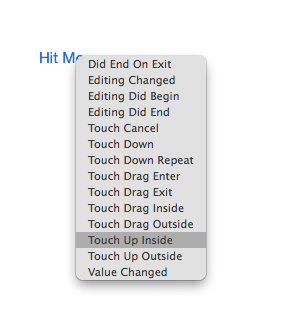
NOTE: when you lift up you must select the kind of event (here we choose "Touch Up Inside")
Event Type
Meaning (appropriate for related widget)
Did End on Exit
example: textField sends the "Did End On Exit" event when you hit the return key
Editing Changed
Edit Did Begin
Touch Cancel
Touch Down
Touch Down Repeat
Touch Drag Enter
Touch Drag Exit
Touch Drag Inside
Touch Drag Outside
Touch Up Inside
example: button lift up
Touch Up Outside
Value Changed
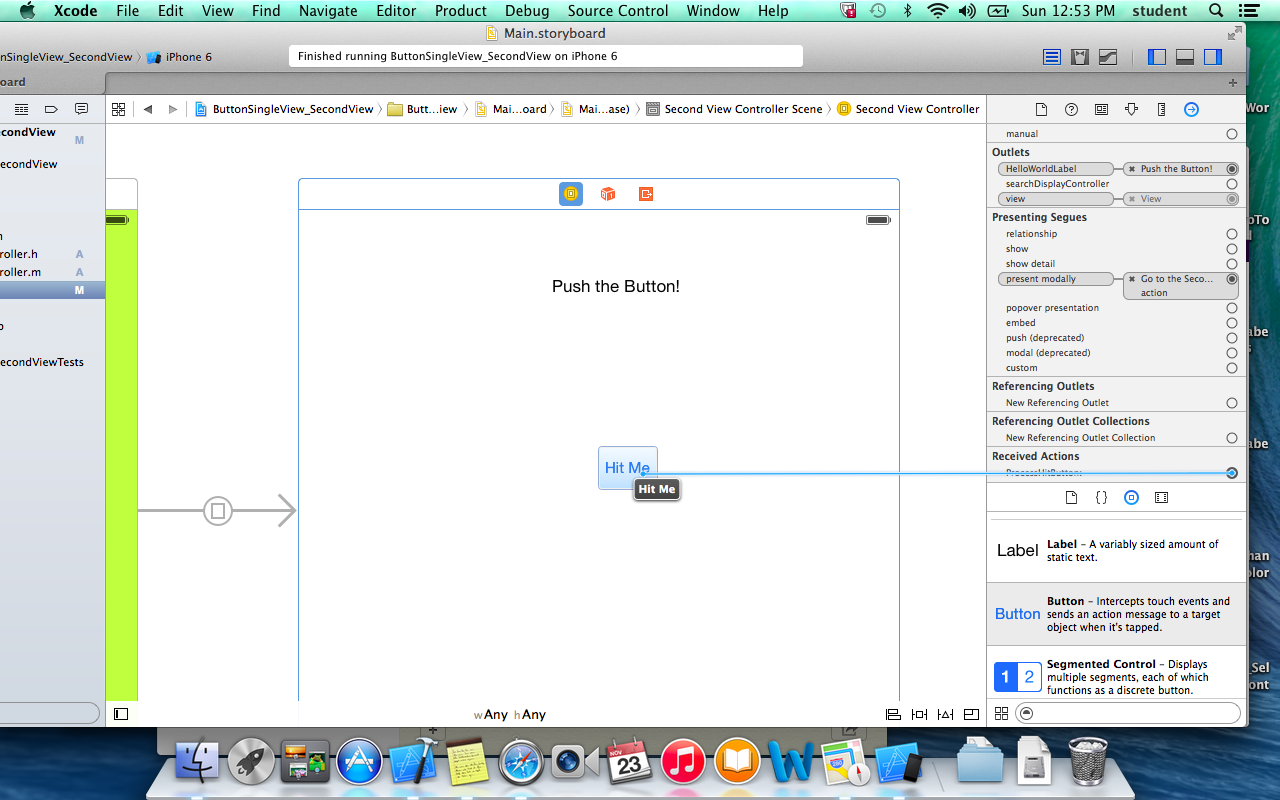
STEP 7: Run the Code (here in Simulator Run button or Project->Run)
App is Launched
Running on 1st View
2nd View after hit "Go to the Second..." button
After hitting "Hit Me"