CS4521: Mobile and Topics in Web Programming |
||||||
|
ListFragement and Fragment classes Example
Taken from http://www.techrepublic.com/blog/app-builder/get-started-with-android-fragments/1050
1. Create a new Android project using Eclipse. To natively support fragments, you must target Android 3.0 (Honeycomb) or greater.
Be sure to change the name of the startup activity to Main.java.
2. For the demo, we will use two layouts: One to represent our main container which holds the two fragments, and a second one to define our detail fragment. The list fragment we will define in code by extending the handy ListFragment class. Add the following layouts to your /res/layout folder.
main.xml


<?xml version="1.0" encoding="utf-8"?>
<LinearLayout xmlns:android="http://schemas.android.com/apk/res/android"
android:layout_width="fill_parent"
android:layout_height="fill_parent"
android:orientation="horizontal" >
<fragment
android:id="@+id/frag_series"
android:layout_width="200dip"
android:layout_height="match_parent"
android:layout_marginTop="?android:attr/actionBarSize"
class="com.authorwjf.hello_fragments.ListFrag" />
<fragment
android:id="@+id/frag_capt"
android:layout_width="match_parent"
android:layout_height="match_parent"
class="com.authorwjf.hello_fragments.DetailFrag" />
</LinearLayout>


detail_fragment.xml

<?xml version="1.0" encoding="utf-8"?>
<LinearLayout xmlns:android="http://schemas.android.com/apk/res/android"
android:layout_width="match_parent"
android:layout_height="match_parent"
android:orientation="vertical" >
<TextView
android:id="@+id/captain"
android:layout_width="wrap_content"
android:layout_height="match_parent"
android:layout_gravity="center_horizontal|center_vertical"
android:layout_marginTop="20dip"
android:text="Johnathan Archer"
android:textAppearance="?android:attr/textAppearanceLarge"
android:textSize="30dip" />
</LinearLayout>
3. We are ready to move on to the source folder. Because fragments act almost like activities, the code in Main.java does nothing more than load the topmost layout.
Main.java

package com.authorwjf.hello_fragments;
import android.app.Activity;
import android.os.Bundle;

public class Main extends Activity {
  @Override
  public void onCreate(Bundle savedInstanceState) {
     super.onCreate(savedInstanceState);
     setContentView(R.layout.main);
}
}
4. Our DetailFrag.java implementation is nearly as simple; it inflates a view and exposes a setText method.
DetailFrag.java
package com.authorwjf.hello_fragments;
import android.app.Fragment;
import android.os.Bundle;
import android.view.LayoutInflater;
import android.view.View;
import android.view.ViewGroup;
import android.widget.TextView;
public class DetailFrag extends Fragment{
@Override
public void onCreate(Bundle savedInstanceState) {
super.onCreate(savedInstanceState);
}
@Override
public void onActivityCreated(Bundle savedInstanceState) {
super.onActivityCreated(savedInstanceState);
}
@Override
public View onCreateView(LayoutInflater inflater, ViewGroup container, Bundle savedInstanceState) {
View view = inflater.inflate(R.layout.detail_fragment, container, false);
return view;
}
public void setText(String item) {
TextView view = (TextView) getView().findViewById(R.id.captain);
view.setText(item);
}
}
5. Last is the ListFrag.java file. We create a list view, implement the on click, and make use of the fragment manager to reference one fragment from another. In the onListItemClick() method, notice the check for whether the target fragment exists in this particular layout — that allows a developer to implement a separate layout for smaller screen devices like phones. Perhaps if this post generates enough interest I will go back and extend this tutorial to do just that.
ListFrag.java


package com.authorwjf.hello_fragments;
import android.app.ListFragment;
import android.os.Bundle;
import android.view.View;
import android.widget.ArrayAdapter;
import android.widget.ListView;
public class ListFrag extends ListFragment{
@Override
  public void onCreate(Bundle savedInstanceState) {
     super.onCreate(savedInstanceState);
  }

  @Override
  public void onActivityCreated(Bundle savedInstanceState) {
     super.onActivityCreated(savedInstanceState);
     String[] values = new String[] { "Enterprise", "Star Trek", "Next Generation", "Deep Space 9", "Voyager"};
     ArrayAdapter<String> adapter = new ArrayAdapter<String>(getActivity(), android.R.layout.simple_list_item_1, values);
     setListAdapter(adapter);
  }

  @Override
  public void onListItemClick(ListView l, View v, int position, long id) {
     String item = (String) getListAdapter().getItem(position);
     DetailFrag frag = (DetailFrag) getFragmentManager().findFragmentById(R.id.frag_capt);
     if (frag != null && frag.isInLayout()) {
         frag.setText(getCapt(item));
     }
  }

  private String getCapt(String ship) {
     if (ship.toLowerCase().contains("enterprise")) {
         return "Johnathan Archer";
     }
     if (ship.toLowerCase().contains("star trek")) {
         return "James T. Kirk";
     }
     if (ship.toLowerCase().contains("next generation")) {
         return "Jean-Luc Picard";
     }
     if (ship.toLowerCase().contains("deep space 9")) {
         return "Benjamin Sisko";
     }
     if (ship.toLowerCase().contains("voyager")) {
         return "Kathryn Janeway";
     }
     return "???";
  }
}
A SPECIAL NOTE: what is android.R.layout.simple_list_item_1 ---- read the following
You can specify the layout of individual rows in the list. You do this by specifying a layout resource in the ListAdapter object hosted by the fragment (the ListAdapter binds the ListView to the data).
A ListAdapter constructor takes a parameter that specifies a layout resource for each row. It also has two additional parameters that let you specify which data field to associate with which object in the row layout resource. These two parameters are typically parallel arrays.
Android provides some standard row layout resources. These are in the
R.layoutclass, and have names such as simple_list_item_1, simple_list_item_2, etc.
Execute it now
We are ready to execute the demo. If you own an Android tablet, go ahead and download the APK to the device. If not, you can easily simulate a tablet using the ADB plugin for Eclipse and the Android Virtual Device Manager by following these steps:
1. Create an emulated device running Android API level 11.
2. Set the skin to 1280×800 pixels.
3. Bump up the device ram to 1024.
4. Set the LCD density to 149.
This should give you roughly the same experience as a first generation Motorola Xoom device.
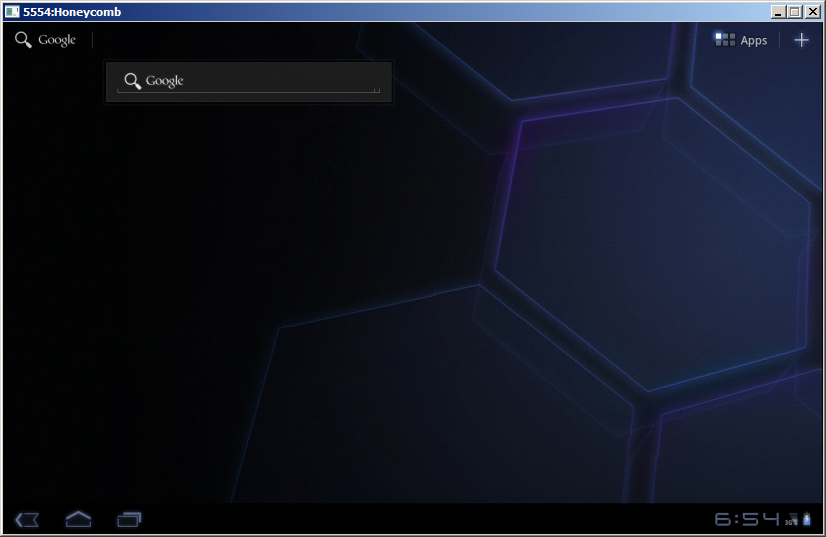
Figure Before Running App -- Emulator for simulated XOOM tablet 1st generation
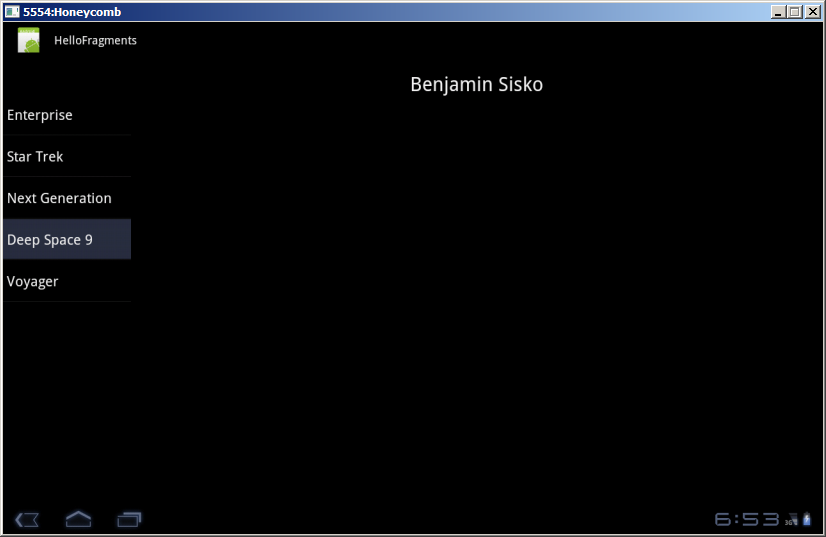
Figure : Running Application that has Activity with 2 Fragments embedded, on left, is a ListFragment and on Right
is a simple class that is a sub-class of base Fragment class.

