CS453 | mobile programming
  • outline
  • projects
  • syllabus
  • links

Android Action Bar

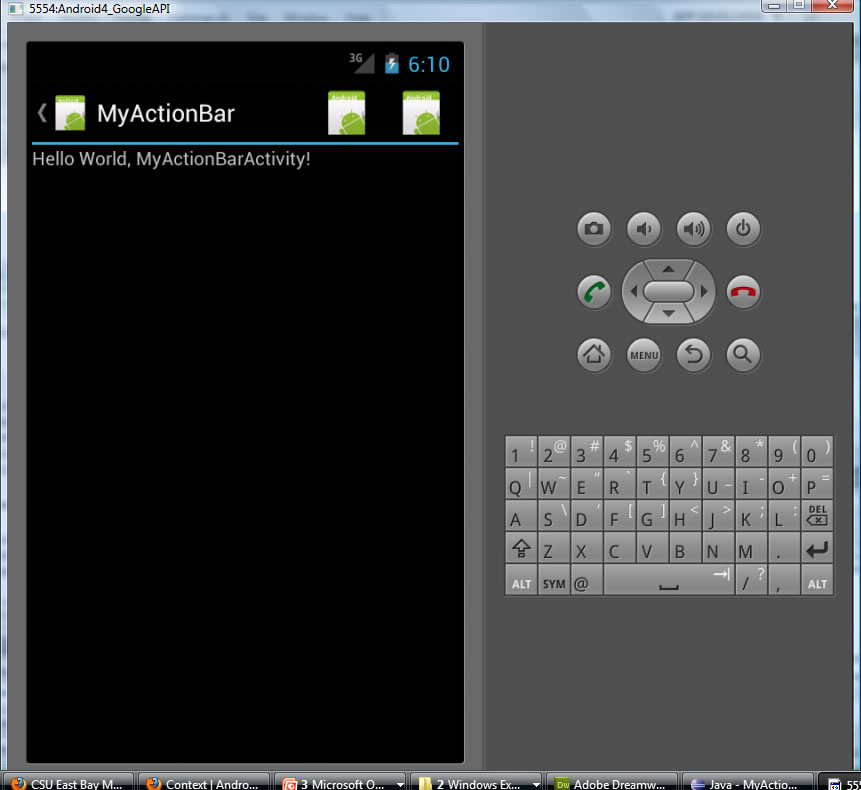
  • Activity Title + Application Icon + optional "action items"

    located at top of the Application

  • YOU can create your own Icon (rightclick on res ->new->other->Android Icon set

    Created file called buzz.png

    location of application icon

    AndroidManifest.xml file


    ***********

    <application
    android:icon="@drawable/buzz"
    android:label="@string/app_name" >

    simple application bar title and icon only


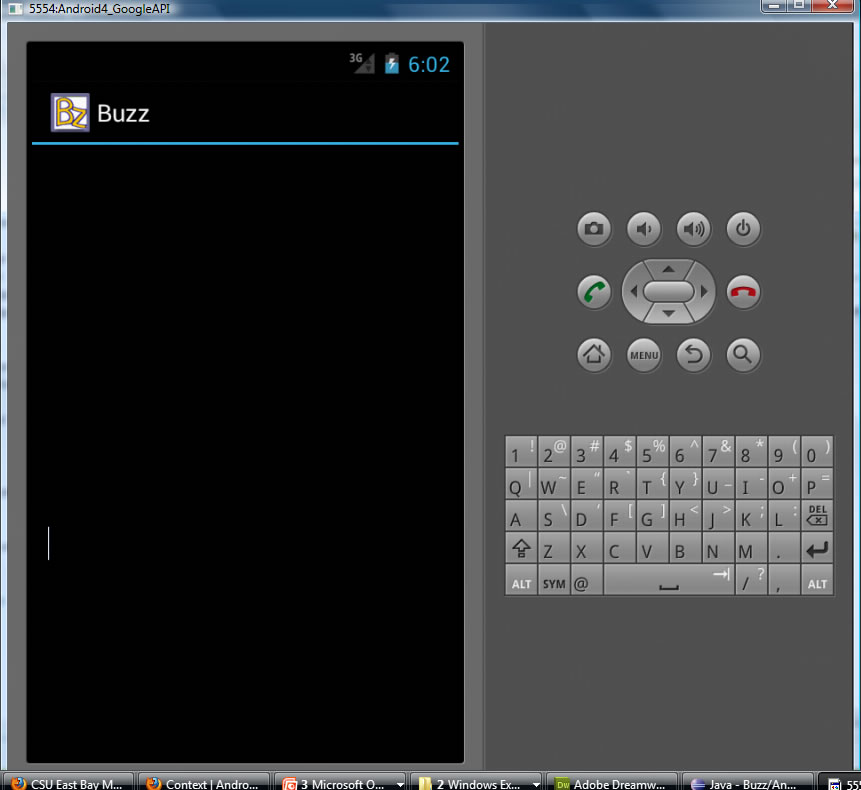
Adding Action Items to the Action Bar

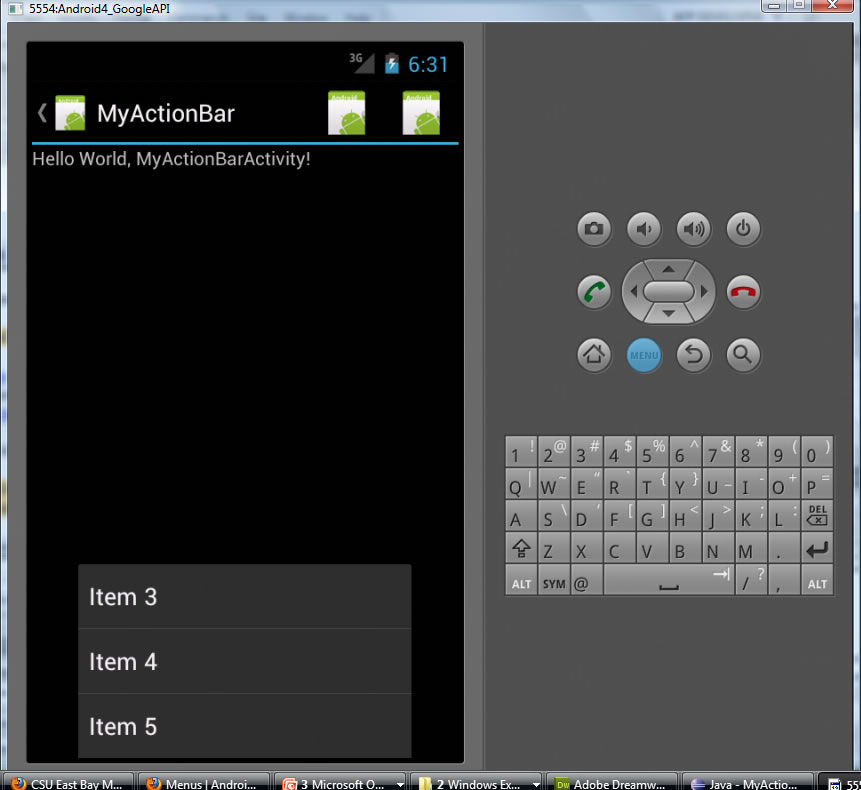
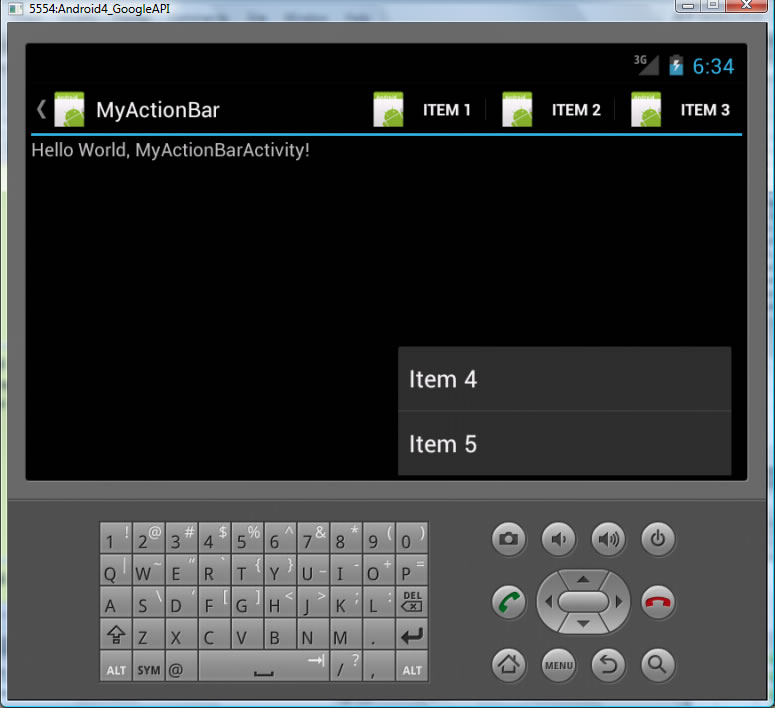
Action Items are like buttons that trigger important actions in your program -- maybe a New item for an Email Application or Reload item again for an Email Application

ACTION ITEMS = ACTIVITIES OPTIONS MENU

  • The options menu is the primary collection of menu items for an activity.
  • It's where you should place actions that have a global impact on the app, such as "Search," "Compose email," and "Settings."
  • Located in the action bar as a combination of on-screen action items and overflow options.

USE THE FOLLOWING METHODS IN YOUR ACTIVITY (override them):

  • onCreateOptionsMenu(*) = this setups up an instance of android.view.Menu that attaches to the top as "action items" in your actionbar
  • onOptionsItemSelected(*) = this is the event handler callback function that is invoked when the user selects any of the menu items

Example from Book (Books/Android/Source Code/MyActionBar)

AndroidManifest.xml

action bar

<?xml version="1.0" encoding="utf-8"?>
<manifest xmlns:android="http://schemas.android.com/apk/res/android"
 package="net.learn2develop.MyActionBar"
 android:versionCode="1"
 android:versionName="1.0" >
 <uses-sdk android:minSdkVersion="14" />
 <application
         android:icon="@drawable/ic_launcher"
         android:label="@string/app_name" >

    <activity      android:label="@string/app_name"      android:name=".MyActionBarActivity">         <intent-filter >             <action android:name="android.intent.action.MAIN" />
            <category android:name="android.intent.category.LAUNCHER" />
        </intent-filter>
    </activity>
</application>
</manifest>


TO SEE Overflow action items (options menu) hit the menu button on emulator


showing overflow (hit the menu button on emulator)
package net.learn2develop.MyActionBar;
import android.app.ActionBar;
         import android.app.Activity;
         import android.content.Intent;
         import android.os.Bundle;
         import android.view.Menu;
         import android.view.MenuItem;
         import android.widget.Toast;
public class MyActionBarActivity extends Activity {
         /** Called when the activity is first created. */
         @Override
         public void onCreate(Bundle savedInstanceState) {
         super.onCreate(savedInstanceState);
         setContentView(R.layout.main);
   
         ActionBar actionBar = getActionBar();
         actionBar.setDisplayHomeAsUpEnabled(true);  //this makes the action items clickable
         //actionBar.setDisplayShowHomeEnabled(true);
         //actionBar.hide(); //if we wanted to hide the action bar altogether
         //actionBar.show(); //---show it again---
         }
   
        //setup the Menu that will be used as the Action Items in the ActionBar
         @Override
         public boolean onCreateOptionsMenu(Menu menu) { 
              super.onCreateOptionsMenu(menu);
              CreateMenu(menu);
              return true;
         }
   

         //Event handler callback function if an ActionItem (MenuItem) in the ActionBar(menu) is selected
         @Override
         public boolean onOptionsItemSelected(MenuItem item)
         { 
              return MenuChoice(item); 
         } 


         //this is the method that actually makes the Menu setting up 5 "dummy" MenuItems to represent
// the action items.
private void CreateMenu(Menu menu) {      MenuItem mnu1 = menu.add(0, 0, 0, "Item 1");      {           mnu1.setIcon(R.drawable.ic_launcher);           mnu1.setShowAsAction( MenuItem.SHOW_AS_ACTION_IF_ROOM | MenuItem.SHOW_AS_ACTION_WITH_TEXT);      }      MenuItem mnu2 = menu.add(0, 1, 1, "Item 2");      {           mnu2.setIcon(R.drawable.ic_launcher);           mnu2.setShowAsAction( MenuItem.SHOW_AS_ACTION_IF_ROOM | MenuItem.SHOW_AS_ACTION_WITH_TEXT);      }      MenuItem mnu3 = menu.add(0, 2, 2, "Item 3");      {           mnu3.setIcon(R.drawable.ic_launcher);           mnu3.setShowAsAction( MenuItem.SHOW_AS_ACTION_IF_ROOM | MenuItem.SHOW_AS_ACTION_WITH_TEXT);      }           MenuItem mnu4 = menu.add(0, 3, 3, "Item 4");      {           mnu4.setShowAsAction(MenuItem.SHOW_AS_ACTION_IF_ROOM |MenuItem.SHOW_AS_ACTION_WITH_TEXT);      }           MenuItem mnu5 = menu.add(0, 4, 4, "Item 5");      {           mnu5.setShowAsAction(MenuItem.SHOW_AS_ACTION_IF_ROOM |MenuItem.SHOW_AS_ACTION_WITH_TEXT);      } } //This is the method called by eventhandler callback to handle each menuItem as it is selected by user // simply displays using android.widget.Toast a temporary message to user they selected that item. private boolean MenuChoice(MenuItem item) {      switch (item.getItemId()) {           case android.R.id.home:                Toast.makeText(this, "You clicked on the Application icon",Toast.LENGTH_LONG).show();
                        Intent i = new Intent(this, MyActionBarActivity.class);
                        i.addFlags(Intent.FLAG_ACTIVITY_CLEAR_TOP);
                        startActivity(i);
                        return true;
          case 0:                Toast.makeText(this, "You clicked on Item 1",                Toast.LENGTH_LONG).show();                return true;           case 1:                Toast.makeText(this, "You clicked on Item 2",                Toast.LENGTH_LONG).show();                return true;           case 2:                Toast.makeText(this, "You clicked on Item 3",                Toast.LENGTH_LONG).show();                return true;           case 3:                Toast.makeText(this, "You clicked on Item 4",                Toast.LENGTH_LONG).show();                return true;                case 4:                Toast.makeText(this, "You clicked on Item 5",                Toast.LENGTH_LONG).show();                return true;      }      return false; }
}


NOTE the above code has the statement --- it says to show with the attached text the menu item -- see below where both the icon for that menu
item and its text are both shown when application is in landscape mode and has more room.

MenuItem mnu1 = menu.add(0, 0, 0, "Item 1");     
{          
       mnu1.setIcon(R.drawable.ic_launcher);          
      
mnu1.setShowAsAction( MenuItem.SHOW_AS_ACTION_IF_ROOM | MenuItem.SHOW_AS_ACTION_WITH_TEXT);     

}


action bar showing with text option


cs453:mobile programming

  • home
  • outline
  • projects
  • syllabus
  • links