How to Develop on a Real Physical Device from IDE (like Android Studio)
Note: you can alternatively move the .apk file for the project to the device directly.
If you run in debug mode it will let you capture Log information, etc.
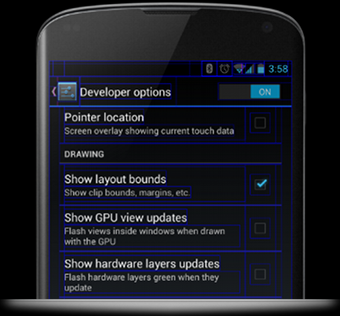
- Enable debugging over USB.
- Quickly capture bug reports onto the device.
- Show CPU usage on screen.
- Draw debugging information on screen such as layout bounds, updates on GPU views and hardware layers, and other information.
- Plus many more options to simulate app stresses or enable debugging options.
STEP 1:SETUP your device:
see http://developer.android.com/tools/device.html for current instruction (VERIFY)
-
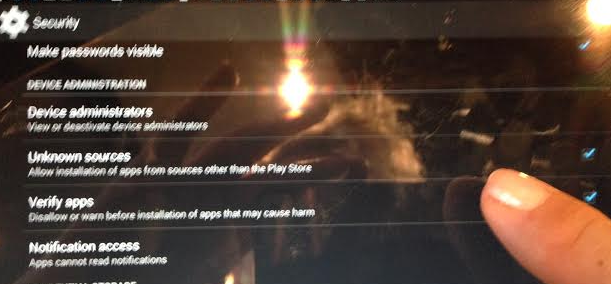
Select Device->Settings->Security->Unknow Sources = turn it on
-
SETUP your Device->Settings->Devloper Options. To access these settings, open the Developer options in the system Settings.
-
On Android 4.2 and higher, the Developer options screen is hidden by default. To make it visible, go toSettings > About phone and tap Build number seven times. Return to the previous screen to find Developer options at the bottom.
-
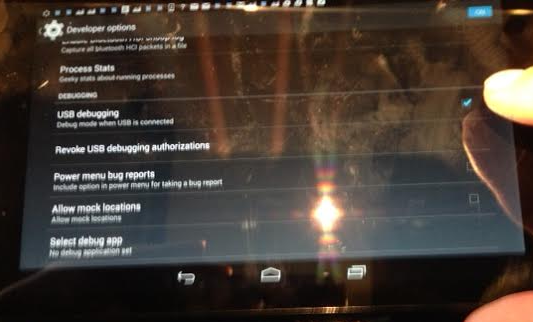
Make sure you select USB Debuggin and set it ON
-
There are other options...you can set too. Read developer android site to learn about them (they are optional)
-
STEP 2: SETUP YOUR ENVIRONMENT For development on Windows machines need USB Driver
OPTION 0 Mac devices --- it says you don't need to do anything
OPTION 1 Non Google Nexus Device
Download drivers ---see details at http://developer.android.com/tools/extras/oem-usb.html
OPTION 2 Have Google Nexus Device
download the Google USB drivers in the Android SDK Manager

YOU MAY NEED to make sure your Device is setup in WINDOWS to use this USB driver for ADB.
You may have to do step 6 and 7 of http://www.androidauthority.com/how-to-root-the-amazon-kindle-fire-36015/
Step 6: Update the USB driver for YOUR DEVICE.
- Open Device Manager from the Control Panel window.
- Look for YOUR Device under Other Devices.
- Right click Device and select “Update Driver Software”.
- Select “Browse my computer for driver software”.
- We now have to browse for the USB driver file we edited earlier, which should be located under Android SDK folder->Extras->Google.
- After choosing the directory, just click Next and a prompt saying “Windows can’t verify the publisher of this driver software” will show up. Click “Install this driver software anyway”.
Step 7: Check if Android SDK will now recognize the DEVICE
- Open up a command prompt window.
- Go to the folder were the Android SDK is installed using the cd command.
- From the Android SDK folder, access the platform-tools folder by still using the cdcommand.
- Under the platform-tools folder, issue the adb kill-server command.
- Next you have to issue the adb devices command. This will give you text similar to the one below. This will indicate that the SDK recognizes the DEVICE.
Here is an example where I have both an emulator (emulator-5554) and a device (057c4400) running 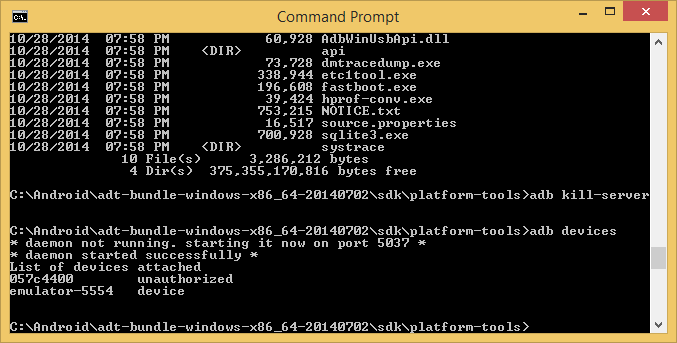
NOTE: On Android Studio --you need to find the install path for platform tool adb.exe for example on my machine is:
C:\Users\Lynne\AppData\Local\Android\sdk1\platform-tools
STEP 3: NOW RUN ON THE DEVICE
1) Right click on Project and select Run
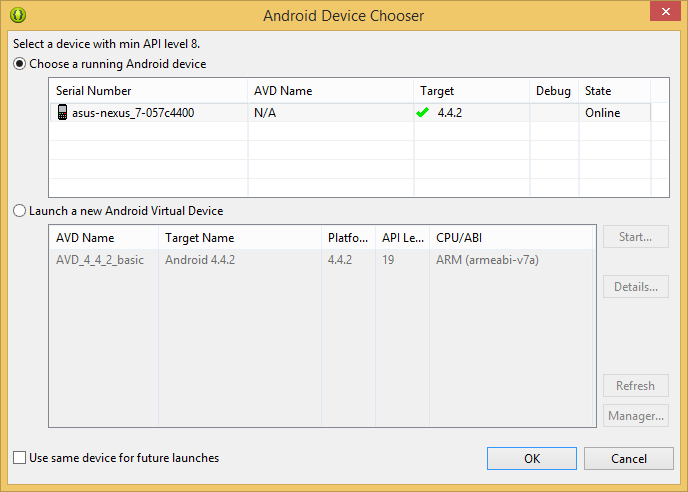
2) You will get prompt ...and select your device. See below where I have a nexus 7 tablet connected and setup
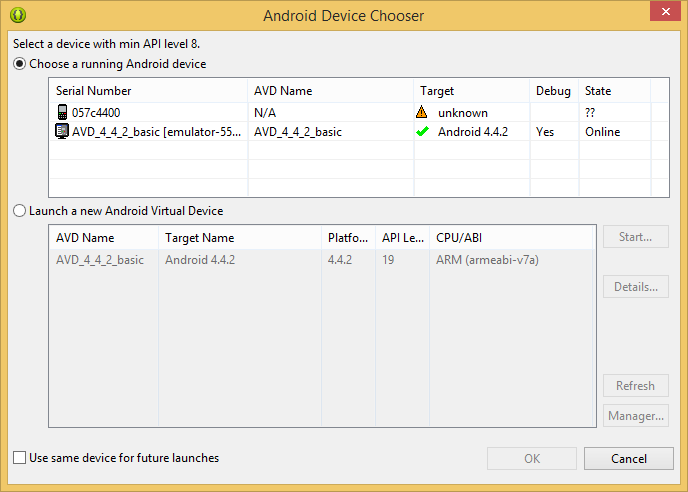
Potential Problem ---if when you do run as device you see Target unknown and a strange device name (below 057c440)....
Solution 1: retart the IDE to restart adb underneath
Then you should get this
IF THAT DOESN'T WORK ....
SOLUTION 2: go to device, Settings->Developer Options/Settings-> Toggle off and on the "USB debugging" option as shown below.
Then try to run again on the device it should show a real device
