Android Emulator
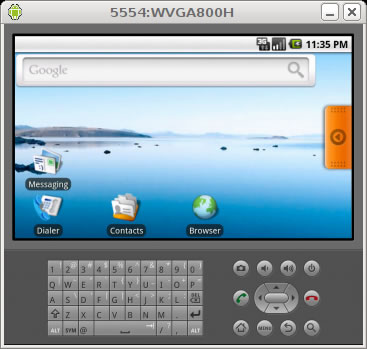
The Android SDK includes a virtual mobile device emulator that runs on your computer. The emulator lets you prototype, develop, and test Android applications without using a physical device. The "look" of the emulator will change depending on the AVD (android Virtual Device) properties you have setup
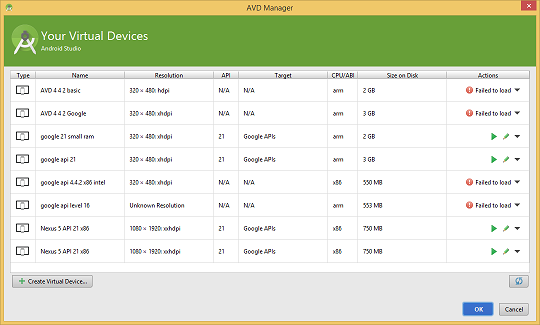
Android AVD manager --- this is where you setup different AVDs that let you simulate different devices in your emulator!!!!!
-
To use the emulator, you first must create one or more AVD configurations.
-
In each configuration, you specify an Android platform to run in the emulator and the set of hardware options and emulator skin you want to use. Then, when you launch the emulator, you specify the AVD configuration that you want to load.
-
Regardless of IDE used, the AVD manager stores the information about the AVDs in the .android directory (e.g. C:\Users\YOUR_UserName\.android)
Android Studio: Tools -> Android->AVD Manager
You will see current AVD configurations (if any) that you have created --- you can select one here and launch it to run with "START" button or you can "Edit" it and change the configuration!!!
| Android Studio |
|---|
|
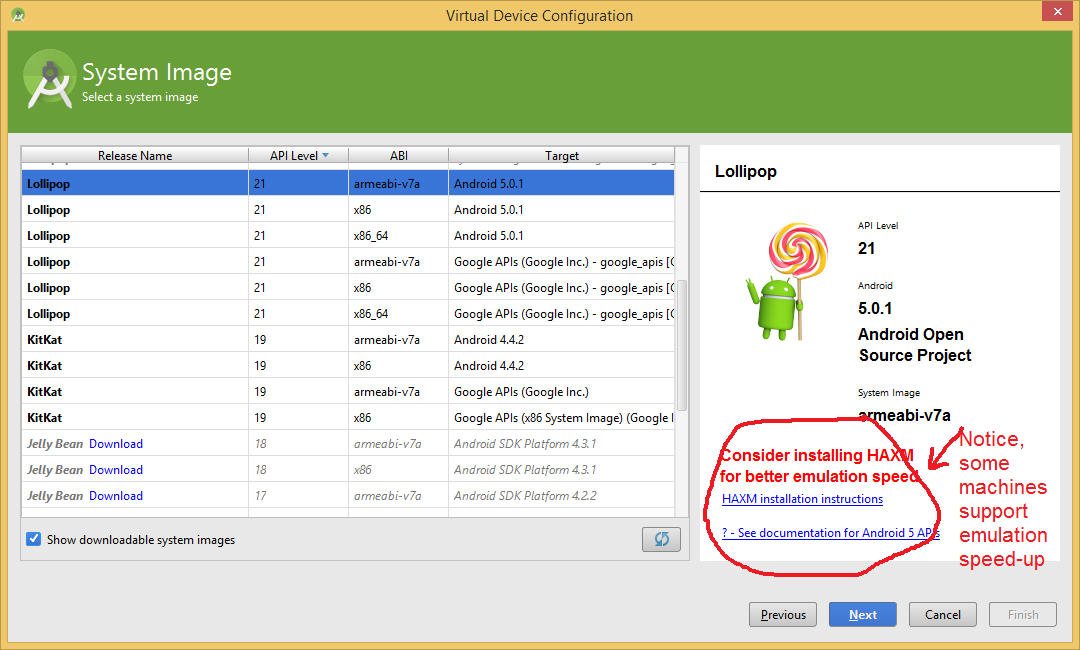
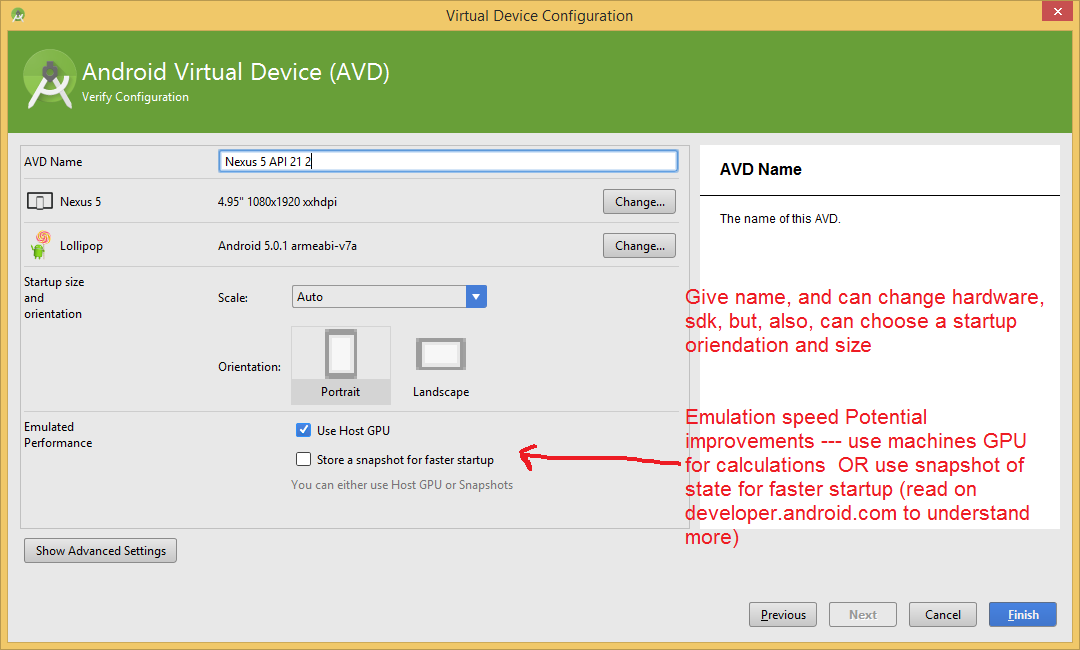
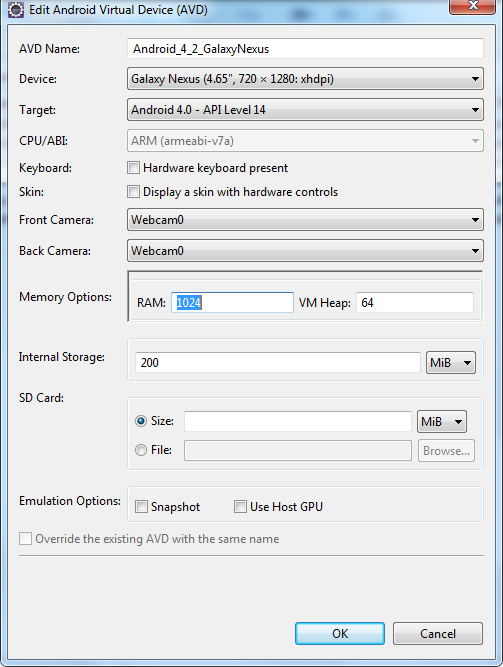
Create a New AVD (android virtual device) configuration
** this is showing a good setup for Android SDK 4.4.2 device
|
|
Step 1: Launch AVD and hit Create Virutal Device button |


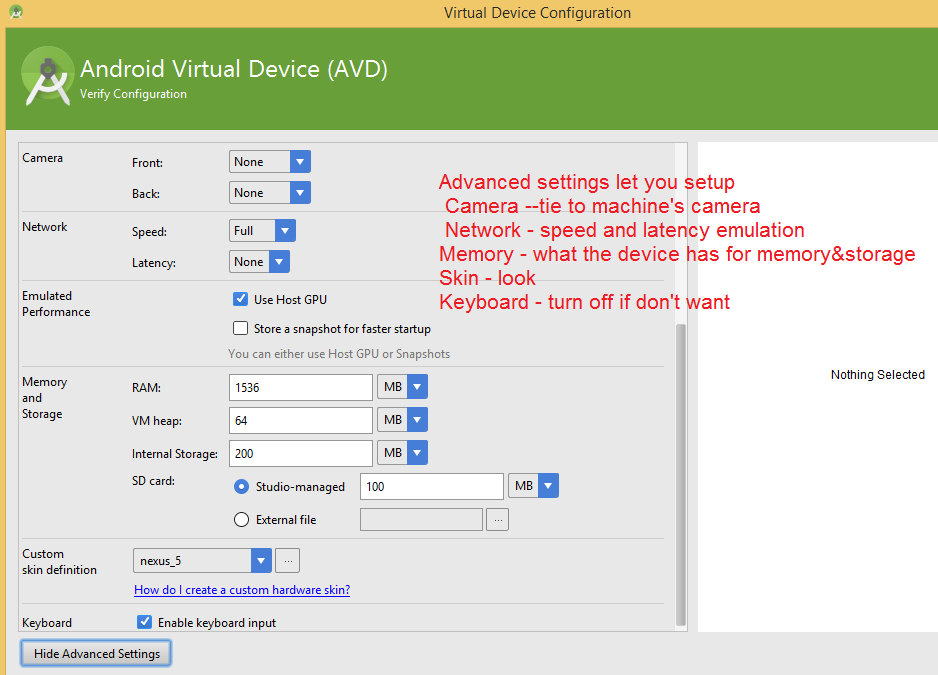
Hardware options for AVD
see Android.com for latest up to date list (this CAN CHANGE)
YOU NEED to add HW options to emulator to enable testing/emulation of certain HW. Example you need to add GPS support to true if
| Characteristic | Description | Property |
|---|---|---|
| Device ram size | The amount of physical RAM on the device, in megabytes. Default value is "96". | hw.ramSize |
| Touch-screen support | Whether there is a touch screen or not on the device. Default value is "yes". | hw.touchScreen |
| Trackball support | Whether there is a trackball on the device. Default value is "yes". | hw.trackBall |
| Keyboard support | Whether the device has a QWERTY keyboard. Default value is "yes". | hw.keyboard |
| DPad support | Whether the device has DPad keys. Default value is "yes". | hw.dPad |
| GSM modem support | Whether there is a GSM modem in the device. Default value is "yes". | hw.gsmModem |
| Camera support | Whether the device has a camera. Default value is "no". | hw.camera |
| Maximum horizontal camera pixels | Default value is "640". | hw.camera.maxHorizontalPixels |
| Maximum vertical camera pixels | Default value is "480". | hw.camera.maxVerticalPixels |
| GPS support | Whether there is a GPS in the device. Default value is "yes". | hw.gps |
| Battery support | Whether the device can run on a battery. Default value is "yes". | hw.battery |
| Accelerometer | Whether there is an accelerometer in the device. Default value is "yes". | hw.accelerometer |
| Audio recording support | Whether the device can record audio. Default value is "yes". | hw.audioInput |
| Audio playback support | Whether the device can play audio. Default value is "yes". | hw.audioOutput |
| SD Card support | Whether the device supports insertion/removal of virtual SD Cards. Default value is "yes". | hw.sdCard |
| Cache partition support | Whether we use a /cache partition on the device. Default value is "yes". | disk.cachePartition |
| Cache partition size | Default value is "66MB". | disk.cachePartition.size |
| Abstracted LCD density | Sets the generalized density characteristic used by the AVD's screen. Default value is "160". | hw.lcd.density |
| Trackball support | Whether there is a trackball present. |
you are using Google Maps and GPS location. Note for Maps built-in applciation and many Google APIs, you MUST HAVE YOUR AVD setup for Google API not jus the standard Android
How to specify that your project will run using a specific AVD
-
The minimum SDK that you have under your project properties must not be greater than the AVD you select for running your program with
-
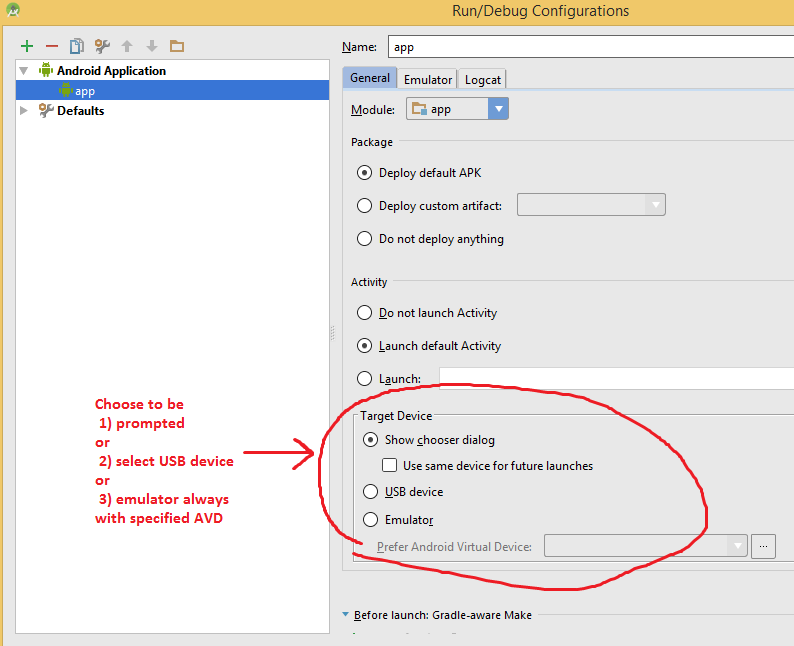
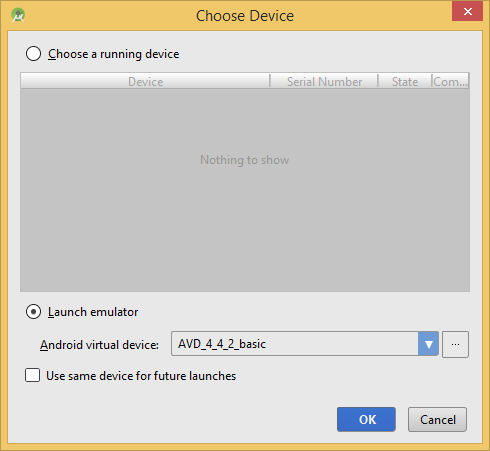
GO to Run->Edit Configurations and it will pop up the following window
-
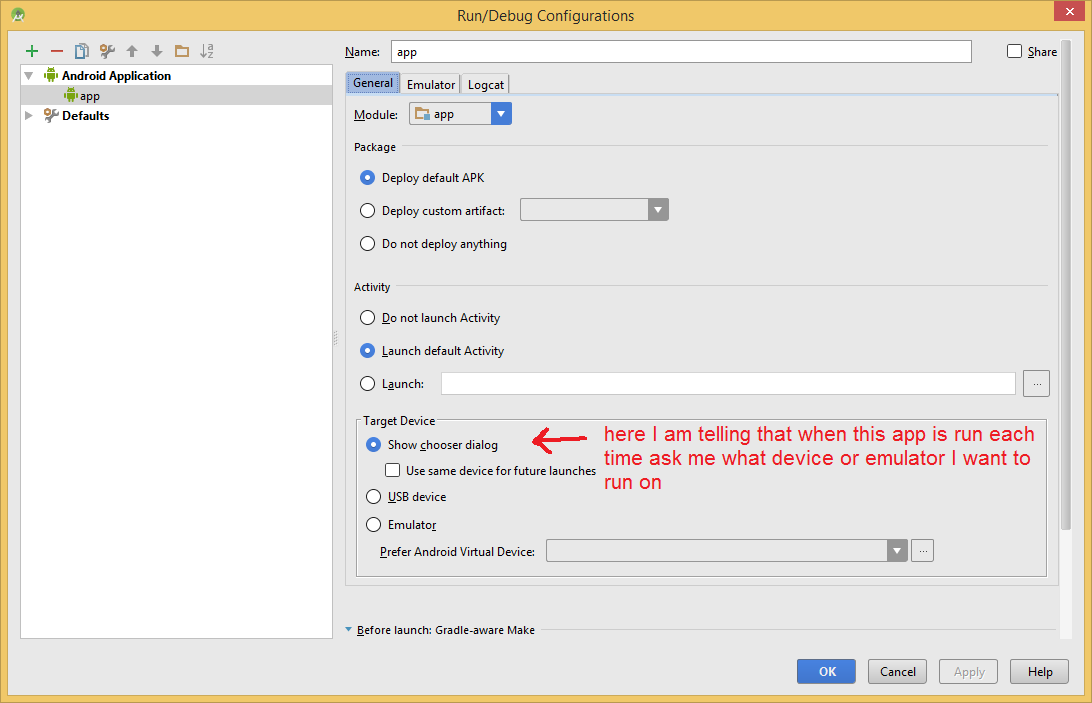
Select the AVD you wish --under target device. I LIKE TO HAVE THE OPTON OF SHOW CHOOSER DIALOG ---so that when I hit run it asks me each time what device I want (of the list that would work for the SDK I compiled the app to)
Android Studio
|
|---|
|

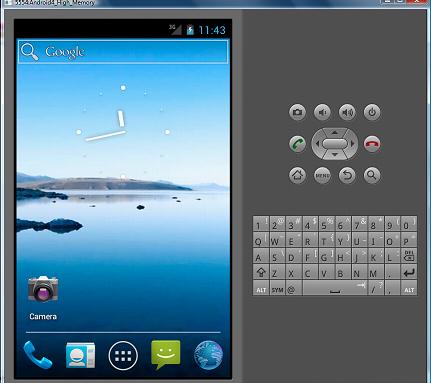
Problems with AVD creation
-
Sometimes you can have problems with creating an AVD that are not explainable or could be bugs or issues with resources available.
-
Example: when trying to make a Samsung Galaxy Android 4.2, API 17 AVD with the following specs when you run you the following error (SOLUTION --- as found on web here and many other peope had same problem reduce memory size to 512)
-
SOLUTION FOR A PROBLEM WITH AN AVD: search on web on error message and read, read, read and try solutions if they make sense.
AVD with a problem
ERROR (partial --when try to run an application with this AVD
Android Emulator tor] Failed to allocate memory: 8 [2013-01-15 13:43:02 - Emulator]
[2013-01-15 13:43:02 - Emulator] This application has requested the Runtime to terminate it in an unusual way.
