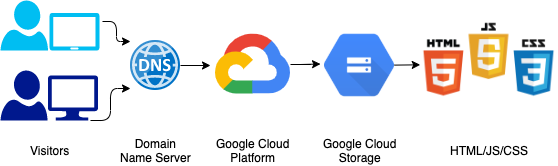
Hosting Static Website on Google Cloud
What you’ll need
- need have a Google Cloud account.
- go to Google’s Console to start using your Cloud services.
- need to enable the Project’s Billing Account, which is a requirement to start storing your files on Google Cloud.
OPTIONAL (we are not doing) if you rather use your personal custom domain (e.g. http://yourdomain.com), you will also need to register a private domain and be the admin (have access to update the domains DNS records) for that domain.
WE are NOT going to go to the effort of arranging for a registered domain name and create sub-domains.
WE WILL use www.example.com which is resevered for this kind of testing use.
STEP 1: Create Project, Enable Billing and Setup Storage Bucket
Step 1.1 Create Project and Select it: Select or create an existing Project from the Project drop-down at the top of the Console.

Step 2.2 Enable billing and associate your cloud credits to it (not showing this step)
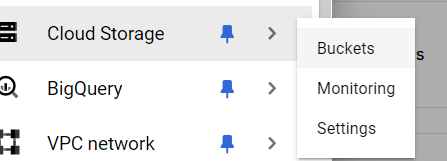
Step 2.3: Setup Storage Bucket for your project - GO on the project menu Storage->Bucket
-
Click + Create to open the bucket creation form.
-
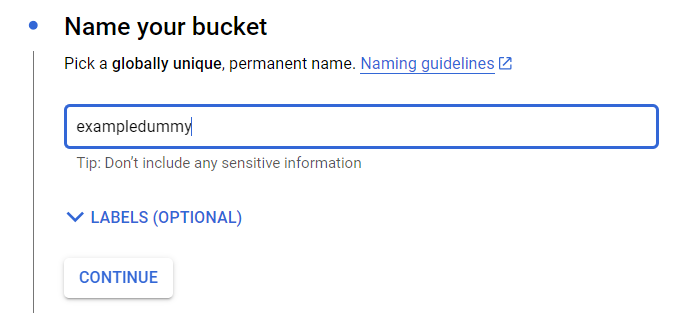
Enter your bucket information and click Continue to complete each step:
-
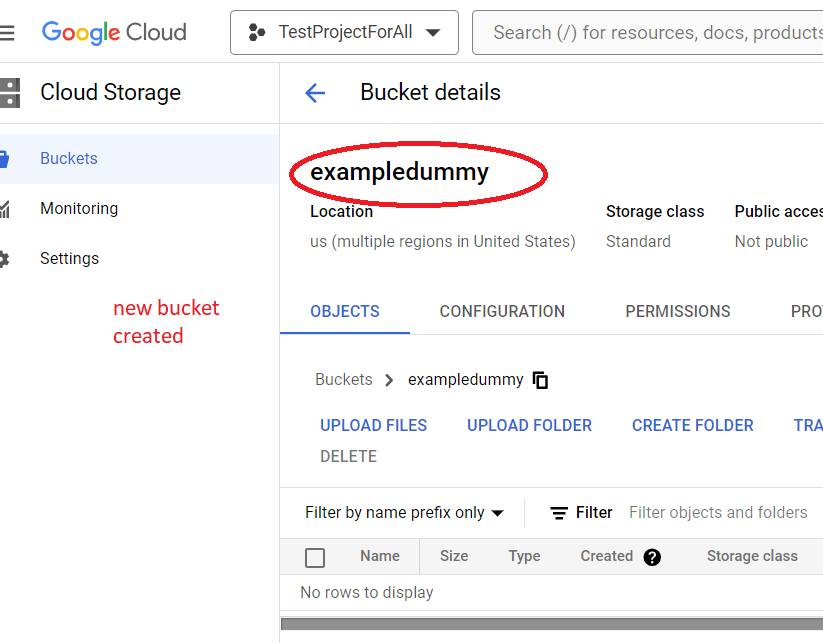
The Name of your bucket, NOTE: you do not have a registered domain name so just give some kind of unique name (I did exampledummy) to your storage bucket
-
Select the Location type and Location of your bucket. For example, Region and us-east1
You won’t be able to update this option later.
TIP1: if your site is, for instance, a local retail storage or a site for your personal usage, you may want to pick “Regional” and choose the geographical location closest to you.
TIP2: If your site is, for example, a corporate domain that gets traffic from many states or countries, then a “Multi-region” option might be best suited. “Dual-region”, as the name suggests leverages the high-availability from 2 regions.
-
Select Standard Storage for the Storage class.
-
Select Uniform for Access control.
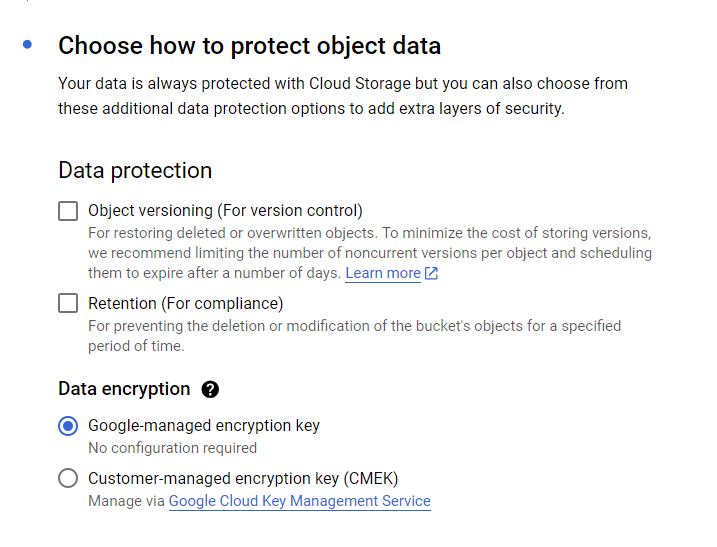
TIP:In general, recommend picking “Uniform” to control the access to objects since normally you’ll want all objects in these buckets to have the same access level (public). However, if you want certain files in the bucket to have a more restrictive access control than others, then you choose “Fine-grained”, which means you’ll have to individually set the access level for all objects. - Dont select anything for Protect Object Data. This is for additional protection and we are not going over this.
Regarding Encryption- TIP: usually “Google-managed key” is adequate for your new bucket. As an extra layer of security, you can provide a “Customer-managed key” to encrypt your data on top of the “Google-managed key”.
-
- Click Create.
HERE are screenshots of me doing the above and the resulting bucket that is created.
STEP 2: Upload files (your website) to the Storage Bucket
- In the Google Cloud console, go to the Cloud Storage Buckets page.
-
In the list of buckets, click the name of the bucket that you created.
-
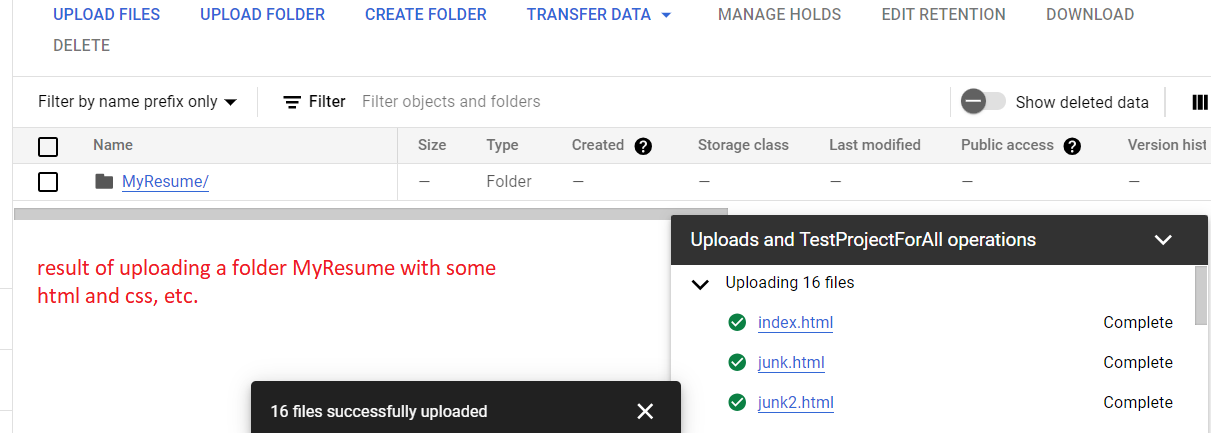
Click the Upload files or Upload folder button in the Objects tab.
-
In the file dialog, browse to the desired file and select it.
After the upload completes, you should see the file name along with file information displayed in the bucket.
STEP 3: Make the uploaded files public (so can be viewed on web browser)
To make all objects in a bucket readable to everyone on the public internet:
- In the Google Cloud console, go to the Cloud Storage Buckets page.
-
In the list of buckets, click the name of the bucket that you want to make public.
-
Select the Permissions tab near the top of the page.
-
If the Public access pane reads Not public, click the button labeled Remove public access prevention, and click Confirm in the dialog that appears.
-
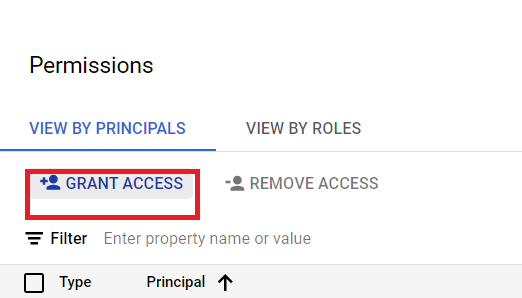
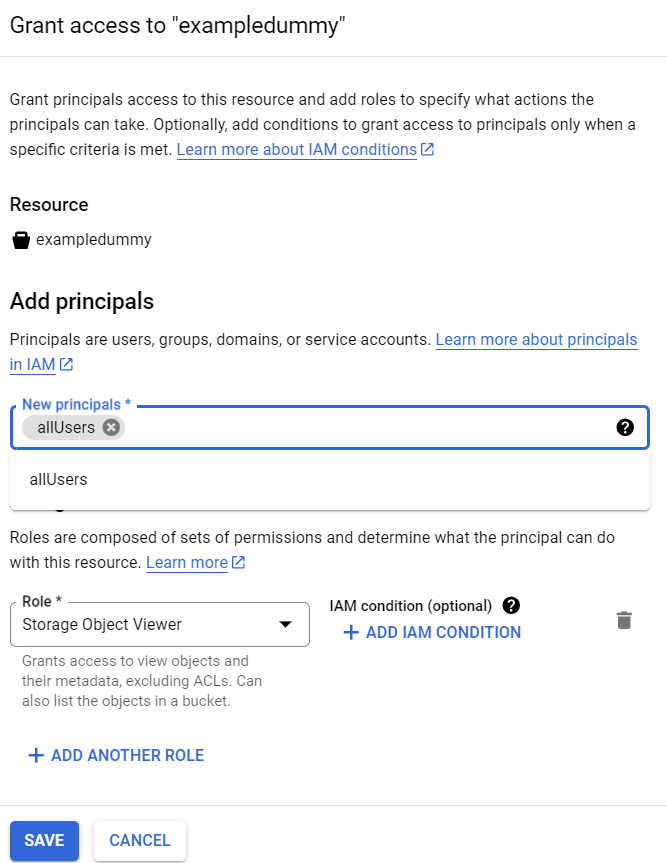
Click the add_box Grant access button.
The Add principals dialog box appears.
-
In the New principals field, enter allUsers.
-
In the Select a role drop down, select the Cloud Storage sub-menu, and click the Storage Object Viewer option.
-
Click Save.
-
Click Allow public access.
Here are some screenshots starting from number 5 above:
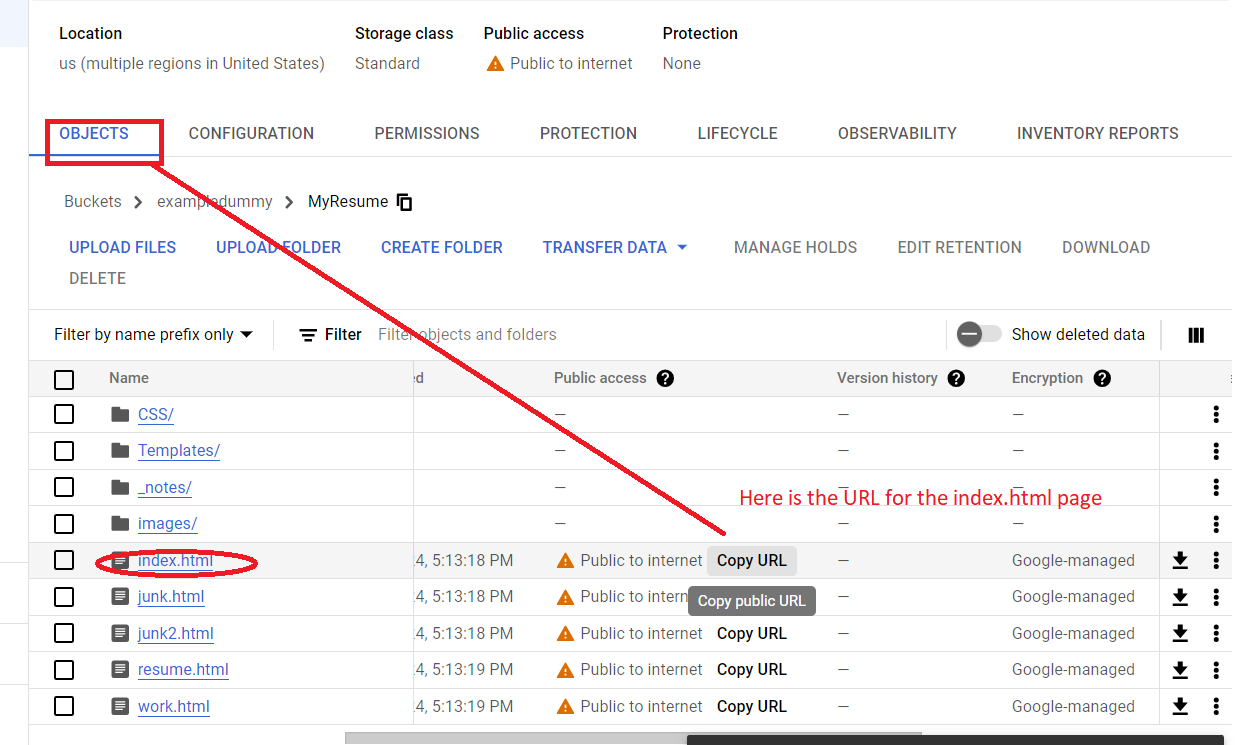
Once shared publicly, a link icon appears for each object in the public access column. You can click this icon to get the URL for the object. GO BACK TO THE OBJECTS TAB TO SEE THIS.
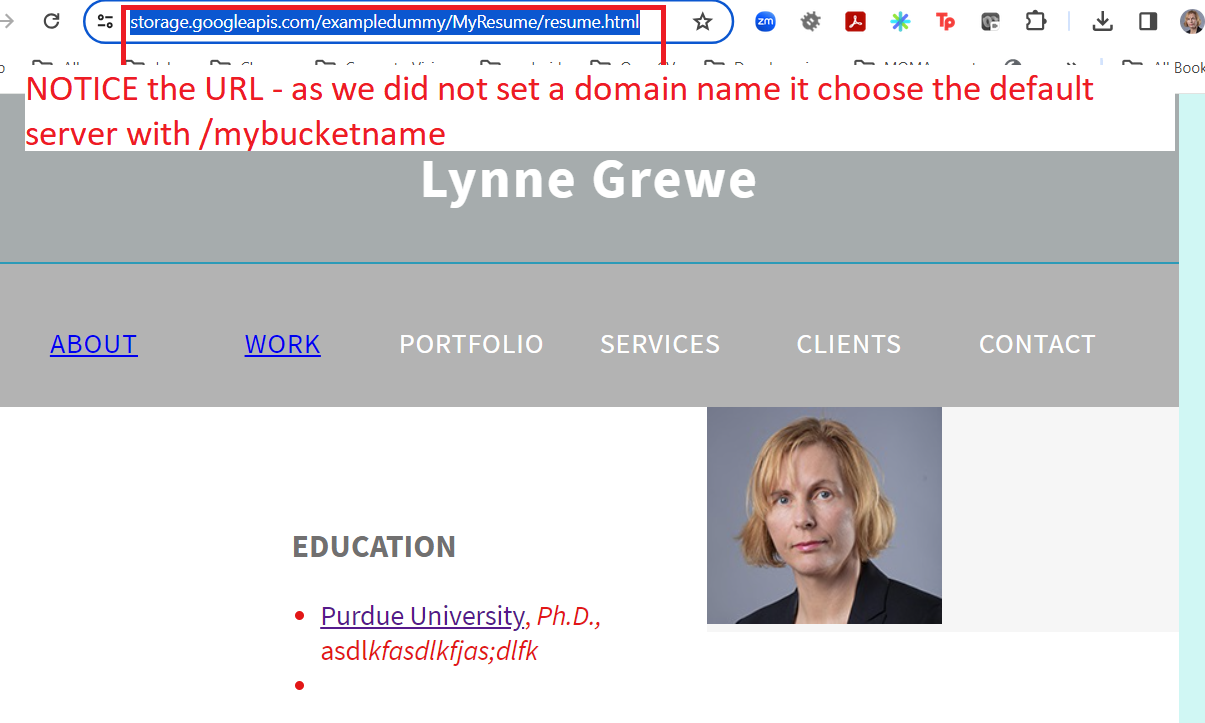
>>for example in the MyResume directory I uploaded there is an html file called resume.html
At the bottom you will see the screenshot of viewing the corresponding ULR (https://storage.googleapis.com/exampledummy/MyResume/resume.html) which will not work anymore as I have taken down this project. Notice that the defaul URL is storage.googleapis.com/exampledummy This is because I named my bucket exampledummy and did not name it a registered domain. Also, this is because I have in the role I setup choose Cloud Storage-Storage Object Viewer.
RESULTING webpage viewed in a web browser, note that the URL (storage.googleapis.com/exampledummy/MyResume/resume.html) starts with the host storage.googleapis.com which is their default domain for storage ---this is used as we did NOT have a registered domain name and in my case simply named my bucket "exampledummy"