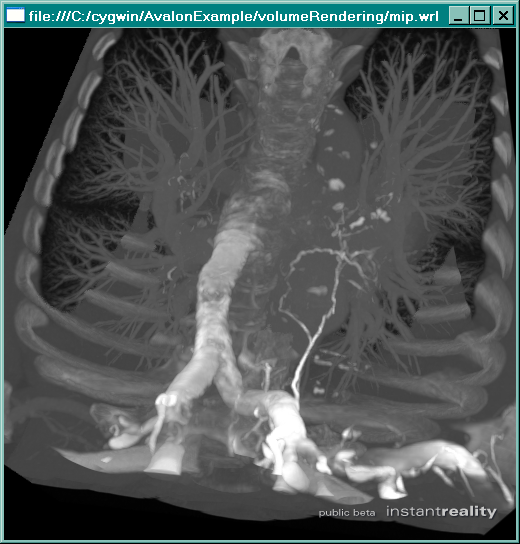
Volume Rendering
Keywords:
volume visualization,
volume rendering,
isosurface,
slicer,
single-pass raycaster
Author(s): Yvonne Jung
Date: 2008-01-10
Summary: This tutorial shows how to do Volume Rendering in X3D.
Rendering Methods
First of all you might ask, what is Volume Rendering? It is an alternate form of visual data representation compared to the traditional polygonal form. Whereas polygons represent a surface, volume data represents a three dimensional block of space that contains some data, based on the assumption of a continous scalar field that maps from IR^3 to IR. Typically volume rendering is used in medical visualisation for visualizing CT and MRI data sets, where the data usually is hold within a grid of so-called voxels. There are a lot of good introducery books available (e.g. "Engel et al.: Real-Time Volume Graphics"), if you are not yet familiar with this topic and want to learn more.
There are many different techniques for visualizing volumetric data. Basically these can be distinguished between direct and indirect methods. The latter are based on the reconstruction of polygonal data (i.e. triangles), which then can be rendered like any other surface mesh. The perhaps most famous algorithm for calculating these so-called isosurfaces, defined as the niveau set f(x,y,z) = c for any c = const being the isovalue, is "Marching Cubes". The algorithm simply traverses the 3D grid containing the volume data and generates up to 5 triangles per voxel.
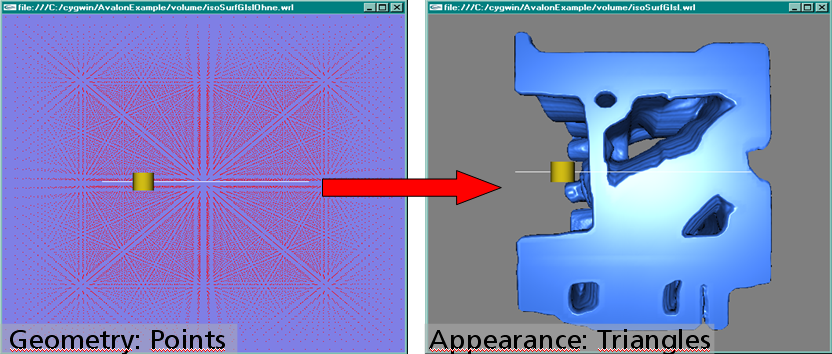
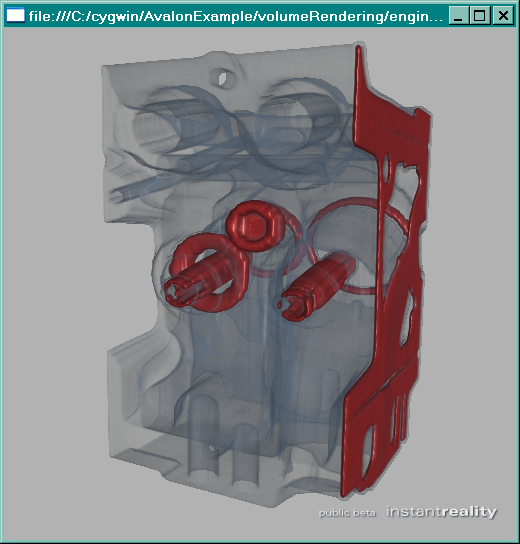
If you are interested in isosurface rendering, you either can do this GPU based (as shown in the image below -- please also refer to the section "Geometry Shader Extensions" in the Shader tutorial), or CPU based (shown in the following code fragment), which also works if you don't have the latest graphics hardware. The IsoSurfaceGenerator node is a kind of simulator, which has an "url" to the input volume data set, whose results can be routed to a TriangleSet or a IndexedFaceSet node. In the latter case indices are needed, therefore with the "genIndices" field it can be defined if they shall be calculated. Because generating isosurfaces can lead to lots of triangles especially for big volumes and an inconvenient "isoValue", they can be scaled down with the "resolutionScale" field.
Code: Generating Isosurfaces
Shape {
    appearance Appearance {
        # [...]
    }
    geometry DEF tri IndexedFaceSet {
        coord DEF coord Coordinate {}
    }
}

DEF iso IsoSurfaceGenerator {
    volumeUrl "Engine.nrrd"
    isoValue 0.2
    resolutionScale 4
	genIndices TRUE
}

ROUTE iso.coord_changed TO coord.set_point
ROUTE iso.index TO tri.coordIndex
Before going over to the next chapter some words on supported volume texture formats: First of all the OpenSG internal MTD format is supported, like any other 3d image formats supported by OpenSG, e.g. DDS or NRRD. Besides, you can use any suitable OpenSG tool or aopt for converting from/ to the supported formats. Or you can even write your own OpenSG image loader (i.e. OSGImageFileType class) for your own or any other missing 3d format. If you check it in or post your sources on the mailing list, the chances are very good that the next dailybuild contains your loader :-)
Slicing
Another rendering method is 3d-texture based slicing. Here the volume data is directly rendered by means of a proxy geometry consisting of view-aligned, parallel polygons (sometimes called slices), which slice the bounding box of the volume according to the current camera position and orientation. The size and bounding box in the local coordinate system is defined by the "size" field of the SliceSet. The slice distance and therefore the number of slices is controlled by the "sliceDistance" value. Every slice is clipped by the bounding box sides and defined by 3 to 6 vertices. Every vertex has a 3d-texture coordinate which defines a normalized position [0;1]^3 inside the bounding box. A big advantage compared to the beforementioned method is the fact, that the visualization is not restricted to an arbitrary surface.
The following code fragment shows how to use the SliceSet (a simple example can also be found in the test files from the downloads section). If you have your volume texture in INTENSITY format, the only appearance property you need is the ImageTexture containing your volume data. But if you prefer a more advanced visualization, you can also write a shader program for doing the lighting calculations. Because for correct lighting normals are needed, you can instantiate a NormalMap3DGenerator node, which according to the "voxelFormat" field settings generates a new volume based on the input volume given in the "sourceImage" field. As can be seen the fragment shader below, color.rgb contains the normal, whereas the original scalar value is stored in color.a.
Code: SliceSet
Shape {
    appearance Appearance {
        texture DEF volume NormalMap3DGenerator {
            voxelFormat "xyzs"
            sourceImage DEF sourceImage ImageTexture {
                url "Engine.nrrd"
            }
        }
        shaders DEF shader ComposedShader {
            exposedField SFInt32 volume 0
            # [...]

            parts [
                # [...]

                DEF fs ShaderPart {
                    type "fragment"
                    url "
                    uniform sampler3D volume;

                    void main(void)
                    {
                        vec4 color = texture3D(volume, gl_TexCoord[0].xyz);
                        vec3 normal = normalize((color.rgb - 0.5) * 2.0);
                        //...
                    }
                }
            ]
        }
    }
    geometry DEF sliceSet SliceSet {
        sliceDistance  1
    }
}

ROUTE sourceImage.image_changed TO sliceSet.set_size
ROUTE sliceSet.sliceDistance TO shader.set_sliceDistance
The Volume Rendering Component
As you might have noticed, volume visualization via polygonal based methods on the one hand is quite limited, and slicing on the other hand can lead to some artifacts on the other hand. Besides this, it is quite awesome to get nice images if you haven't much experience in shader programming. Therefore the new Volume Rendering Component, which currently only exists as an X3D extension proposal, tries to alleviate these drawbacks by proposing nodes/ interfaces that only define the type of visual output required but not the techniques used to implement it. Nevertheless we used GPU based single-pass raycasting for implementation, where the volume is traversed along a single ray per pixel, because it seems to lead to the best results although it requires modern graphics hardware.
Warning: Currently only the following nodes are implemented, and you can only load one volume per scene.
- VolumeData
- ProjectionVolumeStyle
- XRayVolumeStyle
- ShadedVolumeStyle
- BoundaryEnhancementVolumeStyle
- OpacityMapVolumeStyle
- ComposedVolumeStyle
- AccelerationVolumeSettings
- NormalVolumeSettings
- RayGenerationVolumeSettings
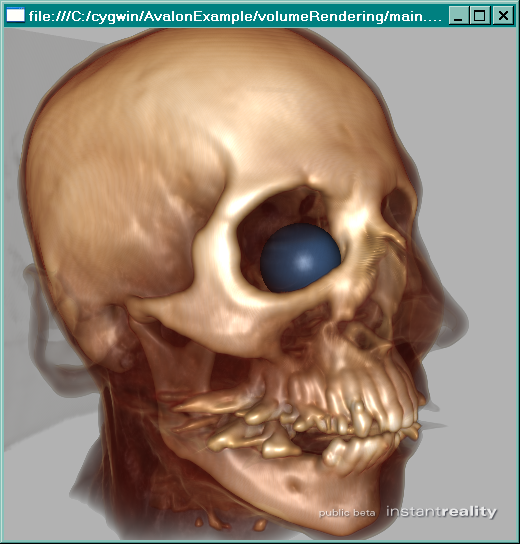
The component separates the scene graph into two sets of responsibilities: nodes for representing the volume data, and nodes for rendering that volume data. As the name already implies, the VolumeData node itself holds the volume data, i.e. the 3d-texture containing the volume, in its "voxels" field. It also has an additional field "sliceThickness" with the default (1,1,1), because sometimes the grid isn't equidistant. The "dimensions" currently is unused, the "swapped" field is a simple helper, because especially 16 bit volumes are sometimes swapped, and the other fields are explained in the following.

Various rendering styles may be used to highlight different structures within the volume. The ComposedVolumeStyle node is a rendering style node that allows compositing multiple styles together into a single rendering pass by listing them in its "renderStyle" field. This way lighting calculations, represented by the ShadedVolumeStyle, can be easily combined with the OpacityMapVolumeStyle (probably a very typical case) or e.g. the BoundaryEnhancementVolumeStyle, which highlights feature bounds and reduces noise.
Like all volume styles the ShadedVolumeStyle has an SFBool field "enabled", which defines whether this style should be currently applied to the volume or not. The "lighting" field controls whether the rendering should calculate and apply lighting effects to the visual output. When lighting is applied, the colour and opacity is determined based on whether a value has been specified for the "material" field or not. The fields "shadows" (attenuation of light incident from a light source) and "phaseFunction" (responsible for representing the angle-dependency of scattering in participating media) are not yet implemented, because currently only an emission-absorption model with a single scattering approximation is implemented.
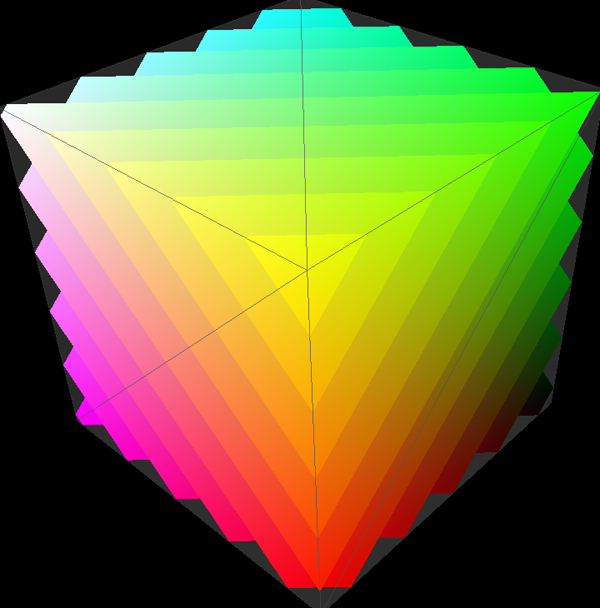
The OpacityMapVolumeStyle introduces an other indirection by providing a transfer function texture to which the opacity (i.e. the scalar value) is mapped to. The "transferFunction" field holds a single lookup texture (an example is shown above) that maps the voxel data values to a specific colour/ opacity output. The node also has an SFString field "type" with at least two possible values: "simple" and "preintegrated". The latter often leads to a much better look.
Most of the VolumeRenderStyle nodes contain a 'surfaceNormals' field, which is not implemented yet. Instead we have the NormalVolumeSettings node for managing the normals of the volume (for all lighting calculations). This has the great advantage, that you can define the type of algorithm to be used, if no normal volume is given. The "algorithm" field can contain the following values: "precomputedCentralDifferences" (the fastest), "onlineCentralDifferences" (usually the most appropriate), "onlineSobel" (the nicest).
Code: How to use the VolumeData node
DEF volume VolumeData {
    voxels [
        DEF voltex ImageTexture {
            url "Engine.nrrd"
        }
    ]
    renderSettings [
        AccelerationVolumeSettings {
            boundingVolumeType  "boundaryGeometry" #"boxGeometry"
            traversalFunction "simple" #"blockSkipping"
        }
        NormalVolumeSettings {
            algorithm "onlineCentralDifferences" # "onlineSobel"
        }
        RayGenerationVolumeSettings {
            type "simple" #"interleaved"
            stepSize 0.0039
        }
    ]
    renderStyle ComposedVolumeStyle {
        renderStyle [
            ShadedVolumeStyle {
                lighting TRUE
            }
            OpacityMapVolumeStyle {
                transferFunction ImageTexture	{
                    url "engineTransferSchnitt.png"
                }
                type "preintegrated" #"simple"
            }
        ]
    }
}
The MFNode field "renderSettings" (analogous to the "renderStyle" field) can contain two more nodes: On the one hand we have the RayGenerationVolumeSettings for setting "stepSize" and "type" ("simple" or "interleaved" -- the latter reduces so-called wood artifacts) of the sample ray, which can improve the overall image quality. And on the other hand we have the AccelerationVolumeSettings, which allow to set the "boundingVolumeType" ("boxGeometry", "boundaryGeometry") for outer space skipping and the "traversalFunction" ("simple", "blockSkipping") for inner space skipping, which, depending on the GPU model, can improve the overall performance. If no render settings are specified, default values will be used.
The ProjectionVolumeStyle, an image is shown below, and the XRayVolumeStyle are non-composable render styles, and therefore can only alternatively be used in the VolumeData node's "renderStyle" field.
