6 Dof Tracking with the Wii-Remote
Keywords:
vision,
6 Dof,
wiimote,
Wii-Remote,
augmented reality
Author(s): Rudolf Adler
Date: 2009-04-15
Summary: This tutorial shows you, how to use the basic features of the 6 Degrees of Freedom Tracker with the Wiimote.
Introduction
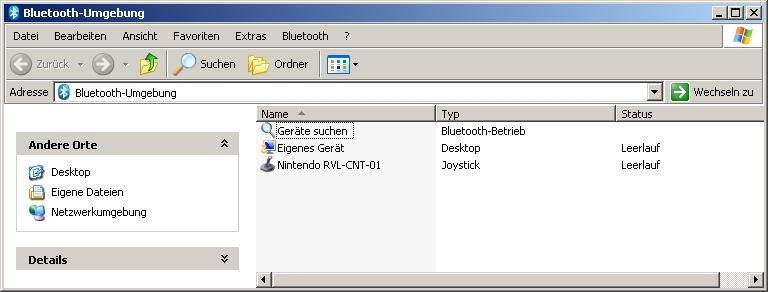
The Wiimote needs to be 'paired' (Bluetooth connected) with the PC before you can use it. Pressing 1 and 2 simultaneously puts it into 'discoverable' mode for a few seconds (LEDs will flash - the number of LEDs reflects the battery level).

IOSensor
The 6dof tracker is loaded like any other Instant IO device via an IOSensor. These are instantvision's fields:
- InstantCamera_Projection (SFMatrix4f): Camera' projection matrix
- InstantCamera_Position (SFVec3f): Camera's position
- InstantCamera_Orientation (SFRotation): Camera's orientation
Code: IOSensor
        <IOSensor DEF='VisionLib' type='VisionLib' configFile='Wiitest_3PointPose.pm'>
    	    <field accessType='outputOnly' name='InstantCamera_Projection'  type='SFMatrix4f'/>
            <field accessType='outputOnly' name='InstantCamera_Position'    type='SFVec3f'/>
    	    <field accessType='outputOnly' name='InstantCamera_Orientation' type='SFRotation'/>
Setting the virtual object's position and orientation relative to the camera
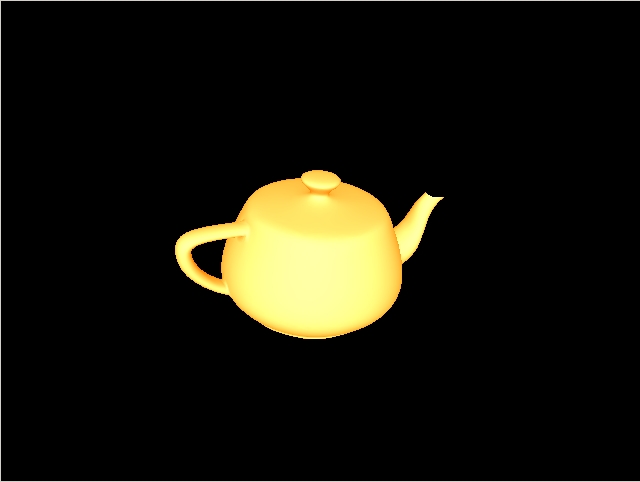
We add a virtual object (a teapot) to the scene.
Code: Add a yellow teapot
    	<Transform DEF='ControlerPosition'>
            <Shape DEF='geo2'>
                <Appearance>
                    <Material DEF='mat' emissiveColor='1 0.5 0' />
                </Appearance>
                <Teapot size='5 5 5' />
            </Shape>
        </Transform>
IR-LED Pattern
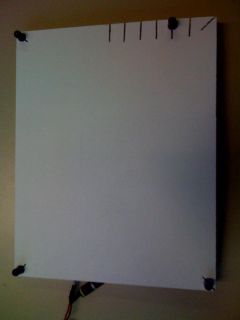
You need a Infrared Pattern with 4 Infrared Lights that looks similar to this
Code: Transforming the virtual object relative to the marker
    <LEDModel key="myLEDModel">
      <LED>
      <Position x="0" y="0" z="0"/>
      </LED>
      <LED>
        <Position x="12.2" y="0" z="0"/>
      </LED>
      <LED>
        <Position x="12.2" y="15.4" z="0"/>
      </LED>
      <LED>
        <Position x="0" y="15.4" z="0"/>
      </LED>
    </LEDModel>

Tracking with more Pattern
To use more than one Pattern you have to write the ID-Points of all Pattern in your .pm file.
Code: Transforming the virtual object relative to the marker
    <HomgPoint3Container key="IDPoint">
      <HomgPoint3d w="1" x="0" y="15.4" z="0"/>
      <HomgPoint3d w="1" x="2" y="15.4" z="0"/>
      <HomgPoint3d w="1" x="4" y="15.4" z="0"/>
    </HomgPoint3Container>

    <LEDModel key="myLEDModel">
      <LED>
      <Position x="0" y="0" z="0"/>
      </LED>
      <LED>
        <Position x="12.2" y="0" z="0"/>
      </LED>
      <LED>
        <Position x="12.2" y="15.4" z="0"/>
      </LED>
      <LED>
        <Position x="0" y="15.4" z="0"/>
      </LED>
    </LEDModel>
Use the Buttons of the Wiimote
To use the Buttons of the Wiimote you have to enable dataAttributeSlots and add your DataBase.
Code: IOSensor
        <IOSensor DEF='VisionLib' type='VisionLib' configFile='Tutorial6dofTracking.pm' dataAttributeSlots='true' addDataBases='WiiData1;InstantCamera;'>
    	    <field accessType='outputOnly' name='InstantCamera_ModelView'     type='SFMatrix4f'/>
    	    <field accessType='outputOnly' name='InstantCamera_Projection'    type='SFMatrix4f'/>
            <field accessType='outputOnly' name='InstantCamera_Position'      type='SFVec3f'/>
    	    <field accessType='outputOnly' name='InstantCamera_Orientation'   type='SFRotation'/>

            <field accessType='outputOnly' name='WiiData1_out_ButtonAPressed' type='SFString'/>
        </IOSensor>
Now you can interact with the A Button of your Wiimote.
To put something in the Wiimote (Rumble or LED´s)
Code: IOSensor
            <IOSensor DEF='VisionLib' type='VisionLib' configFile='Tutorial6dofTracking.pm' dataAttributeSlots='true' addDataBases='WiiData1;InstantCamera;'>
    	    <field accessType='outputOnly' name='InstantCamera_ModelView'   type='SFMatrix4f'/>
    	    <field accessType='outputOnly' name='InstantCamera_Projection'  type='SFMatrix4f'/>
            <field accessType='outputOnly' name='InstantCamera_Position'    type='SFVec3f'/>
    	    <field accessType='outputOnly' name='InstantCamera_Orientation' type='SFRotation'/>

            <!--Wiidata Input Slots-->
            <field accessType='inputOnly' name='WiiData1_in_Rumble' type='SFString'/>
        </IOSensor>